
Subscribe to continue reading
Subscribe to get access to the rest of this post and other subscriber-only content.
Subscribe to get access to the rest of this post and other subscriber-only content.
Annnnnnd, we’re on to paint! After finally deciding to stick with the original green (Pop won), we are ready to rock this out. The key to a great paint job starts with ensuring that the surface you are painting is pristine. Dent free, chip free, lint free, dust free, hair free, your breath free…NOTHING to impede the smooth application of paint. In other words, some serious prep work is needed.

Based on the horrors we’ve uncovered these past years while pulling Mavis apart piece by piece, she’s definitely been through it. Her front driver’s side seems to have been submerged in water for some time and she has seen her share of hailstorms. We’ve already perfected our welding skills by patching some of the holes in her frame, but now it’s time for delicate surface work. The reality of the sitch is that we probably should skim coat every surface of Mavis; her doors, fenders, hood, roof, etc., and block sand until every little knick and dent she has is filled and smoothed over. But, as we are self-taught , we know she will not be absolutely perfect and like me, now over 50, she has gained the right to have a pucker or a dimple here and there.
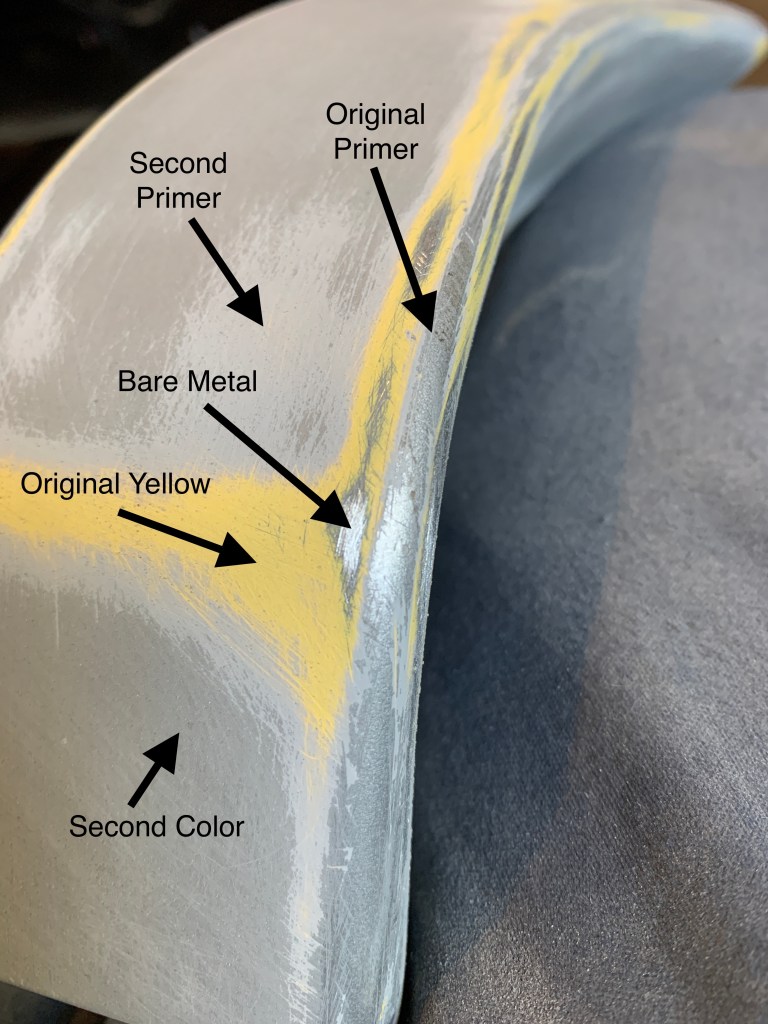
I do though take care of my skin as best possible, so we will give old Mavis a fighting chance and attend to her more obvious surface flaws. We start with an 80 grit paper and get down to either the original primer or bare metal. Consider it an intense facial chemical peel. This car has been painted twice, first with the original factory yellow and then a slightly metallic gray. Getting through all that isn’t easy.
Then, we apply a little ‘foundation’, filling any dings and pockmarks down to about 1/8” with glaze putty. For anything 1/4″ deep or more we bring out the big guns…filler. A little bodywork Botox. Hit any remaining bare metal with self-etch to keep from rusting then feather sand out all repairs with 220 paper. When you are happy with that (which I never am), DA and hand sand all with 320 until smooth. Best way to tell if something is as smooth as possible is to close your eyes and move your hand slowly over the surface, feeling for any slight differences. So most of the time it looks like I am lovingly caressing Mavis with a confused look on my face.


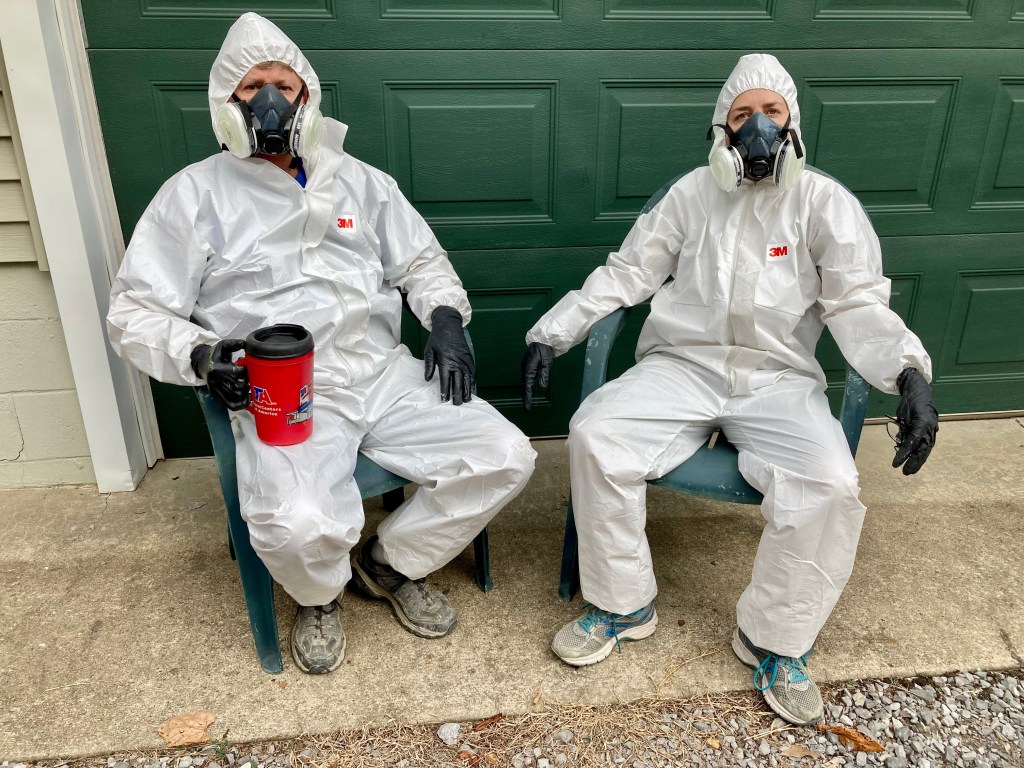
A good washing of all surfaces with mild soap and water and then comes primer….break out the paint guns!!! Not so fast slick, you now have to tape out anything that you do NOT want hit with that gray primer and cover anything you don’t want hit with any hint of gray primer ‘dust’. So Pop and I put up our Dexter crime scene tarps, sweep, set up our custom exhaust system (fan in the door) and I get to taping. Again, the better the prep, the better the paint job, so a clean and accurate tape job is imperative. If you may recall, I’m a very good taper.
Now we’re on to our high build primer. Primer goes on really nicely and knowing that you are going to sand it down gives you a little more freedom to fuck up while painting. It’s a great time to practice with the gun.

After laying down 3 coats of primer we let it dry completely. Then comes dry sanding with 320 paper to take off the very top bumps of the primer surface. Next, a wet sand with 600 until it’s as soft as a baby’s bottom. I’ll tell you there is NOTHING smoother then a wet primer surface sanded with 600. I can’t even explain it, so here’s a visual.
Enter, color! We carefully mix the correct proportions of color and reducer and load the gun. Pop is my ‘gun man’, as he preps the paint and ensures the settings on the gun are optimal. The correct fan size, amount of paint vs. air coming through and the pressure are very important in how the paint lays down. He’ll also follow me while I paint, ensuring the air hose doesn’t trip me (although it always trips him), helping to turn the pieces if need be and pointing out areas I may have missed.

Now, spraying color is where the rubber hits the road. This is the real deal, no looking back, any screw ups now mean sanding back down and starting over. I was a WRECK!!! The minute I put on my paint suit I’m sweating like a pig and so nervous I need to take 5 to calm myself down. I pull myself together and we begin. A half squeeze of the trigger for a little squirt of air to remove any pesky bits of dust that have come to the party last minute, and we’re off!

So you’d think clear coating is the easy part. Color is done and looking good, let’s just seal the deal with some shiny goodness and call it a day. Nope, clear is a bitch! Too light a coat and you don’t get that shine, too much and you have drips and sags that need to be buffed out. What you are looking for is the perfect ‘wet’ coat, right between lackluster and disaster.
Getting a sag is so disappointing. You think you’ve laid down your clear coat beautifully, but then have the realization that you may have actually passed an area twice. Slowly, out of what seems like nowhere, the weight of that extra coat takes hold. Before your very eyes your beautiful paint job looks as if it’s melting off the surface, sliding down in first one long sag, then breaking out into individual runs that say, “you suuuuuuuuuuuuck!” as they cruise down your paint job.

There is a way out though. I’ll attempt to scrape these babies down to just before level then buff the wahoosy out of them to blend. We put enough clear coat down to hopefully be able to do this without taking it all off, in theory. We shall see. All in all, I think we did a damn good job. Not perfectly professional, but good enough to be proud of. Pop and I taught ourselves to paint in our makeshift booth with a $100 paint gun. I’m pretty happy with that.


Next up, prepping and painting the rest of the car. What’s left is the hood, trunk deck and the remaining body. Anything that is still grey/yellow in this pic.

That will be a huge job and will no doubt take the next 2-3 visits. In the meantime, we’ll need to ensure we have everything we need to put the ol’ girl back together. I’ll take inventory of remaining tasks and parts needed next. We’re getting there! Squeeeeeeeeee!
She’s alive. Yes, Mavis’s engine is in and has successfully turned over. Honestly, the whole thing scared the CRAP out of me. First off, after connecting the electrical and gas lines, and actually putting gas in the car, things started feeling dangerous. The possibility of electrocutions and explosions became a reality and I couldn’t remember if Pop said amps burn you but voltage can kill you, or the other way around. It’s one thing to talk about souping up a little I6, another to have a great time building it, but once you connect everything to real power…holy crap!
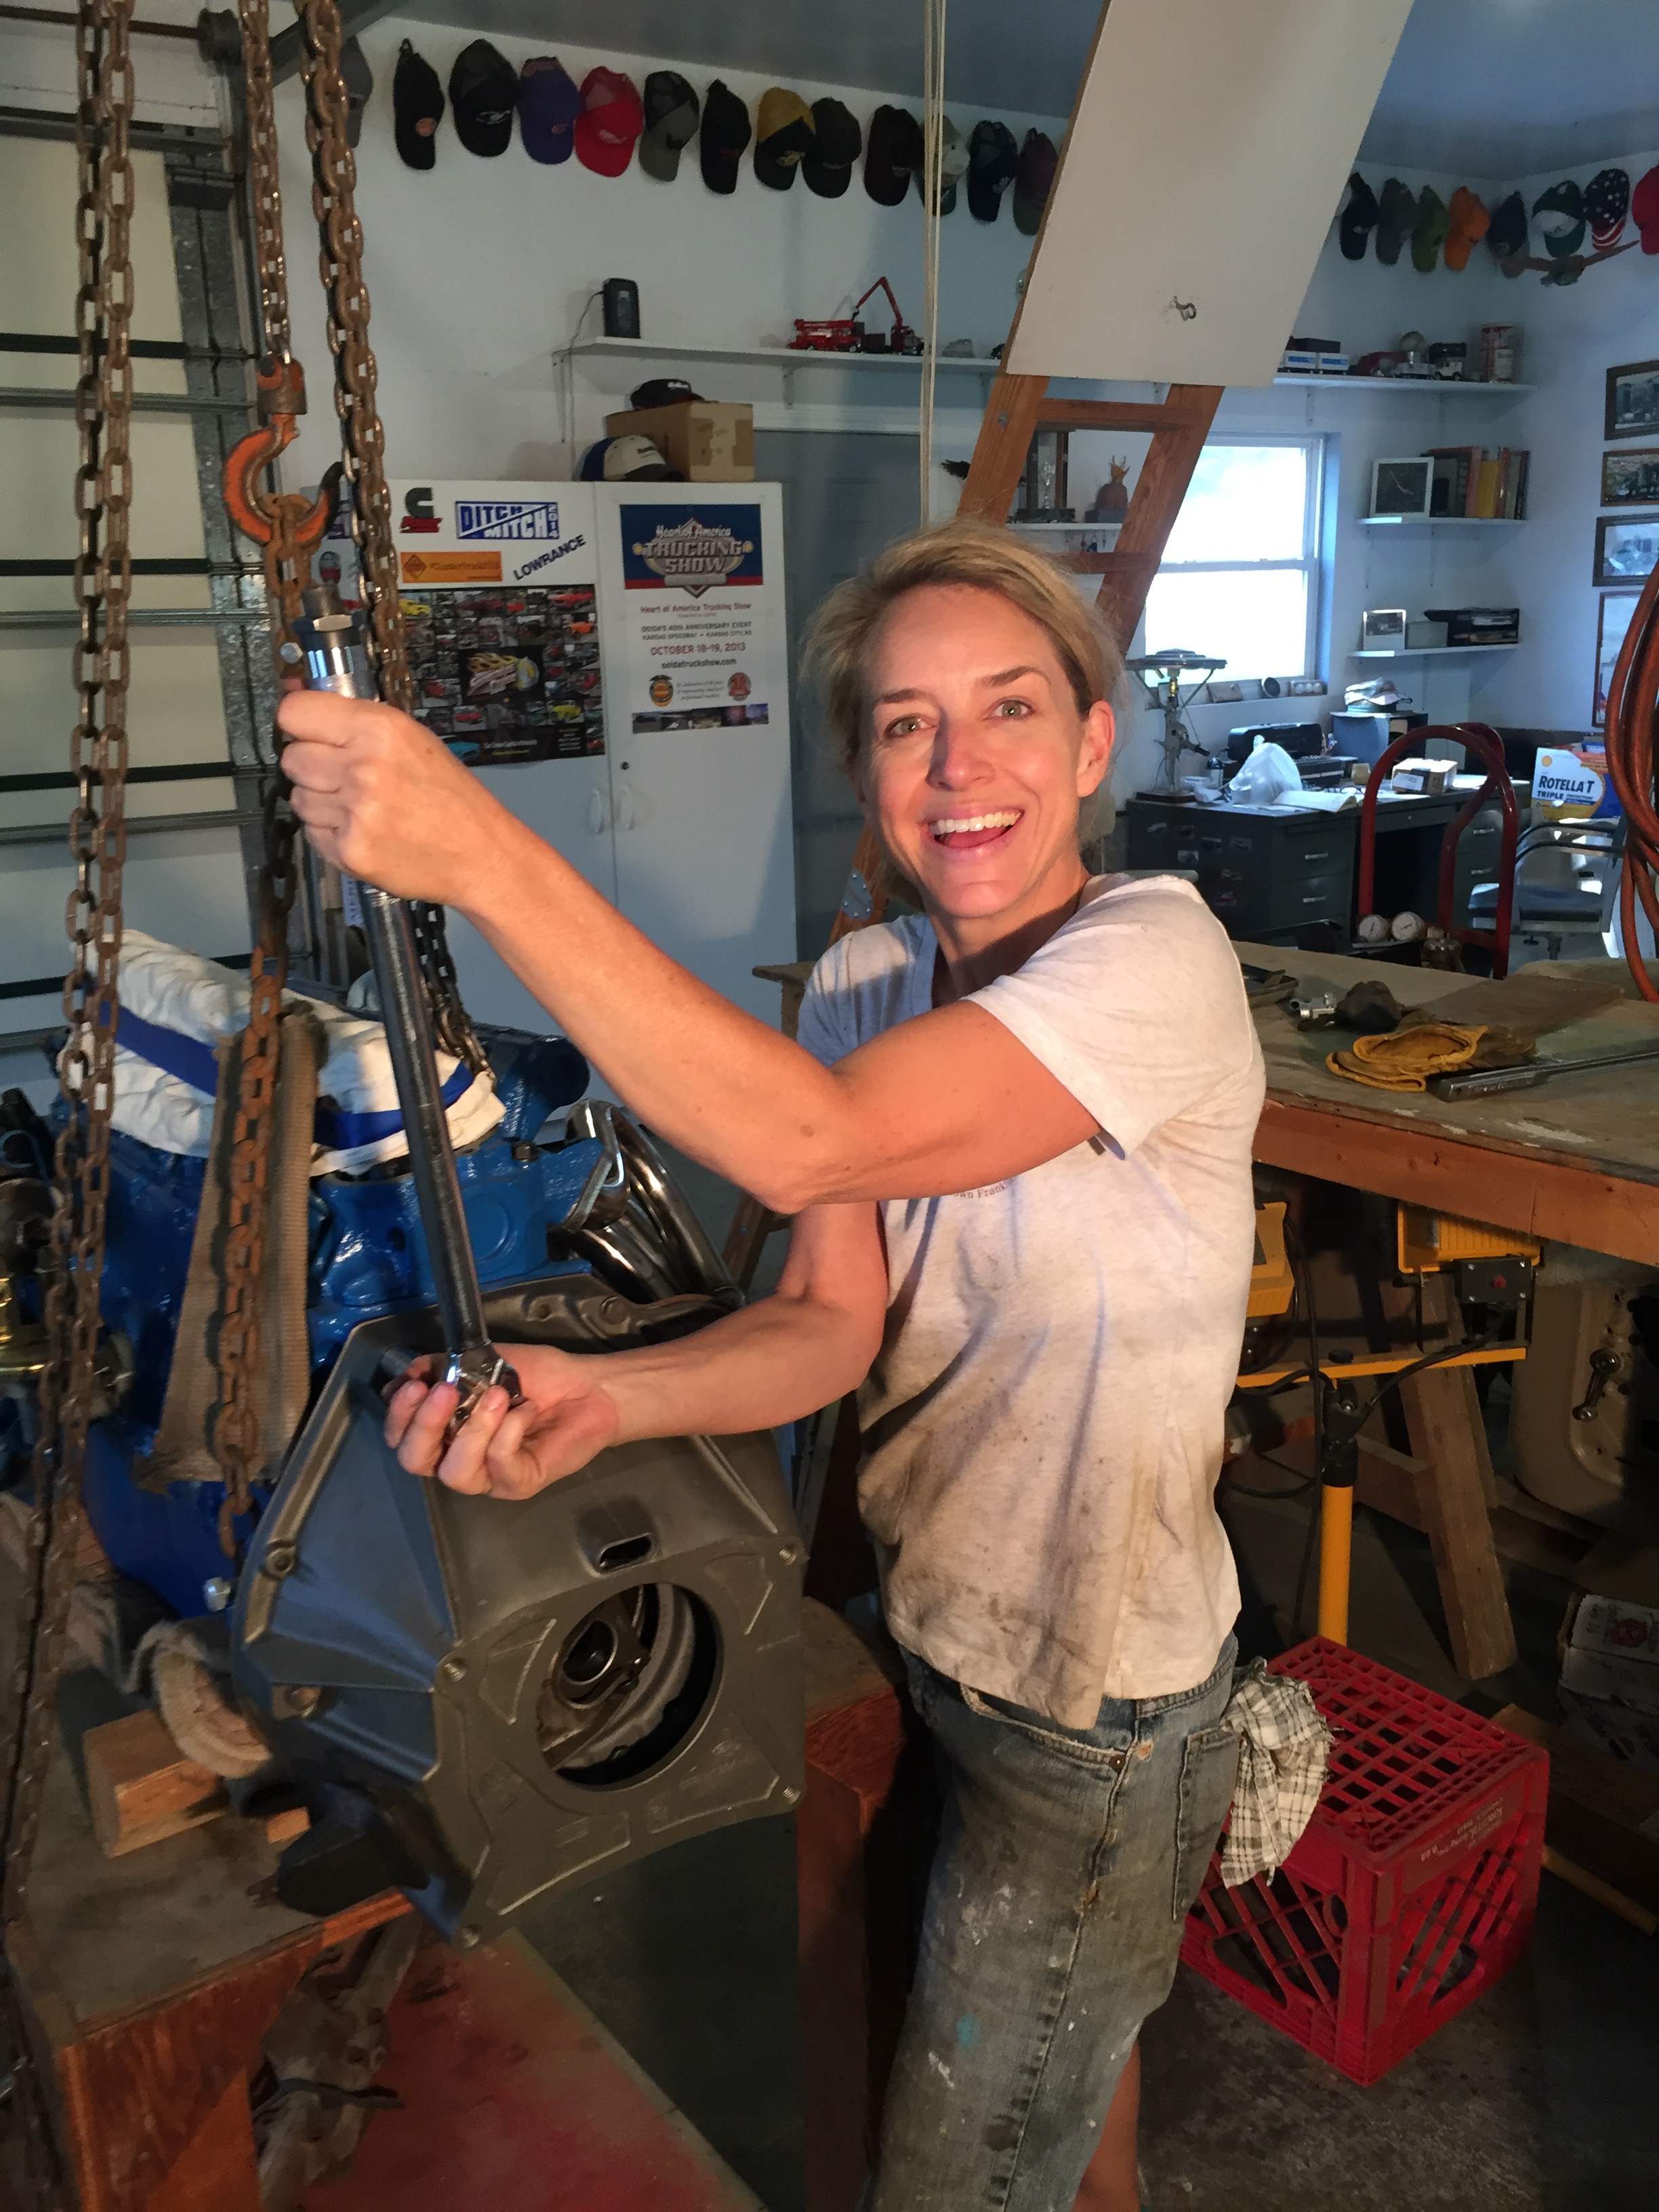
Couple KY visits ago, we installed all of the engine’s accoutrements, as I like to call them. Accessories such as the water pump, thermostat, starter, fly wheel, clutch disc, pressure plate and bell housing. Then, headers and transmission, which turned the engine into a 5 foot long beast we needed to get into Mavis’s little body.

Transmission on.
Unless we were missing something, there is no way to remove the front upper radiator support bar in the engine compartment. So, to properly install the engine, we really needed an engine hoist with an adjustable bar to allow us to tilt the engine in order to ‘insert’ the transmission through the engine compartment, move the whole kit and kaboodle back and in, lift the trans nose before it scraps the ground and settle the 400 pound engine and transmission assembly snuggly into place. We didn’t have that special hoist, but because we are geniuses we figured we could make this work without. It was just a matter of hoisting the engine in a way that allowed for the correct tilt and then pushing the car forward as we carefully lowered the engine in.
I was NOT looking forward to this procedure, as it’s nerve-wracking to see your newly built engine dangling from chains secured with a few temporary bolts…let alone at a jaunty angle. As I enjoyed my coffee on the porch the morning of ‘insertion day’, Pop heads out the door saying, “I’m going out to experiment with some fulcrum points.”
“Don’t fucking drop my engine old man…or hurt yourself!”
But he was half way to the garage, determined, with plan in place. I stayed right were I was and finished my coffee. Once Pop felt confident in his fulcrums, we lifted the whole thing up and in.
The whole process took about 10 minutes and consisted of me under the car a good amount moving the jack into the right position, guiding the transmission’s tail onto it and then raising it as the engine moved down and into the compartment. I will admit that once this was all done, we ended up lifting it back out order to ‘manipulate’ the shock tower so that the headers were not touching it. This consisted of first banging the hell out of the shock tower and then heating the whole thing up and prying the hot headers away from the wall. Come to find out that the whole engine was shifted to the right about 1/2 inch due to the fact that we installed the motor mounts opposite. Who knew there was a designated right and a left? (Apparently, not us.) Plenty of clearance now!
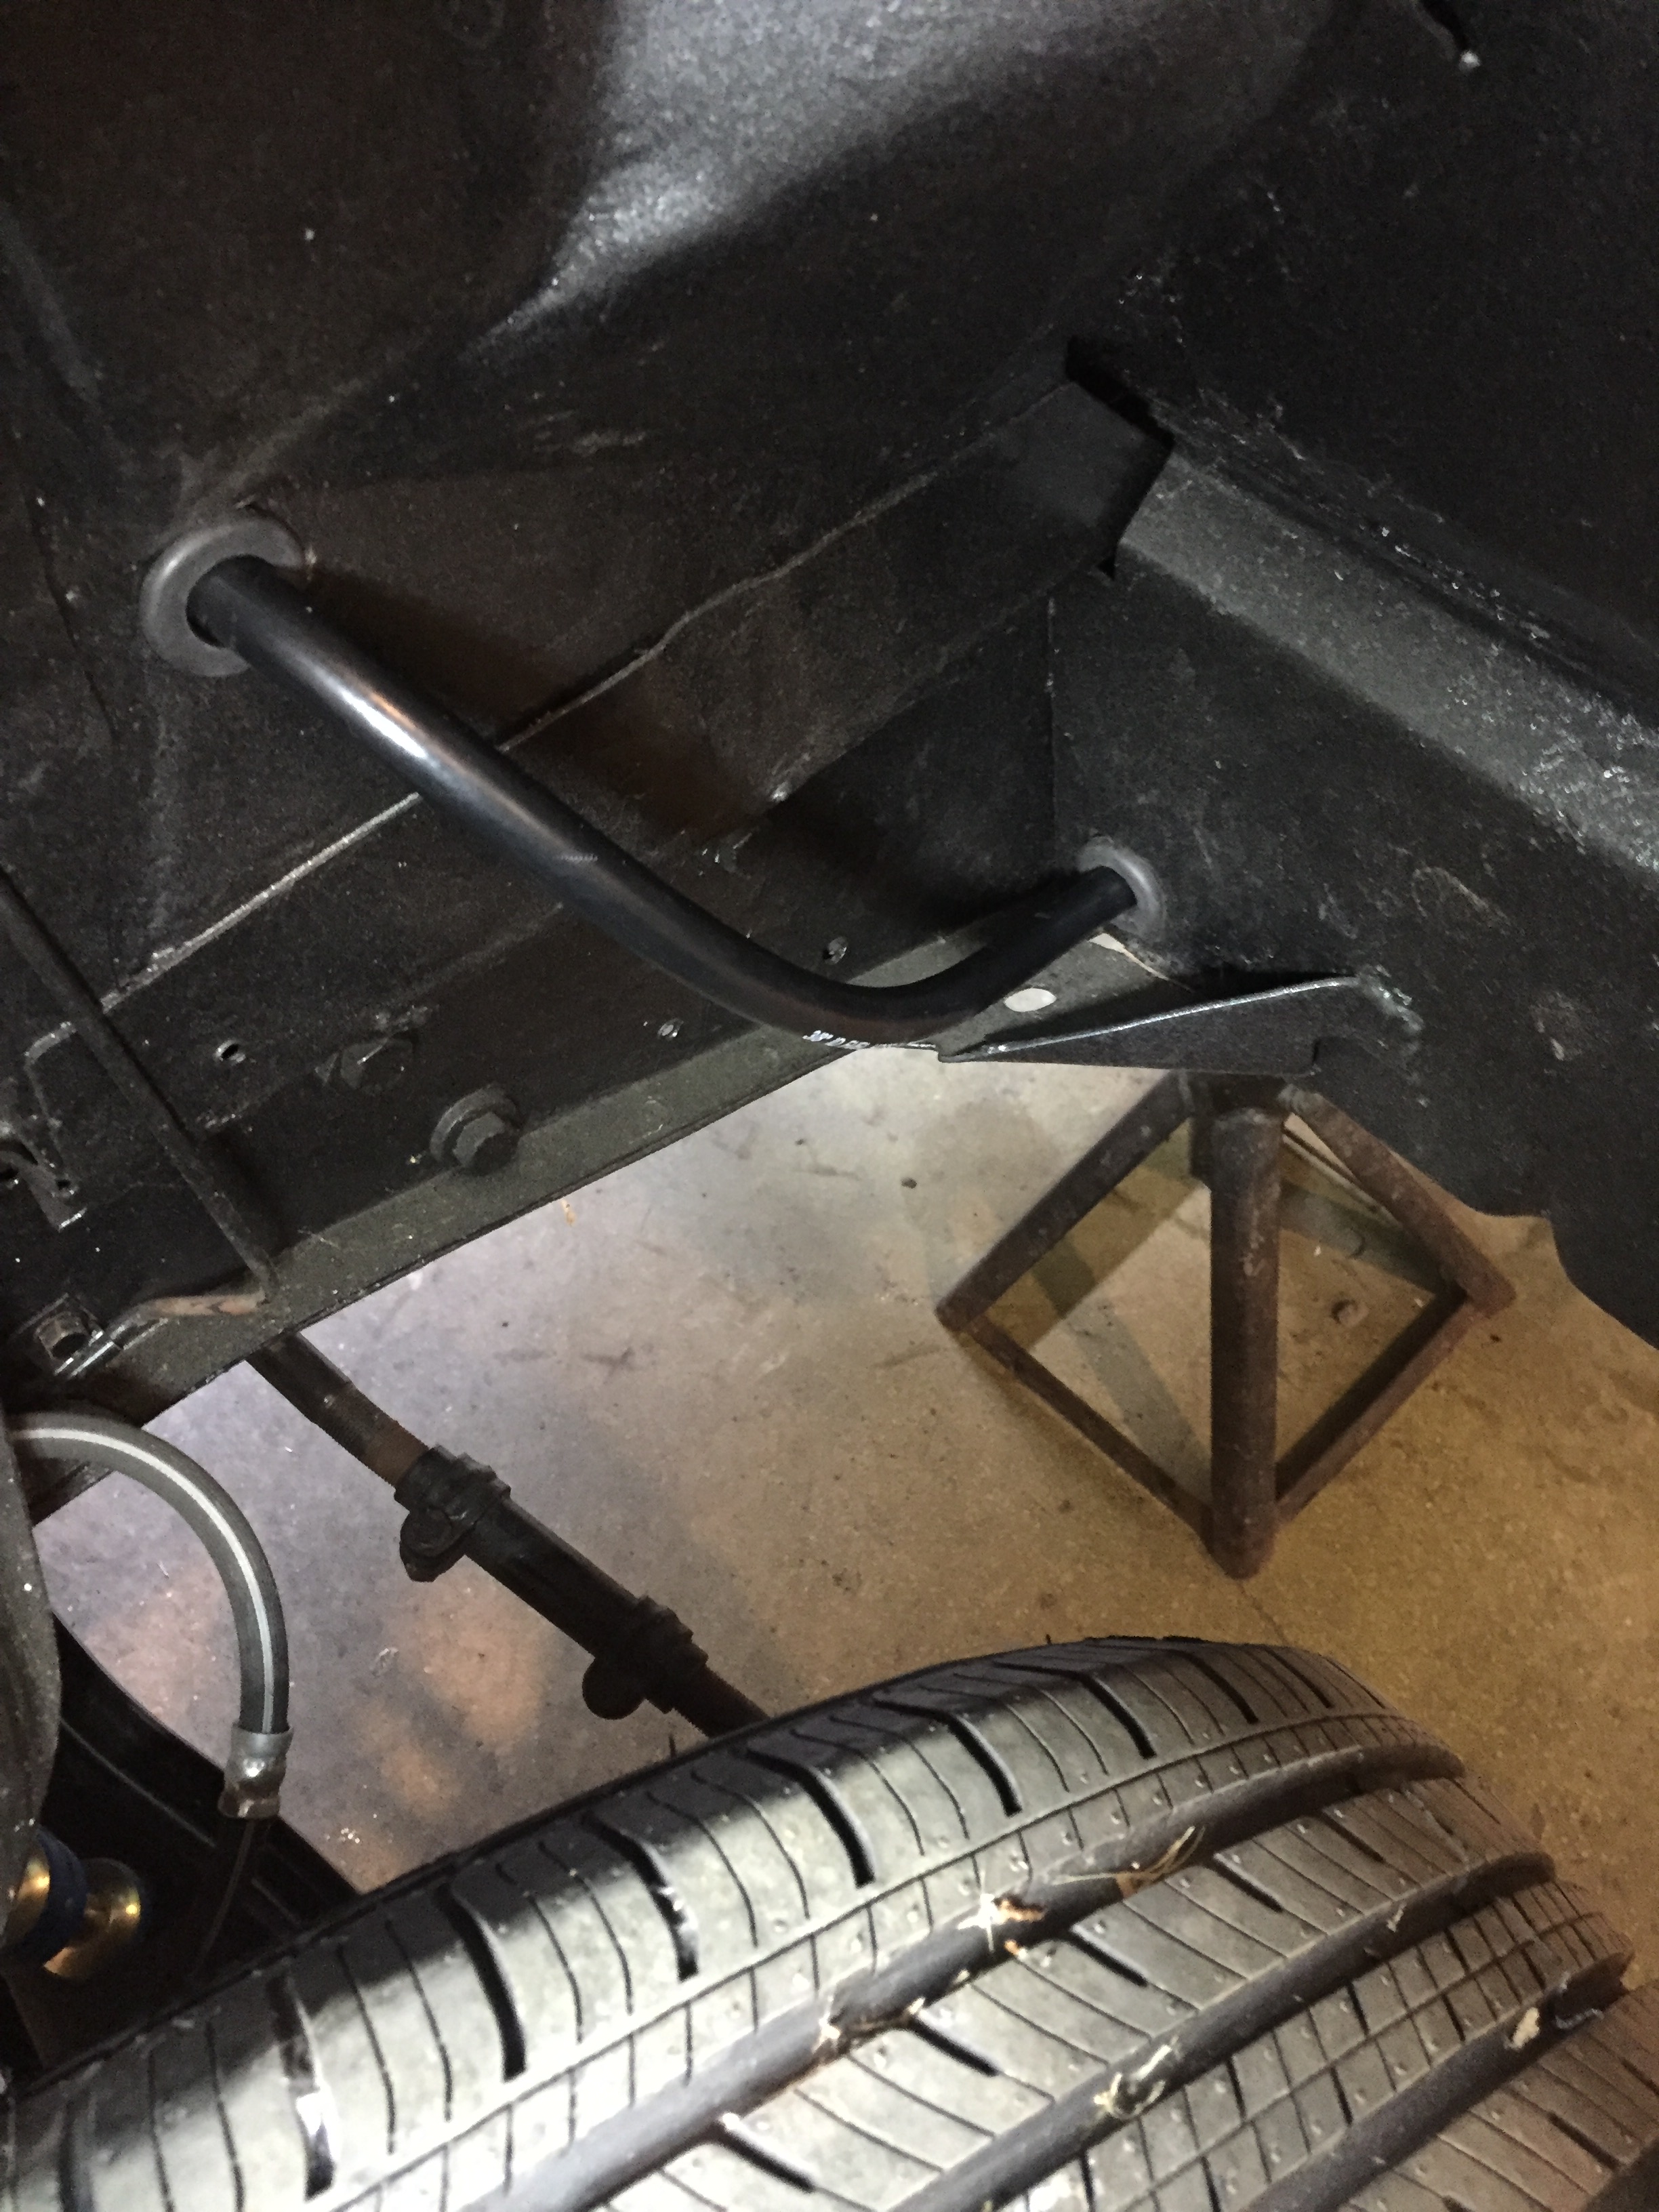
Next up, connecting the gas line from the tank all the way to the carburetor where it is mixed with the other vital ingredient, air, and turned into energy to keep the motor running. We had the main line in, but needed to bisect it for a fuel filter. We installed a new gas hose to get it from underneath the car and up into the engine compartment (Pop and I LOVE rubber grommets, look how clean it is.)
Feeding gas line to engine.

Gas line and carb.
Now, to test that the gas is flowin’ correctly and we don’t have any leaks from the tank.
We celebrate even the small successes, as one should. A final connection to the carb and some tweaking to convert it from an automatic choke to a manual one and we are done with that job!
Next up, electrical. We were trying to save as much as we could because the electrical system in even a ‘Simple Man’s Machine’ is really complicated. We had labelled the wires carefully when taking everything apart, so all I had to do was clean them up, replace any really bad parts, re-tape and reroute them to their various locations. No problem, right? WRONG! It totally sucked. Look at this mess!
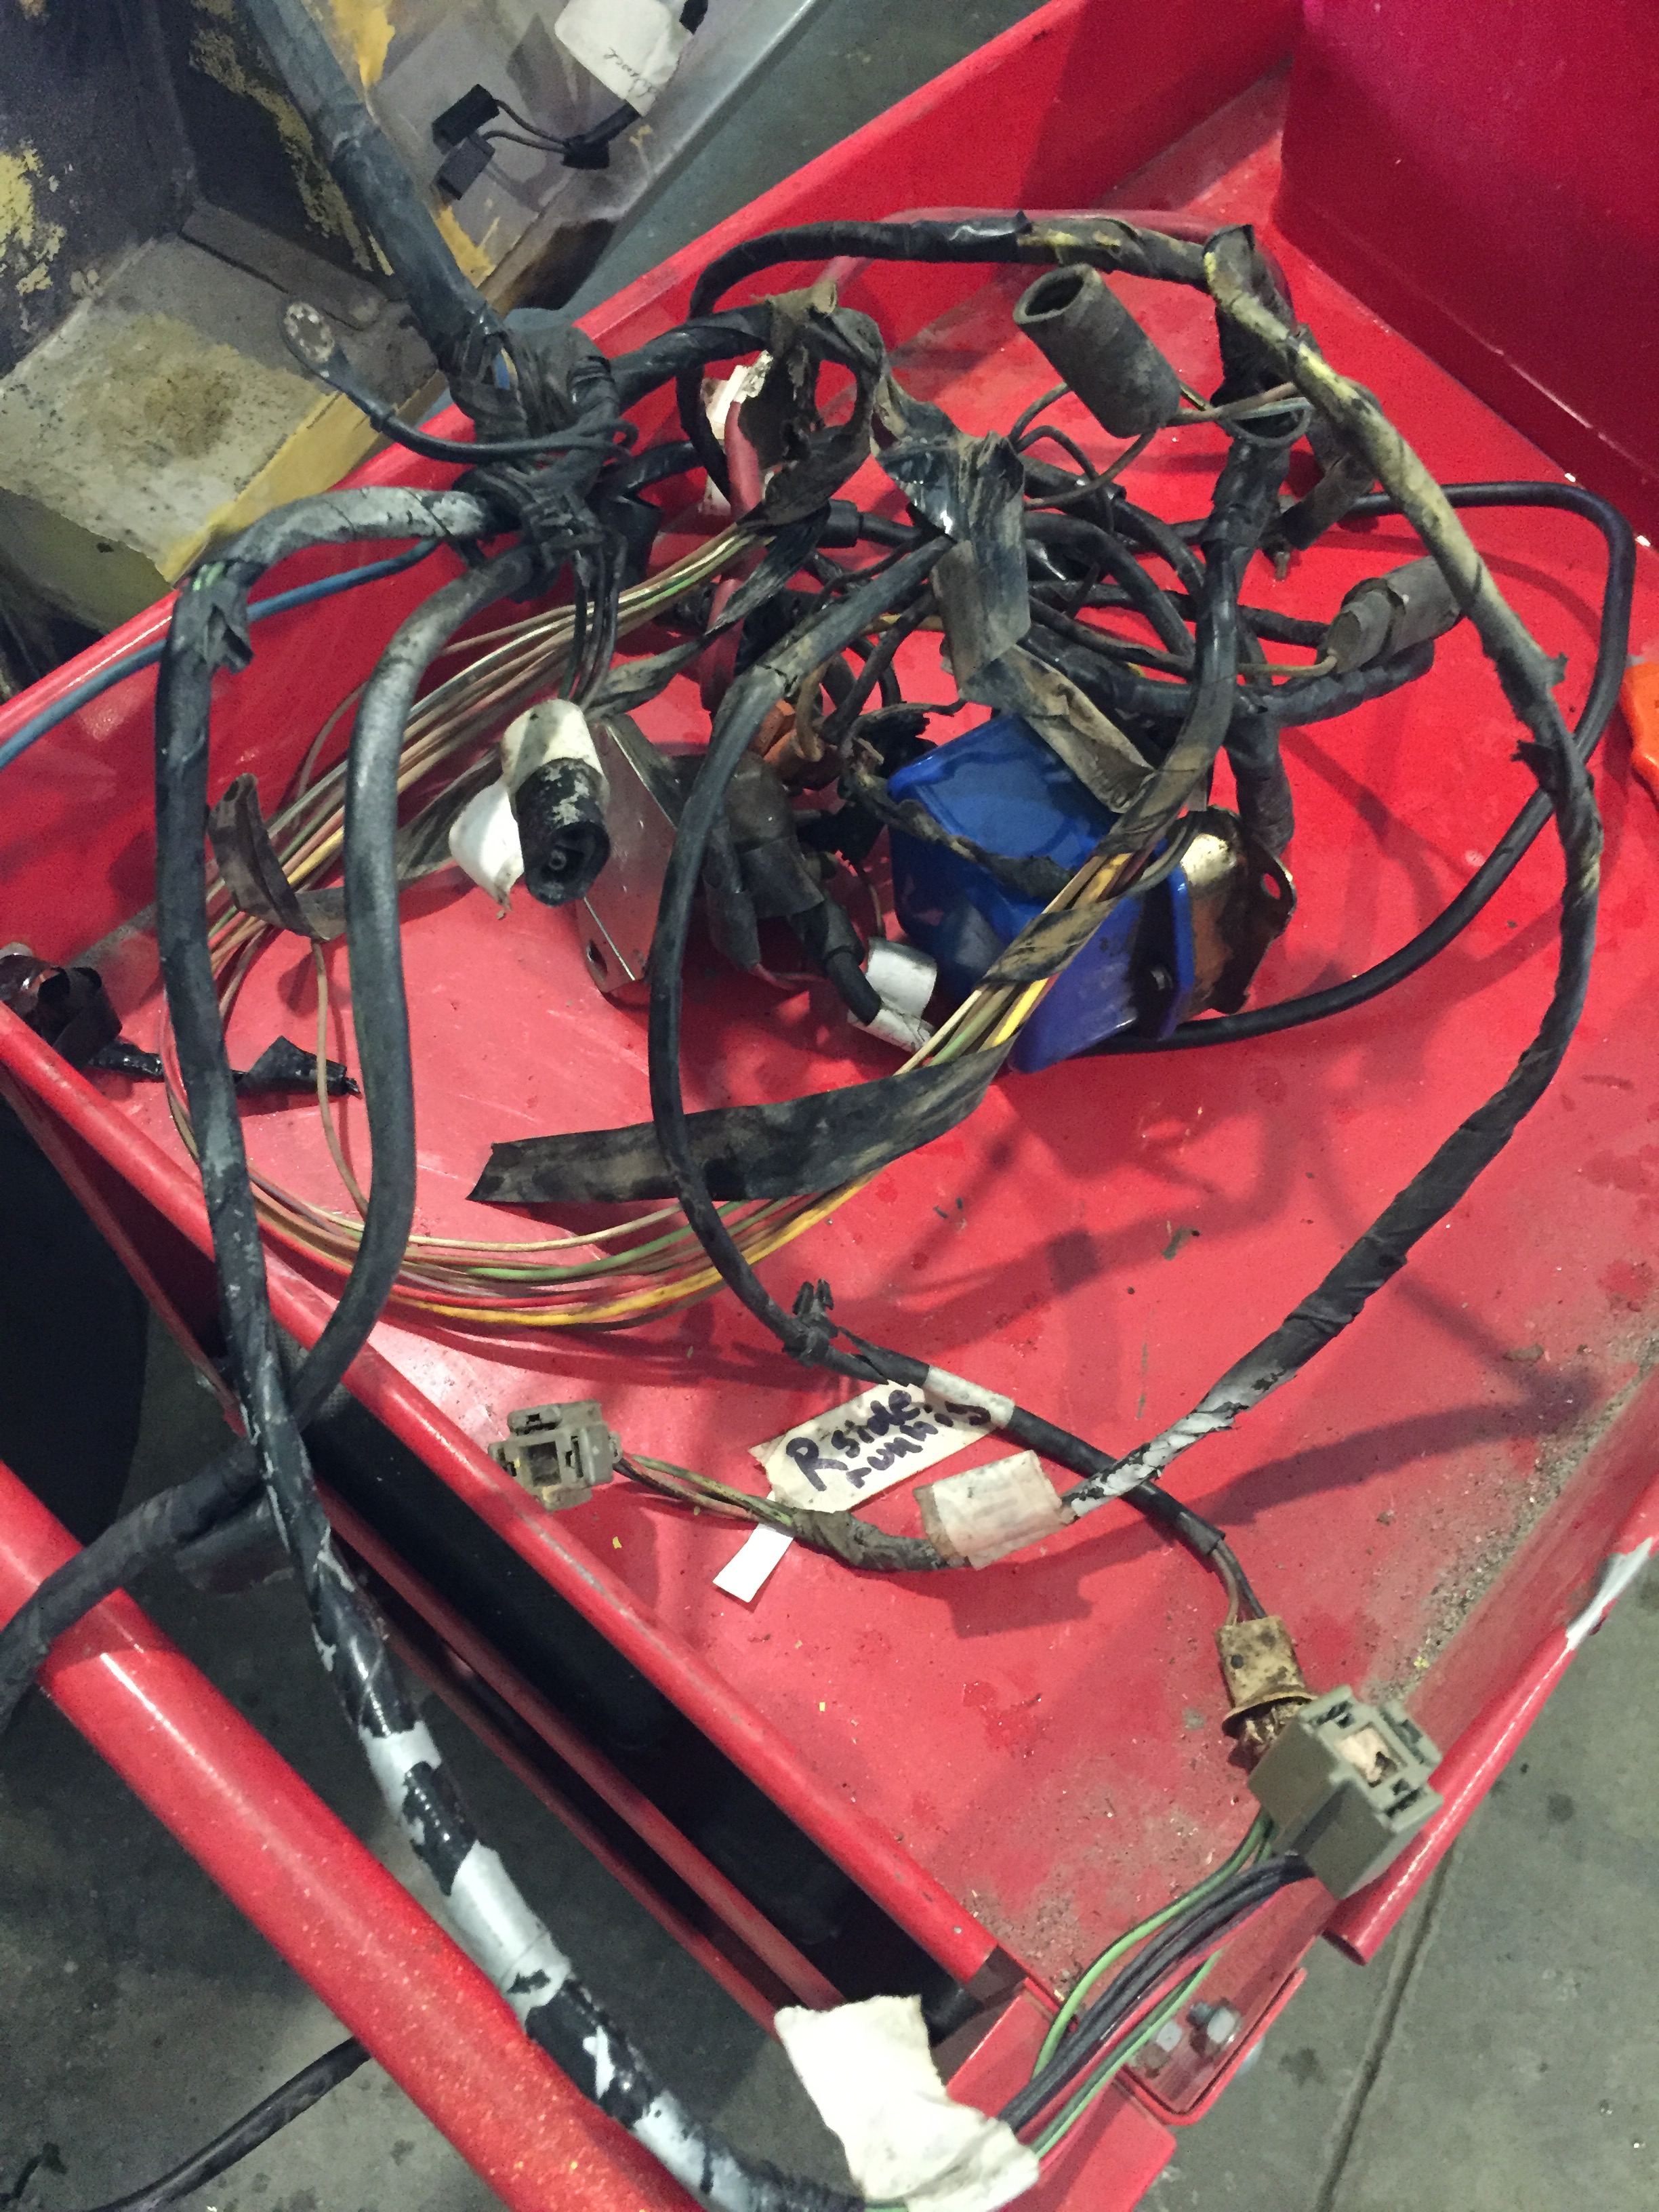
Wiring…Janet’s job.
Ok, so I kind of loved it. I made them all so pretty and even ended up wrapping parts of the wiring in looms to made them super neat. Squeeee!


We had some trial and error around figuring out what went where when it came to the solenoid and voltage regulator. The first time the fan came on inside the car was incredibly exciting, celebratory even, as it blew 50 year old pine needles in my face. So with gas and electric connected, there was but one thing left to do…start her. 🙂
The engine turned over first try, which was just amazing. I don’t know why I didn’t think it would, but you build this thing from engine block up and can’t imagine it’s going to just…start. Pop never doubted it. So exciting. We’ve since worked on the timing and have a little more work to do to get her idling right, but this was just HUGE!
Mavis has her rear end up, almost. It’s so great to be able to start putting parts and pieces back on the car rather than taking them off. So when I say ‘rear end’ I’m referring to the gas tank, back axles, differential, leaf springs, shocks, drum brakes and parking brake. We also got the brake lines and gas line connected. This picture doesn’t really do it justice, but here is the finished product of a shit ton of work.
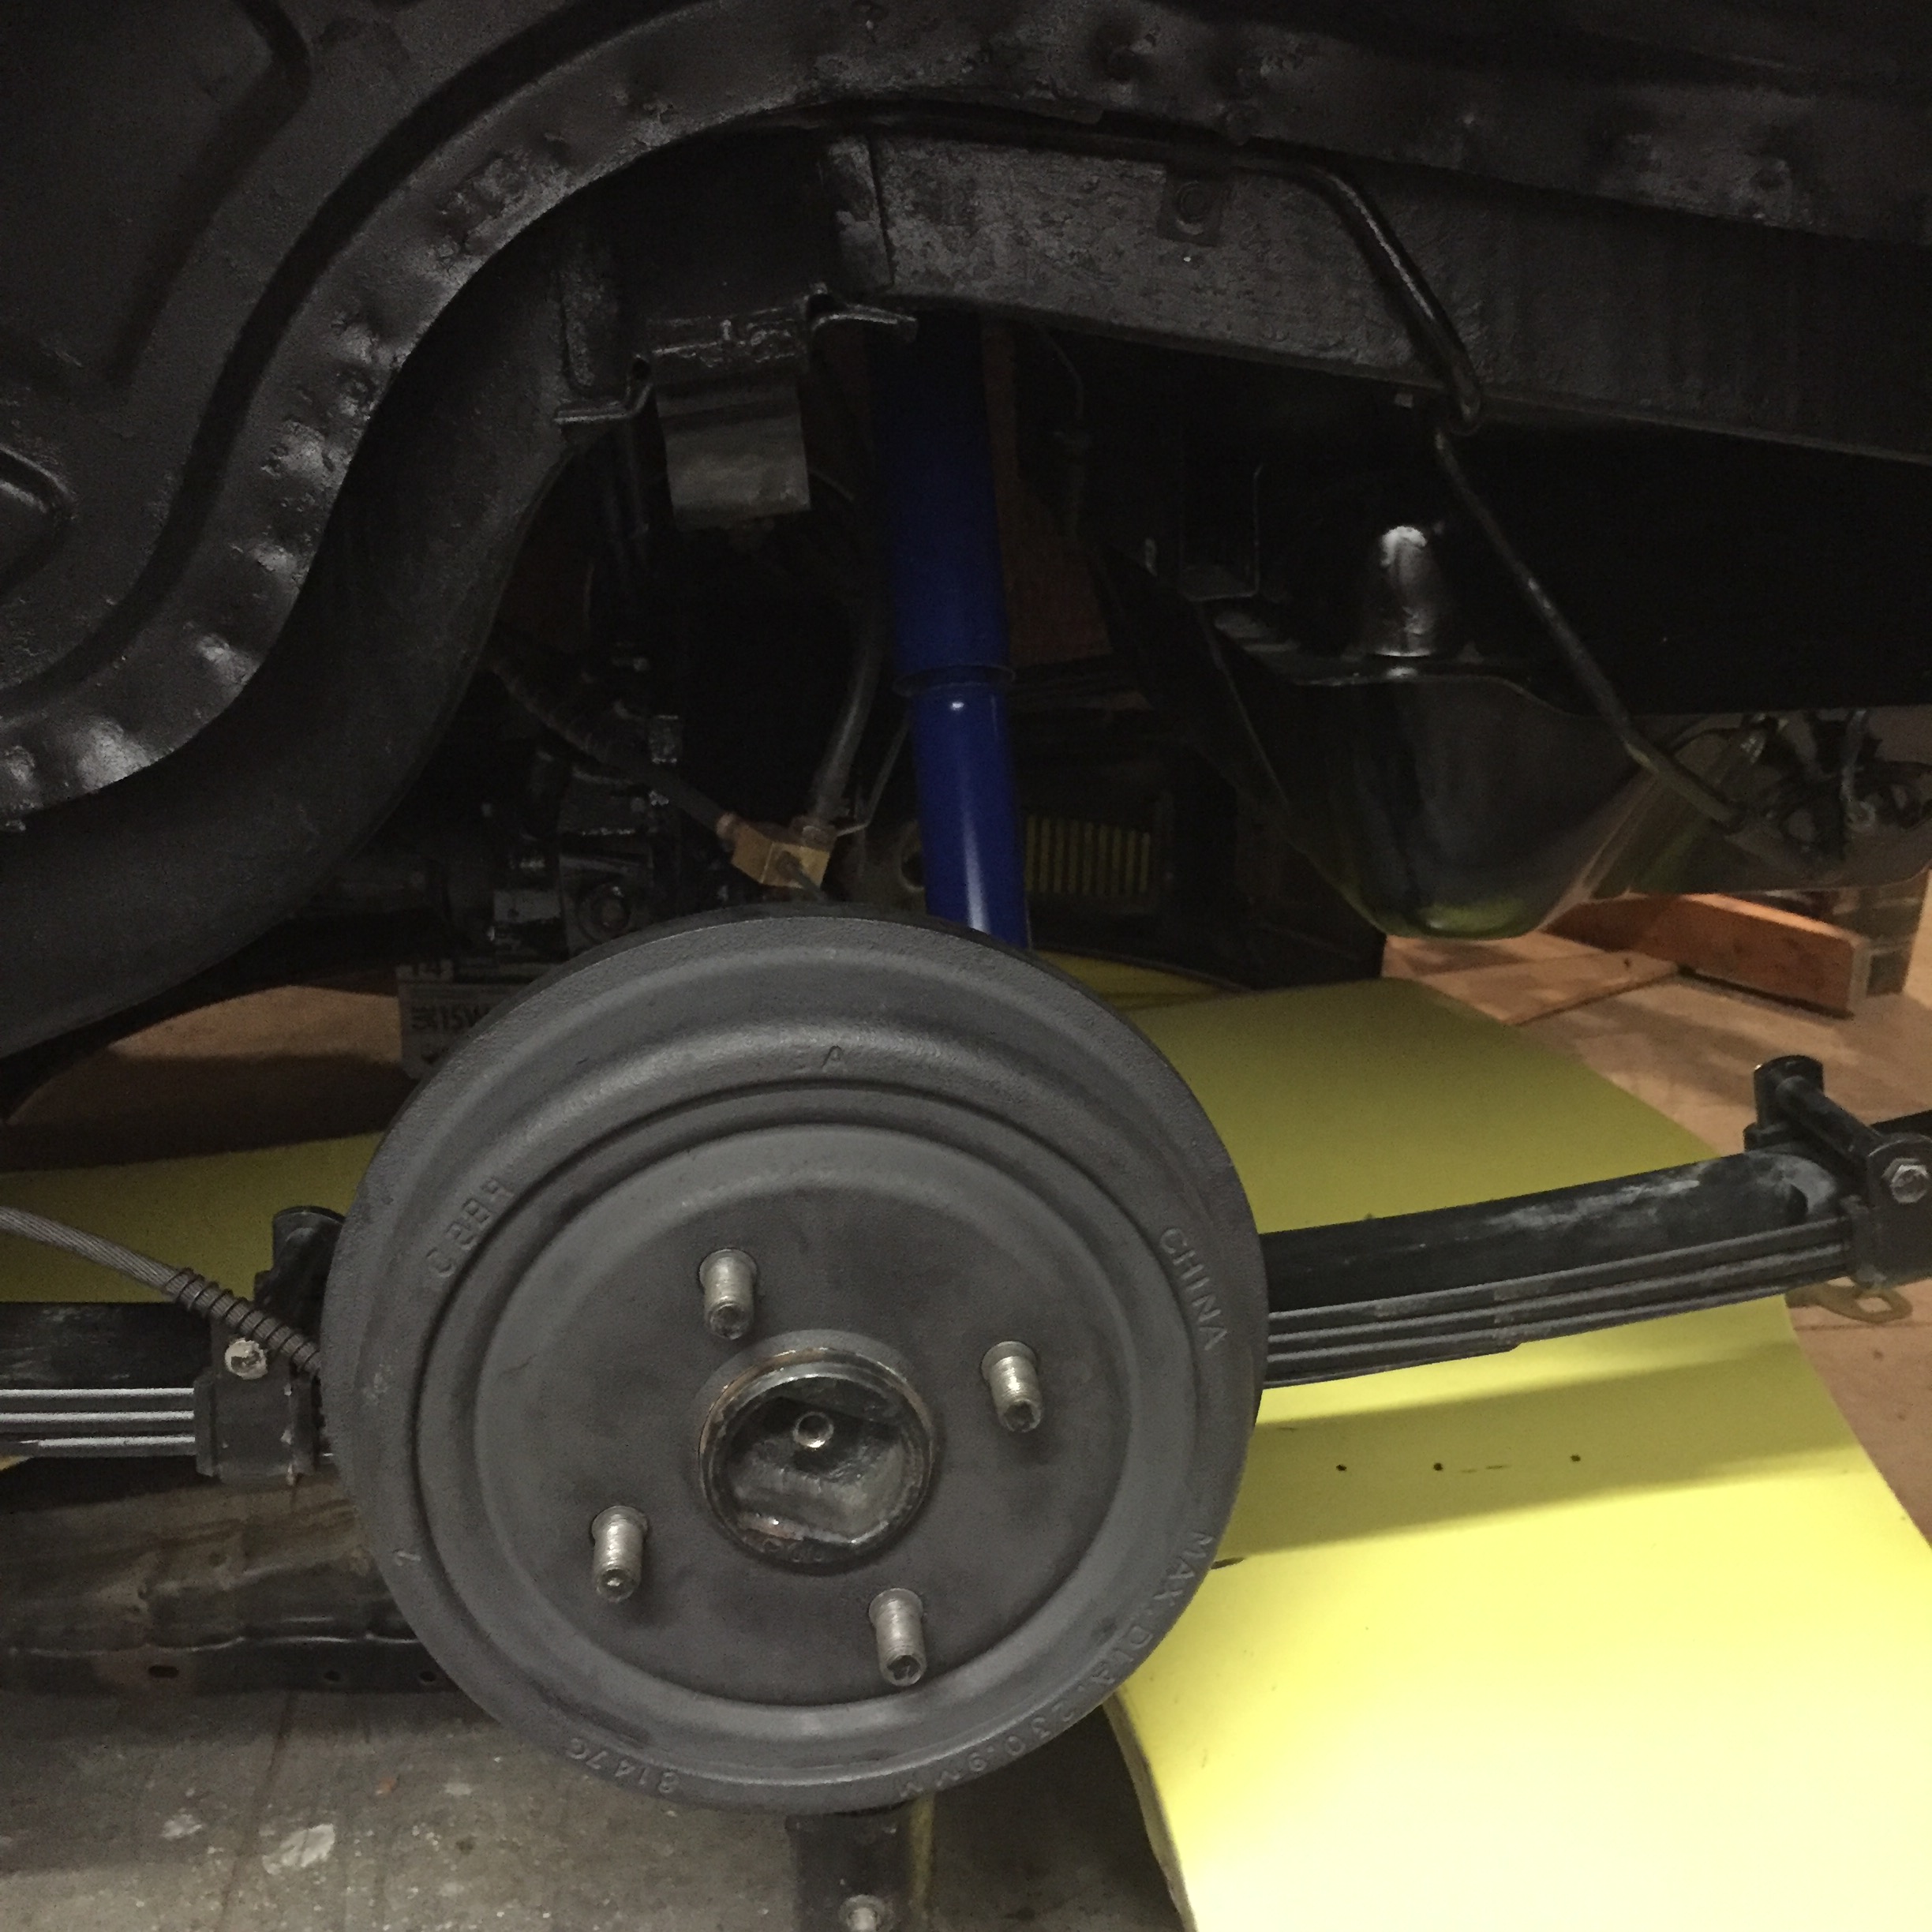
First thing up was the gas tank. Those two long bolts can be shortened, but all that is covered by the back bumper eventually. We also got the front of the leaf springs up and they lay in waiting for the differential assembly.

We ended up keeping our original axles, but bought new bearings and had to get those pressed on. Curt to the rescue! We went over to his garage where he cut the old ones off (the ONLY way to get them off) and used his 40 ton press to press the new ones on. He did the first one and let me do the second. This machine is quite intimidating, you can crush things in it! On approach, it looked like an industrial guillotine.

Curt showed me how to place the axle with the new bearing. Here’s how it looks all ready to be pressed.

Of course, me being who I am, decide I was going to be concerned that with all the pressure, the bearing may go on crooked. I find things to be worried about, you see. Here I’ve never done this myself nor seen it done and I’m telling a long-time veteran mechanic not to “put it on crooked”. So, I deserved this. Perhaps that’s why Curt wouldn’t accept any money for his work, because giving me shit was more satisfying.
Bearings, pressed and ready.

Back at Woody’s Garage we carried on. Backing plate on, axles inserted, brake cylinder attached and brake lines in.


Pop says, “We’re a fucking machine shop!” As much as you can call cutting screws shorter and rethreading them ‘machining’ things. But we did have to come up with a solution to a brake line issue we had. The main line was still in good shape (the line that brings the brake fluid from the master cylinder in the front of the car back to the axle.) Where that line splits into two, we had to order. Miraculously they fit, but for just a few modifications we made with a tube bender. What didn’t fit were the fittings that connect them to the junction block where they split off. BUT – the ones that were on the $100 piece of metal (the unusable axle we bought from Mustang Marty Miller) did. Yes! One less trip to the parts store! We cut off just the tip of the ends, replaced the fittings and reflared the tubing.

To do this, we had to use a special flare tool. I don’t understand how Pop continues to come up with a tool for EVERYTHING. We’ll run into a problem or a need for something very specific and his eyes get all big and his mouth says, “ooh” without any sound. He puts his gorilla finger up in a ‘wait a minute’ sort of way and says, “I have just the thing.” Then he rummages through the garage and comes back with the perfect tool to get the job done. I think he’s jacked to be able to use what 60 years of tool gathering gets you. It is pretty awesome.

Flare tool, happy to be used.
Next up, getting the differential housing attached to the springs, the back end of the springs up and add shocks. So here’s a big admission. I didn’t know that the axle sits on the leaf springs. I can’t say I knew how it was attached to the car at all. I can’t even say I pondered this at any point during this project so far. So when that concept clicked in my mind and I had that Aha! moment, Pop just looked at me and said, “How did you think it connected to the car? Did this not occur to you when we disassemble it?” Again, I hadn’t really thought about it. I was like, “What’ev.”

We used the jack to hold the axle in place while we set it on the springs, secured the axle on the springs with u-bolts then raised the back of them and connected. Who knew?!
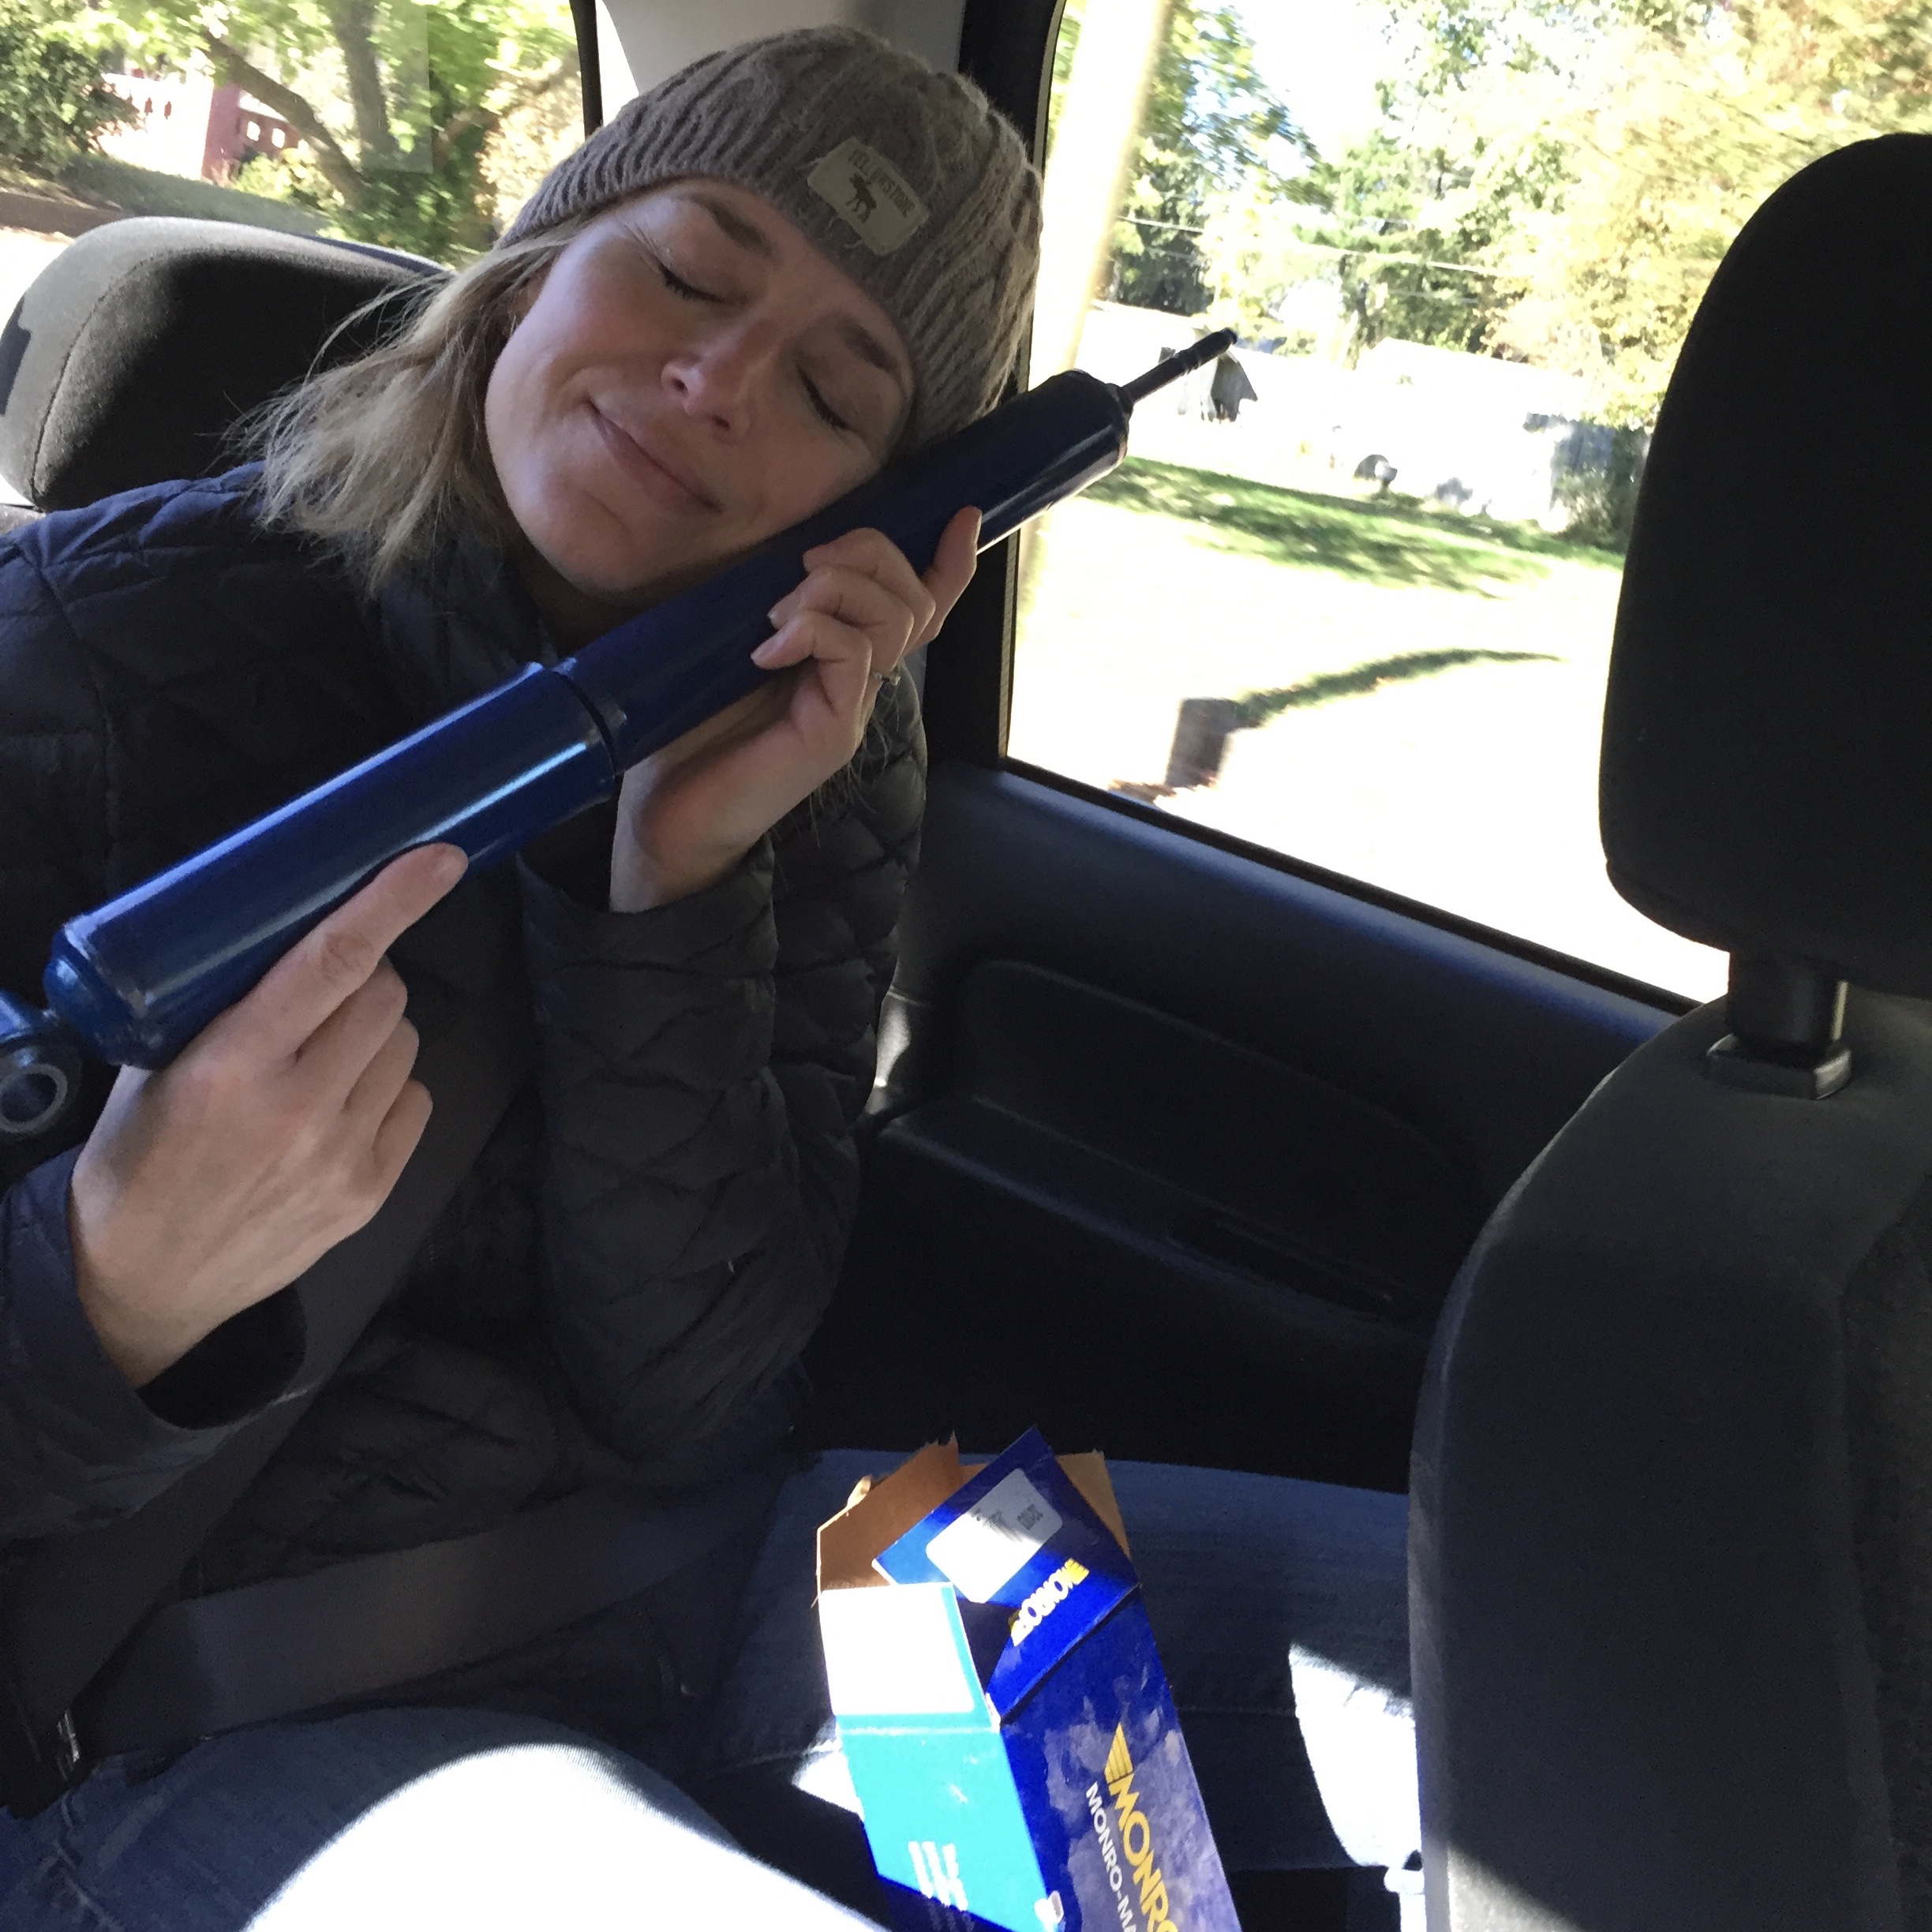
Next, shocks. One of the parts that must be bought new because they lose their gas and their ability to dampen motion, or in my terms, their ‘puffiness’. Quick trip to O’Reilly and boom, new shocks. It’s always exciting to get a new part…here’s me coddling $60 worth of shocks on the way home.
One of the final steps was getting the brakes assembled. These are the second set of drum brakes I’ve done, as we had to put the Firebird’s back together to get it on its wheels and out of the garage at the very beginning of this project. Still though, Pop and I had to dodge a couple errant springs. We have the tool for getting them on, but not off. So we work together with a screwdriver and pliers and wait to see who’s going to lose an eye.

Although this all sounds like a lot of work, and it was, we still had time to fart around a bit. Curt put Lil’ Big Rig up for auction so we went to that and watched him say goodbye to his baby. We also took the opportunity to get under any 60’s Ford we saw to check out the parking brake system (which we also finished on Mavis.) So everyone is walking around looking at these beautiful cars and Pop and I are like this most the time…

Curt got close to what he wanted for Lil’ and it was the star of the show as it’s quite the site. All chromed up and shiny. Pop kept saying that someone should buy it to pull their 5th wheel camper with but I think it looks more like something a Country Santa with a cowboy hat would ride down Main Street in a Christmas Parade. Well, we all felt for Curt as he had a lot of hours and TLC into that truck. Couldn’t have been easy to see it go…but then he texted Pop a pic of a 1932 Ford Victoria kit he bought the day after. Curt’s moved on.

Lil’ Big Rig
Momma, Pop and I also went to a car show in Somerset, KY where I got to meet Tony, the fine gentleman who donated a hood latch to our cause when he and Pop met at the Maverick/Comet gathering last summer. What a great guy. He asked me what it was about the Maverick that made me choose it for the project. When I said that I just loved the shape of it, that it is a beautifully balanced little car, I think he teared up before hugging me. Tony was at the show with Lemonade, his beautiful, supercharged 302 Mav, which Pop says is a ‘truly dangerous vehicle’ (in a good way.) Afterward we followed him back to his garage where he literally, has Mavericks STACKED.


So, great last trip. Lot’s of work, lot’s of fun and now the holidays hit. Next up on Pop my Ride, Mavis’s front end, disc brakes and more adventures.
The first week of my second trip back to Eddyville has been quite successful. The back end is out of Mavis, which means the differential with its axle, springs, shocks, gas tank and all the various tubes and pipes that entails. Still, everything takes longer than you think it’s going to. Something as simple as pulling the filler neck out of the gas tank through the trunk took over an hour and we had to consult the experts.
Thank God for our new Maverick/Comet forum friends! Inevitably someone has gone up against the same challenge and has that little tip that does the trick. Even if the advice is to spray it down with a lubricant, have a couple beers and then bang the shit out if it. Pop and I did cause a bit of stir when we started asking about souping up our Inline 6, which I’m happy to report we are indeed keeping (no 302 switch out for us).

A girl and her Inline 6.
I must say though, for a bunch of macho dudes in a male dominant field, these forum guys can bitch fight with the best of them. So, Crazy Larry from the 302/V8 crowd got into it with gregmaverick of the Inline 6 sanction over advice for Pop and me.
Crazy Larry: A car like that needs a V-8 swap. If you just want to get the car running, keep the 200 completely stock. It’s a complete waste of money trying to soup up a 200 I-6.
gregmaverick: Sixes are way cool (posts some pics of his ‘killer 6 banger’ as Pop called it.)
Crazy Larry: Maybe in an alternate universe. The sixes of the Ford Maverick era are no comparison to the sixes of today. They make good boat anchors, but are otherwise a big waste of time & money.
Dang Crazy Larry, you CRAZY!
gregmaverick: Larry, perhaps you have no time or no money…???
Crazy Larry: Whether I do or not is irrelevant. The fact is that spending the same amount of money on a V-8 will yield much greater performance as it would on a I-6 from the 1970s. You can argue all you want but it won’t change physics. At the end of the day, it ends up being a huge waste of time and money to hop up one of those sixes, which is something that most people who are new to these old cars do not need.
Pop and I had been interjecting with questions and such, but at this point, we sort of ‘crept away’ and let these two go at it.
gregmaverick: Gee Larry – we’re up to the challenge. “Laws of Physics”? Which ones? I’m curious to hear your explanation in terms of Newton, thermodynamics, and bore/stroke ratio. Perhaps you need to go back to the library and re-do your homework…?
Ooooooo-eeeeee! He did NOT!
Crazy Larry: You’re hilarious. Like I said; put the same amount of money into a V-8 as the Ford I-6 from the ’70s, and the v-8 will stomp all over it (not to mention that it will sound a heck of a lot better too). And if Newton’s theories, or thermodynamics were on your side in this debate, there never would have been any reason to create the V-8.
gregmaverick: Well Larry, I don’t know what to tell you…except, you still haven’t answered the questions. Perhaps it’s a little too technical for you. We’ll just let it go at that.
And it goes on and on. The forum admin tells them to ‘give it a break’ but they keep at it. Rapture chimes in and I adore him.
Rapture: i mean wouldnt they have to upgrade their brakes, rear end, transmission, radiator, and a bunch of other small things to put in a v8? i feel that would eventually put the cost way higher for them. of course they are not going to get the same horsepower as a v8 from the inline but beefing it up for a more fun driver doesnt sound bad to me, doesnt sound like they are throwing away money necessarily. do the upgrades and enjoy, but thats just my opinionated suggestion.
It was like watching an online fight between a Trumpy and, well, everyone else, but much less maddening. There is no lack of strong opinions in the car world. On one of our many excursions to Harbor Freight, the ‘Bed, Bath & Beyond’ of the automotive enthusiast, we were tracked like prey by ‘Jeff’ and his V8 hard on. When I explained our project and Mavis’s cute Inline 6 he immediately turned up his nose. Out came the pics of his high horse power, Chevy LS crate engine and his Ford insults. We couldn’t shake this guy, popping up around every corner to tell us what saw blade we should buy and where to get it. After he explained that he’s been off work with a bad back, I asked him, “So this is what you do? Hang out in Harbor Freight bugging people?” I couldn’t help myself, by the time he was telling Pop how to hang paint tarps I was done.
This isn’t Pop’s first rodeo and the Ford Inline 6 is an incredibly strong engine, so as I said, regardless of the arguments, we’re keeping the 6. I’m not racing this fucking thing (although you never know), but I do want a little zip. Besides, Pop’s got his 350 V8 we can cause trouble in. We took the Bird out the day after I got here. Pop says, “Go tell Ma we’re going hot rodding.” Warning, I’ve taught myself a little iMovie and I’m working on mastering the cheesy video.
As well as being a stupid good time, this little act was an exercise in differentials and how the rear axle isn’t one big tube going from one wheel to the other. Each side is it’s own section and they can turn at different speeds. This explains that when you ‘lay down some rubber,’ one wheel bites while the other burns it up! How do you think you can take a tight turn and not have the outside tire skip and skid to keep up with the other? It’s like when iceskaters do their little whip line. The inside one basically turns in a circle while the outside gal is skating her ass off to keep up.
We made some pretty big purchases this round too. I’m switching out the 3 leaf for 4 leaf springs. Seeing that part of the old spring fell off as we removed it, I figured I should. Needed new u-bolts and shackles for those and pinion seal and u-joints for the differential. We found an original front grill and fender splash guards on eBay that I grabbed and also picked up some smaller fun stuff like window handle knobs and a dome light cover. All these little things add up so believe me I’m saving everything I can possibly save regardless of the work. I’ve spent 3 days on the gas tank already. I really really want to do this thing right, and as you know, I love me some physical labor, so I scraped the outside of the tank of road crap, rust protected it and painted it. Pop and I cleaned and sealed the tank with a special 5 step process and that’s that.
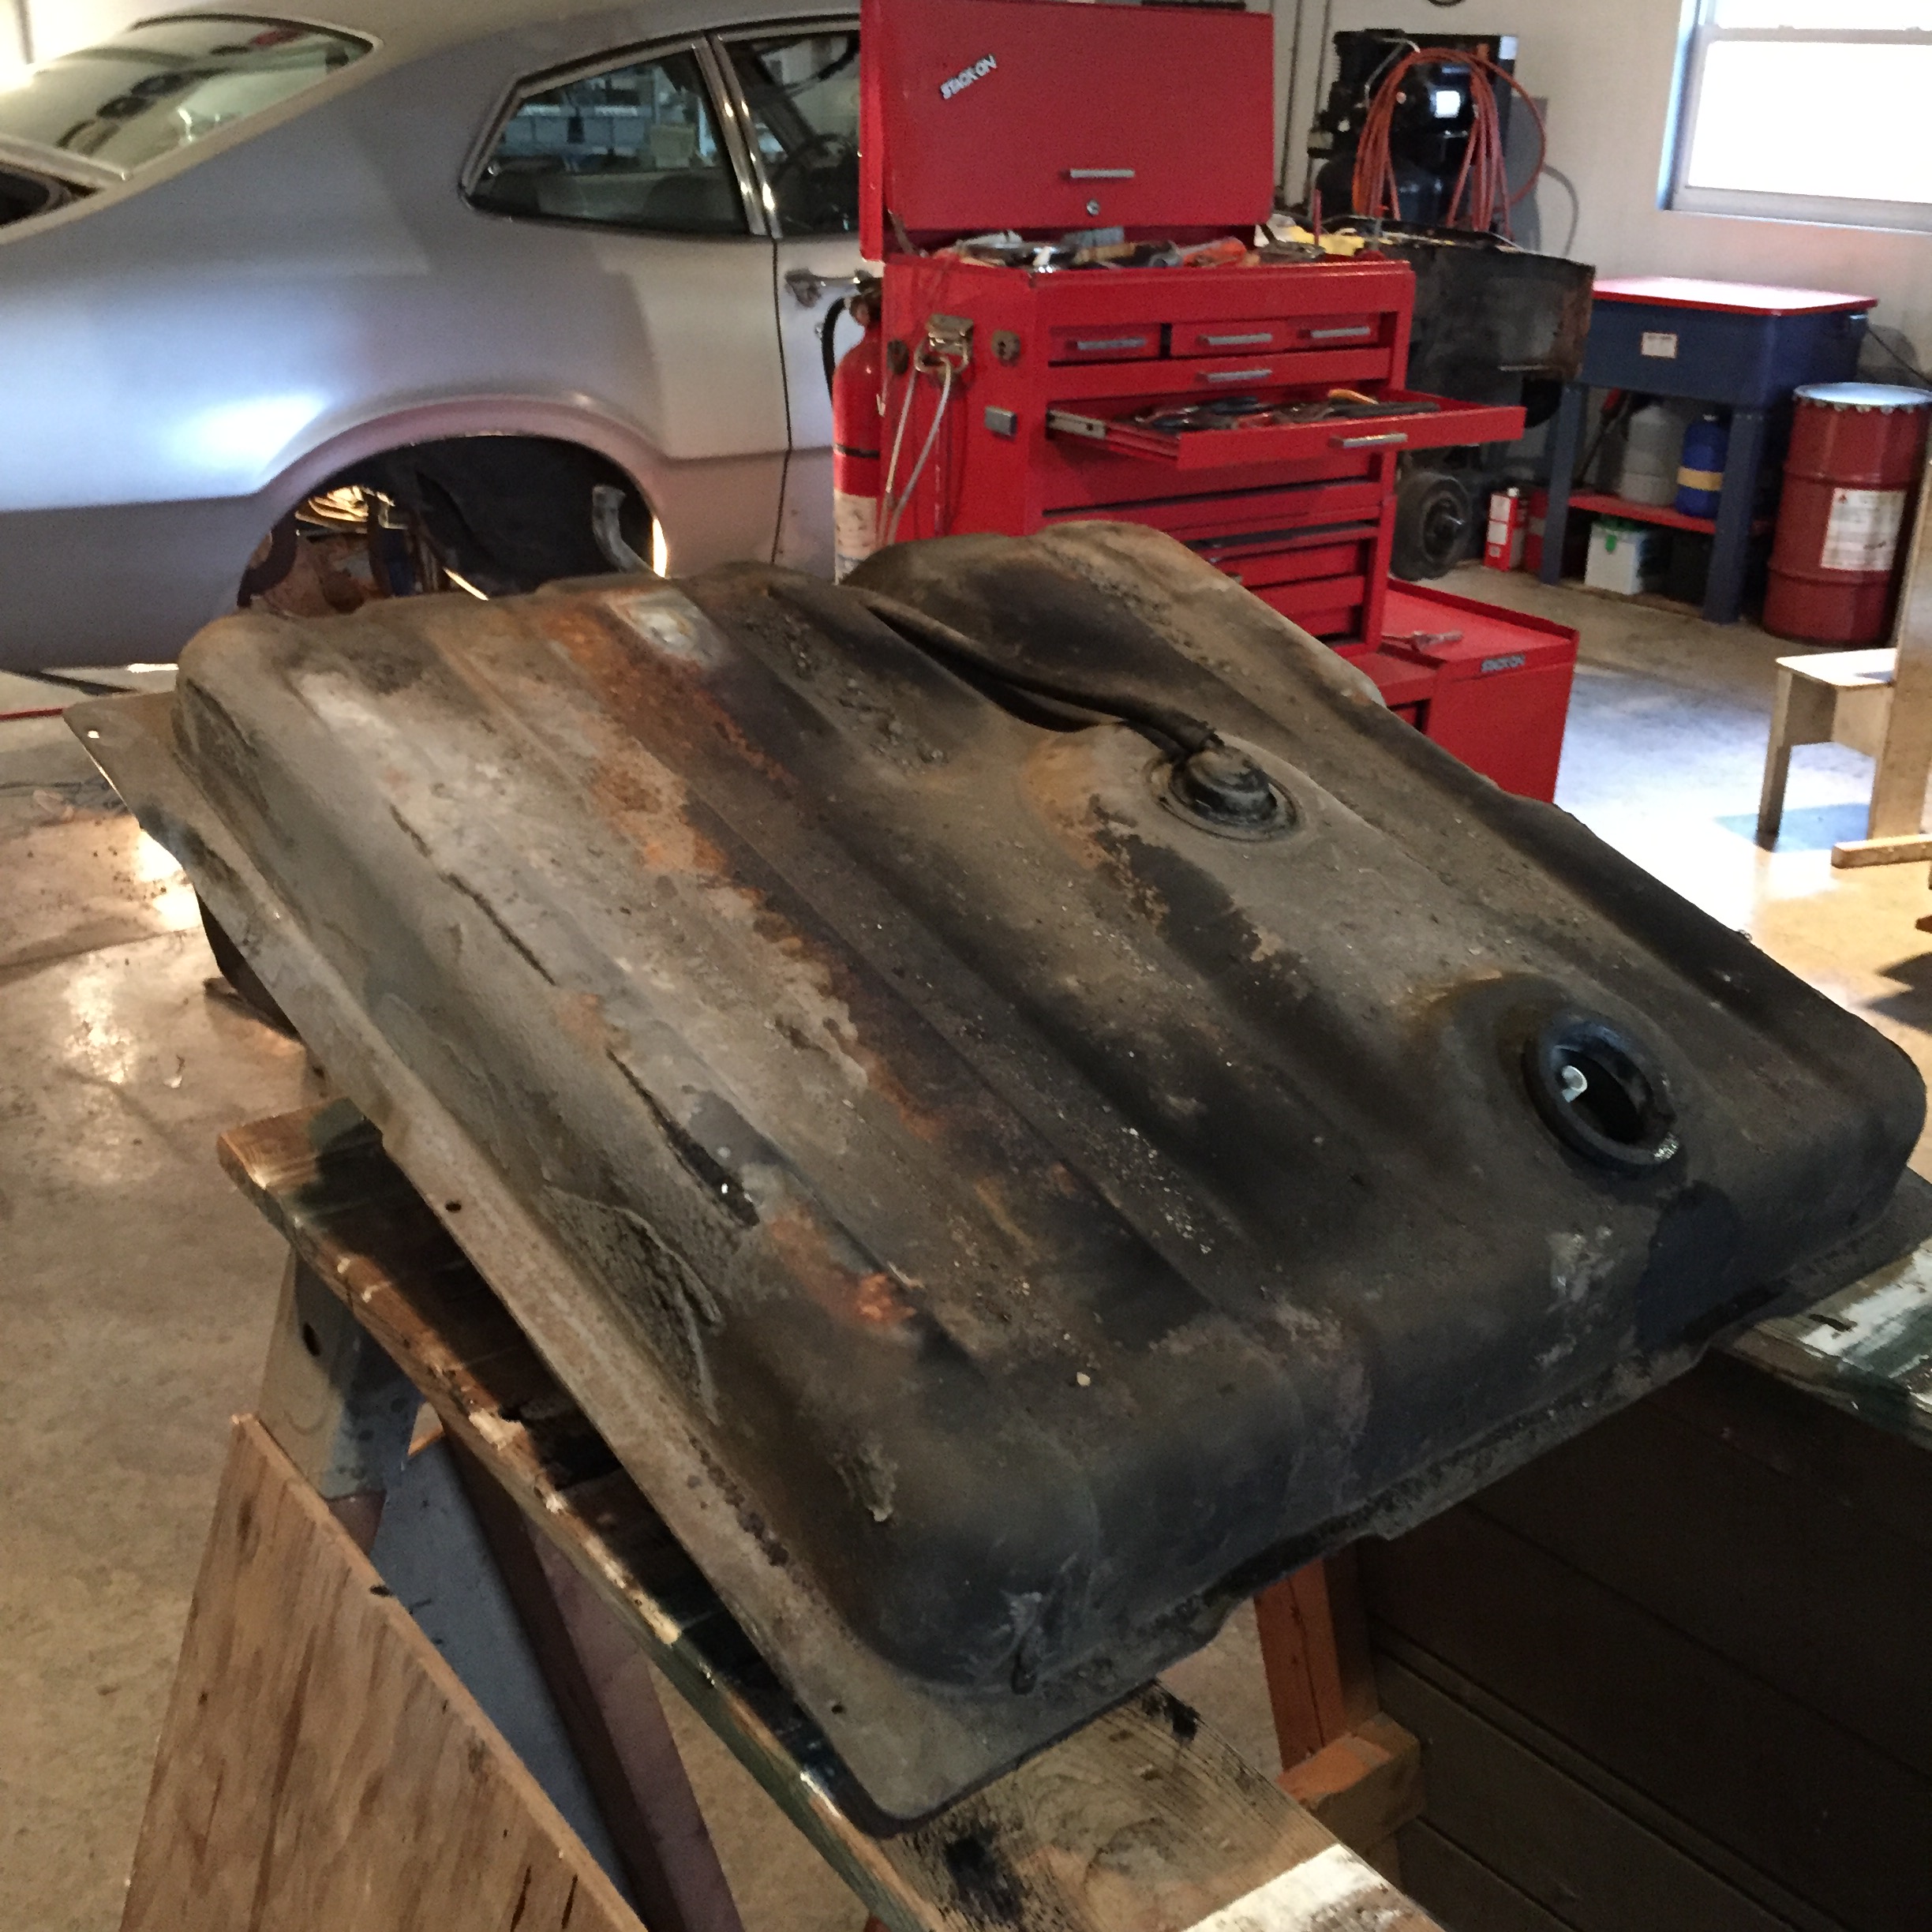
Gas tank before: Covered in tar, dirt, old undercoating and shame.

Gas tank after: Cleaned, sealed, fast-etched (rust protected) and painted. Proud as a peacock.
I’ve added the tank to the Before and After section of this blog…it’s just the beginning. I love tracking this kind of stuff. I’ve also started in with my spreadsheets for listing parts needed, bought, costs, timing, etc. All told, we’ve figured that this little car project will cost about $10K and take 2 years. I’ve been told it’s more realistic to double both of those numbers, but I’d like to finish the car before I turn 50! I personally think that Pop is slow playing this whole thing to savor it, which I get cuz we’re having a blast, regardless of what Crazy Larry thinks.
