Cancer, COVID, and Quarantine Green

Thirty-three years ago Pop had the upper lobe of his right lung removed, which included a cancerous tumor. When he checked into the hospital the day of the surgery they asked if he wanted a smoking room.  That’s messed up, but it was 1988, I was 18 and like Pop, also smoked.  Driving out of the parking lot after visiting him post-op, I dramatically threw a half-smoked pack of Newports (yuck) out the window, tears in my eyes…“Never again!!” In all honesty, it took me a bit more time being an idiot before completely kicking the habit.

Fast forward to 2020 and dang, they find a spot on Pop’s left lung, this time in the lower lobe.  We hoped for the best, but as my sister Kristen reported, the ‘nodule’ was being an asshole, and was again, cancerous.  Pop had surgery to remove the lobe, which he got through like a fucking champ, as well as some preventative chemo.  The day after he got home from surgery, he told me on the phone, “I feel great!  I could chop wood!”  Now, the old man was on pain meds and later would say he could barely walk, but I loved his enthusiasm. Momma’s been amazing, taking things as they come and as usual, being optimistic and so, so strong.

So with that, and this pandemic thing we have going on, visits to Kentucky to see the P’s and work on Mavis have basically ceased for the past year. During this time, I’ve have had waaaaaaaaay too much time to think about the color I’ve chosen to paint Mavis.  This is chapping Pop’s ass because I have already picked the color, purchased it, and painted the wheels with it, but I don’t think I like it. Yes, I spent $320 on the paint, but like every car restoration project out there, the budget was blown long ago. I figure, regardless of all the glorious things Mavis will have under her hood, the exterior paint color is the first thing I’ll see.  I should love it, right?

IMG_3092
I went through a ridiculous amount of different shades of green.
1976-fordtruck-pg01
I finally settled on Medium Green Glow Poly (W2784)

Ford Medium Green Glow / #53692f Hex Color Code

#53692f Paint Chip

Problem is, between choosing the color and actually painting my wheels with it, there was quite a long break. I didn’t even realize the color I actually got was not the right green when I painted the wheels. This was after painstakingly sanding and prepping each one (thanks Kristen and Griff!) We even had the tires put on, we were so darn pleased with ourselves. Then came my dramatic realization that it was NOT the green I originally picked and I’m pissed at myself that I didn’t compare it to the original paint chip. It’s not the right green, and it’s also too yellow for my liking. Like, I don’t think I can just ‘live with it’.

Now Pop has been trying to convince me for the past year that the green is “just fine!” He even painted the trunk deck with it to show me how great it is. I’m not convinced, and I know I’m just exacerbating an already tense paint stand off between us. But I don’t know, Pop, I’m feeling a whole different color all together. Screw the green, I think I’m going cream! (I’m picturing him rolling his eyes as I type.)

Here’s the good news. My man Mike and I will be headed to KY in a month and the thought of actually hugging both my parents fills me with total joy. (We are all vaccinated!!) I’ll make the final call on the color, we’ll do some serious sanding and body work and hopefully get a start on the final paint job. Can’t wait!

IMG_4325
It’s green, but is it the right green?

Pop – Putting it Back Together

Hi folks, it’s Pop here.  Janet did an excellent job explaining basically the what’s and why’s of rebuilding her little 200ci six banger.  More air, more fuel, bigger spark, bigger explosion and more power.  Carl’s Machine Shop was fantastic, and now we have to assemble the parts.  This indeed trips my trigger and I will explain the procedure much to the boredom of some of you.  But, perhaps we can convert a few into budding “gearheads”.

We’ll begin with the bare engine block which was cleaned up, magna fluxed (a process to detect cracks…it passed), over bored 60 thousands of an inch (this is the maximum and was necessary because of scoring in cylinder #4, the result of a broken ring), and new freeze plugs installed.

IMG_4275

The crankshaft went in first with .010” over bearing inserts.  This requires clearance checks using plastigauge.  Plastigauge is thin plastic thread which when compressed, spreads out and its width is then measured to determine clearance.  The top bearing shells are placed in the block, then the crankshaft, then strips of plastigauge across the bearing journals, then the bottom bearings and caps.  The bearing caps are then torqued to specs.  The caps are then removed and the width of the plastigauge measured.  I won’t further torture you with the measurements acceptable throughout the assembly procedure except to say, “everything checked out”.  (Janet: “Except to say we had to do math…math sucks.”)  The crank is then removed and turned over 180 degrees and the process repeated, assuring a straight bore and shaft.  Everything checking in specs, the bearing surfaces are lubricated, assembled and torqued to specs.  One final step, the crankshaft is then moved forward and backward to check end play.

The camshaft (which opens and closes the valves) was original and installed by Carl’s with new bearings, as this requires special tools.  (Janet: “Some of the only tools Pop apparently does NOT have in his garage. It’s just a matter of time.”)

IMG_4312

Next, the pistons with new rings (which snap into piston grooves, hold compression and control oil on the cylinder walls), three rings per piston.  Before the rings are installed in the piston grooves they must be placed in the proper cylinder bore and the gap between the ends measured.  Too close a gap and the ring will break when it expands with heat, spelling disaster.  (Janet: “Apparently I got my dramatic nature from my father.”)

IMG_4278

Each piston is fitted to numbered connecting rods then placed in the proper cylinder and attached to the crankshaft, plastigauged, lubed and torqued to specs.  With the installation of a new oil pump, the “bottom end” is now complete.


New timing chain (which goes on gears at the front end of the crankshaft and camshaft) is installed and the front cover and oil pan installed.  We’re now ready for our new and improved cylinder head.

IMG_4230

One final and most important measurement is needed, valve clearance.  We now have oversized valves and increased openings with our new 1.6 to 1 rocker arms.  Heaven forbid the valves hit the pistons at top dead center!  That would again lead to disaster.  (Janet: “Need I say more?”)

IMG_4342

With #1 piston at the top dead center, we fill the space between the block surface and the piston with clay (in our case, Playdough).  We also filled #6, then install the head gasket and head.  The head bolts are torqued, the valve train assembled and adjusted and the engine turned over 720 degrees or two revolutions of the crankshaft (one revolution of the camshaft).  With fingers crossed, we disassemble the valve train, remove the head and measure the distance from the bottom of the valve indentations to the piston surface.  Yes!  We have clearance!

IMG_4329

The top end is now reassembled and the oil pump driven by an electric drill (the bottom of the distributor shaft will do this).  Checking for oil flow from the rocker arms aaaaaaaand – success!


Finally, valve cover on and new Ford blue paint job.

IMG_4346

IMG_4357

During Janet’s next visit we’ll install our Autolite two barrel carburetor with automatic choke onto the beautiful adaptor plate on the intake manifold.  Add our new 50,000 volt ignition and big exhaust headers and we’re ready to kick some ass.


(Janet:  “Pop and I have very different ways of showing overwhelming excitement.”)

IMG_0950.jpg


Is it Done Yet?

I don’t know that everyone who knows I’m rebuilding a car with my Pop realizes that I’m actually rebuilding a whole car.  Taking Mavis totally apart, cleaning, fixing or replacing every piece and reassembling her to be a greater version of her former self.  Yes, Mavis is taking some time.  My 48th birthday this past July marks two years since I came up with this wack-job of an idea.  But I’m ok with that.  In fact, here is a pic of me in my car, just enjoying the process, thinking about the damn good time I’ve had so far and how amazing the finished product will be.

IMG_3489

Patience is a virtue.

Actually, a lot has happened in the last two visits down to good ol’ Eddyville, KY.  Best way to describe the progress would be to say that once we put the tires back on Mavis, she’s rolling.  Now, she has no engine or seats to speak of, but she has her back end up, front end together, brakes, steering and suspension.  Mavis and I could literally be pushed down a hill and I could steer us to safety and stop, sans injury.  This, in my book, is progress.

First things first, we (I) finished the scraping and sanding of the engine compartment.  With our previous welding reinforcements and patching we were ready for paint which was VERY EXCITING as it was my first time using the spray gun that Pop has spent months teaching himself.  A coat of Rustoleum, a couple coats of glossy black and we’re set to go.  We’re a good team, as Pop takes the ‘easy to reach’ areas and I lay on my back to get in the nooks and crannies.

IMG_3135

IMG_3182

As you may recall, the brake situation stumped me and Pop for quite some time.  Went with the 9 inch drums in the back and took a chance ordering a disk brake kit for the front.  We knew going in that we had a spindle issue, that being that the 4 lug kit we wanted would only fit on ’65 Mustang spindles.  NOWHERE is there a front disk brake kit for a ’72 Maverick that we could find.  It was all about the bearings, inner and outer, not being the correct size for the spindles we currently had on Mavis.  We found a shop that at first we thought could machine down our spindles to meet the needs of this disc brake kit, but when that proved to be impossible we bit the bullet and ordered the ’65 Mustang spindles off eBay for $75 a piece.  Everything we read said they should work.  These things showed up while I was back in Denver and Pop said that they were the wimpiest looking set of spindles compared to the Mav’s.  But he also said that he’d never heard of old Mustang wheels just ‘breaking off the car’ and we’d probably be ok.

IMG_3481

Wimpy spindles…we can only hope we’ll be ok.

By being smaller, the spindles allowed the steering wheel to turn way too far to the left and the right, resulting in the soon-to-be installed tires rubbing on the soon-to-be installed fenders and that wouldn’t do.  So, as we tend to do, Pop and I came up with an ingenious little adaptation by adding an extra piece of metal rod to the stop on the spindle arm.

IMG_3494

Gosh, hope it holds.

We shaved down both sides of the two rods to a flat surface and had our buddy Curt weld the shit out of it.  It’s not pretty, but it will do the job.

Before installing the brakes we had to get the suspension in place.  This part of the project was a test of both of our coping skills.  Attempting to squeeze a massive metal coil down enough to fit in a small compartment and then releasing the insane amount of pressure on that coil so that it sits correctly in that compartment without crushing your finger off is quite the challenge.  No fingers were lost, but I do seem to remember at one point the car shifting on its stands, me leaning against it to keep it upright while screaming, “Pop! Put her down!!!!!”  Not one of our better moments, nor decisions, but the good news is we got the fucker in…both sides.

IMG_3168

Brakes went in pretty easily, as Pop had already done one side to ensure that they would actually work with our dinky spindles.  Because we went with drums in the back and discs in the front, we did need to install a proportioning valve to ensure the pressure to the back and front brakes was correct.  Pop and I installed the master cylinder (came new with our disc brakes,) connected the lines, put the discs on, bled the system and voila, we got brakes!

IMG_3153

Golf tees to stop the flow ’til we’re fully connected.

IMG_3487

We found the smallest can possible to catch brake fluid in.

Next up, wheels refinished and on, then tires.  See?  We’ll be rolling down a hill in no time!

I’ll leave you with yet another of my video creations.  On a visit to Curt’s, we were dazzled with a display of his new toy.  Enjoy.


Keep on Rockin’ in the Wheel World

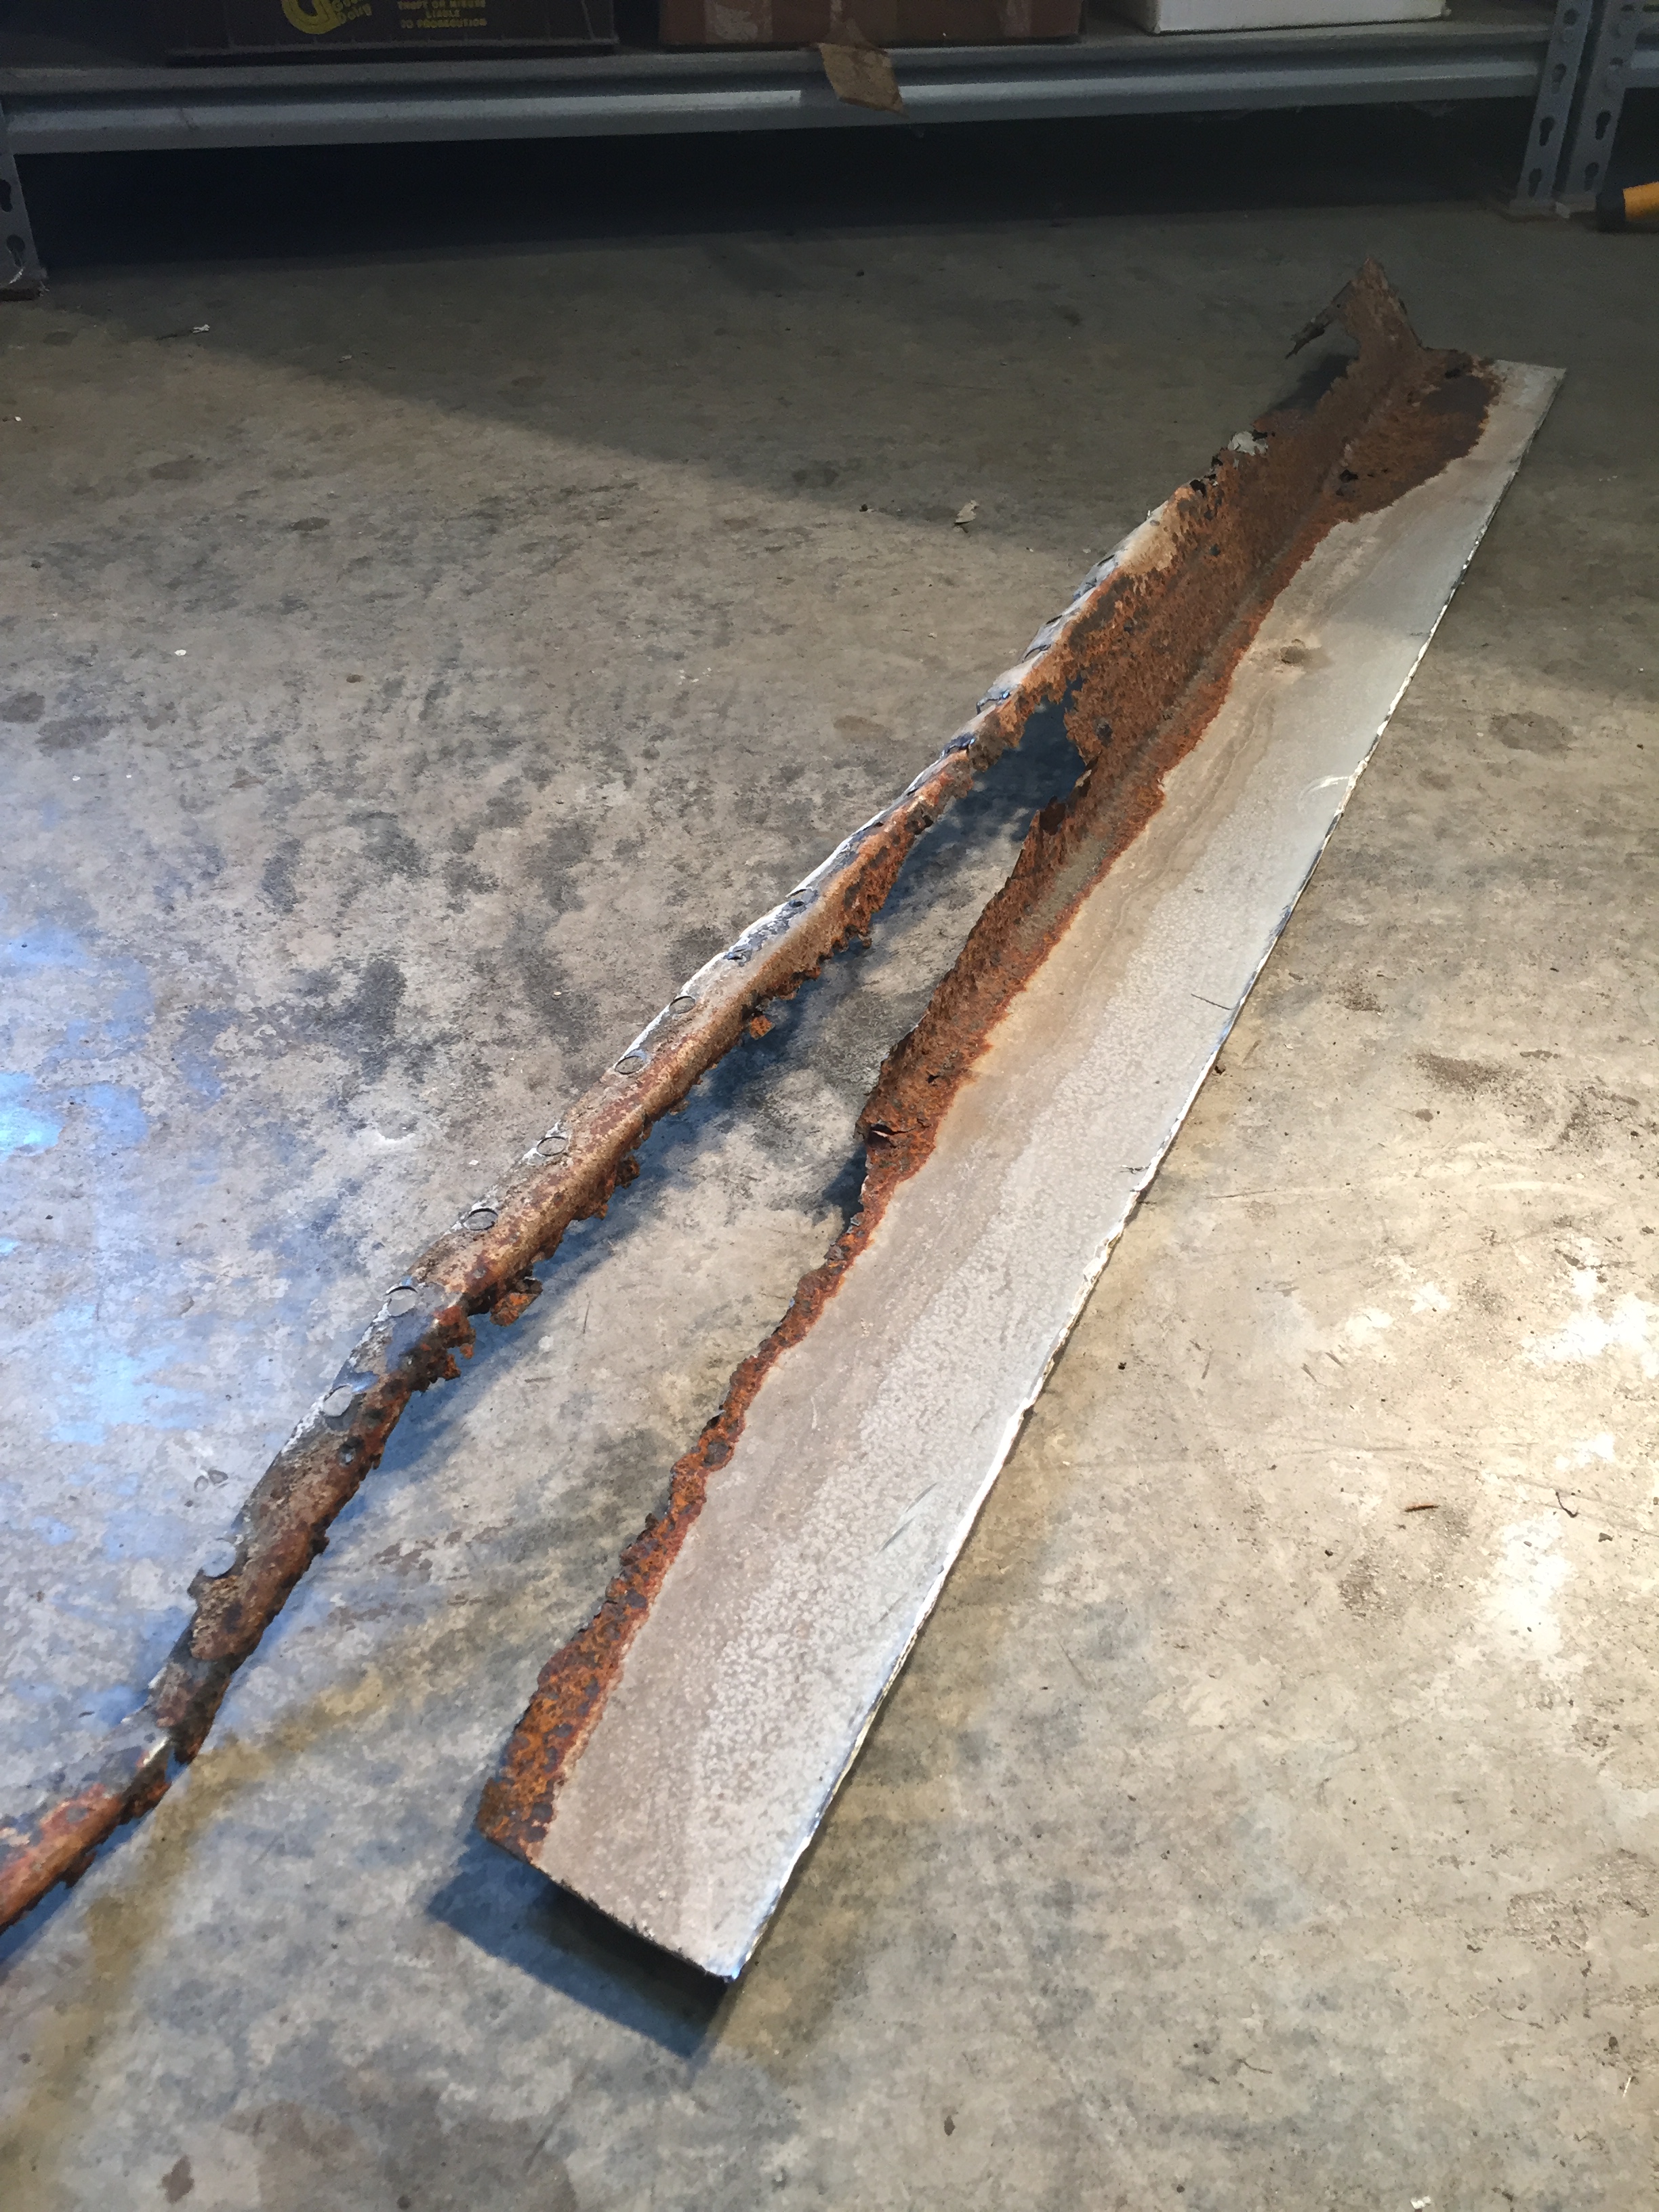
Pop and I had to replace one of Mavis’s rocker panels because it was totally rusted out.  This was a BIG deal and new even to Pop, but we both think the results are of rock star quality.  The rocker panel is the length of metal that runs from the back of the front wheel well to the front of the back wheel well just underneath the door.  It’s what you step over to get into any vehicle.  I’ve recently discovered that its name originates from back in the day when they were building horse drawn carriages.  Here’s a fascinating bit of info for ya from “A Practical Treatise on Coach-building” by James W Burgess, published in London in 1881.

“Proportion in carriages applies to both form and colour; as regards form, it regulates the sizes of the various parts so that the whole may harmonise, and dictates the adoption of contrivances for lessening the apparent size of those parts which would otherwise be unseemly. Thus, the total height which is necessary in the body for the comfort of the passengers is too great for the length which it is convenient to give it ; therefore the total height is reduced, and to give sufficient leg room a false bottom is affixed by means of convex rockers, and which, being thrown back and painted black, cease to form a portion of the elevation ; they are, -like a foundation, out of sight, and thus the proportion of the front view (the side is called the front in coach-builder’s parlance) is preserved.”

Well thank God!  I felt my original explanation to friends who were trying very kindly to understand (and stay interested) in my rocker panel story was much more understandable.  I told them to imagine driving their car over a very steep bump in the road.  It would surely get stuck at the top, rocking back and forth with the wheels above the ground on either side.  What it would be rocking on would be…you guessed it, the rocker panels!

Regardless, they do tend to rust out faster than any part of a car or truck and Mavis’s passengers side had seen better days.

Skills required to replace a rocker panel:  Metal cutting, accurate measuring, plug welding, tack welding, grinding, body filler work, sanding, more sanding, patience and a good attitude.  It is really really stressful because neither Pop nor I are psyched about making our first real cut into Mavis’s body and fucking it up isn’t really an option.  There are only so many YouTube videos you can watch before you gotta get in there and make it happen.

I think this part may mark the first fight Pop and I have gotten into during this project.  Ok, not a full out fight, but he was clearly irritated with me.  We were up under the back wheel well where I was showing him the inner patch for the back of the panel I had been working for like, 3 hours on, and felt I had messed up.  So both our heads are crammed into this 2×1 foot space, 2 inches from each others faces and I’m whining about this shitty patch and he’s telling me it’s “just fine” and I’m saying it’s unacceptable and I’m pissed and now he’s getting pissed.  We keep grabbing this patch out of each others hands tryting to show the other how it’s working or not working and dropping it and hitting our heads trying to pick it up and in the stress of this whole fucking thing Pop says, VERY sternly, “God Dammit Janet, stop being such a perfectionist!”  I mean, he’s not happy with me, which hasn’t happened often, or ever, in my adult life.

Years ago I would have immediately felt that stinging feeling in my nose just before the tears come.  Now, I was just so blown away with being called a perfectionist tears were beyond me.  A perfectionist?  I think the only other person who has ever called me that was my best friend Beth of forty years who is a trained psychologist and knows me better than almost anyone.  So really, what does she know?

Fuck.  I may be.  Never thought of myself as a perfectionist, but I do have to admit that there isn’t much space between, “we’re going to do this thing right to the best of our ability” and, “if I can’t do this thing right I have no abilities.”  I’ve been known to never start something because it may not turn out how I envisioned it.  After years of doing this to myself on a creative level, I now decide to rebuild a car?  Not sit and doodle out a sketch, not try some slab work with clay…no, rebuild a whole fucking car.  It was the black and white of it I was attracted to at first.  Either the car starts and runs or it doesn’t.  You’ve either succeeded or failed.  But like anything, there are so many levels of what is acceptable or what is ‘right’.  High-end, high gloss, big money Foos paint jobs or flat black spray paint applied in the hot sun in the backyard.  I’m cool with both for others, why not me?  Pop and I, we are not high end, we are ‘do the best you can do with what you’ve got’ because that is what he, and Momma, taught me.

This is a lesson.  Not one I planned on.  But as I write I’m realizing that I must stay true to my mission…which I didn’t have for this project until now.

Have fun, damn it.  Do your best, learn, be in the moment and enjoy the loving relationship you and Pop deserve to have with the added appreciation of being comforted by Momma with long warm hugs, morning chats and dinners from my childhood.  Love them both back deeply, be grateful and keep on rockin’ the rocker panels!

Here are shots throughout the rocker panel replacement process.  Please enjoy, Pop and I are very proud.

IMG_1786

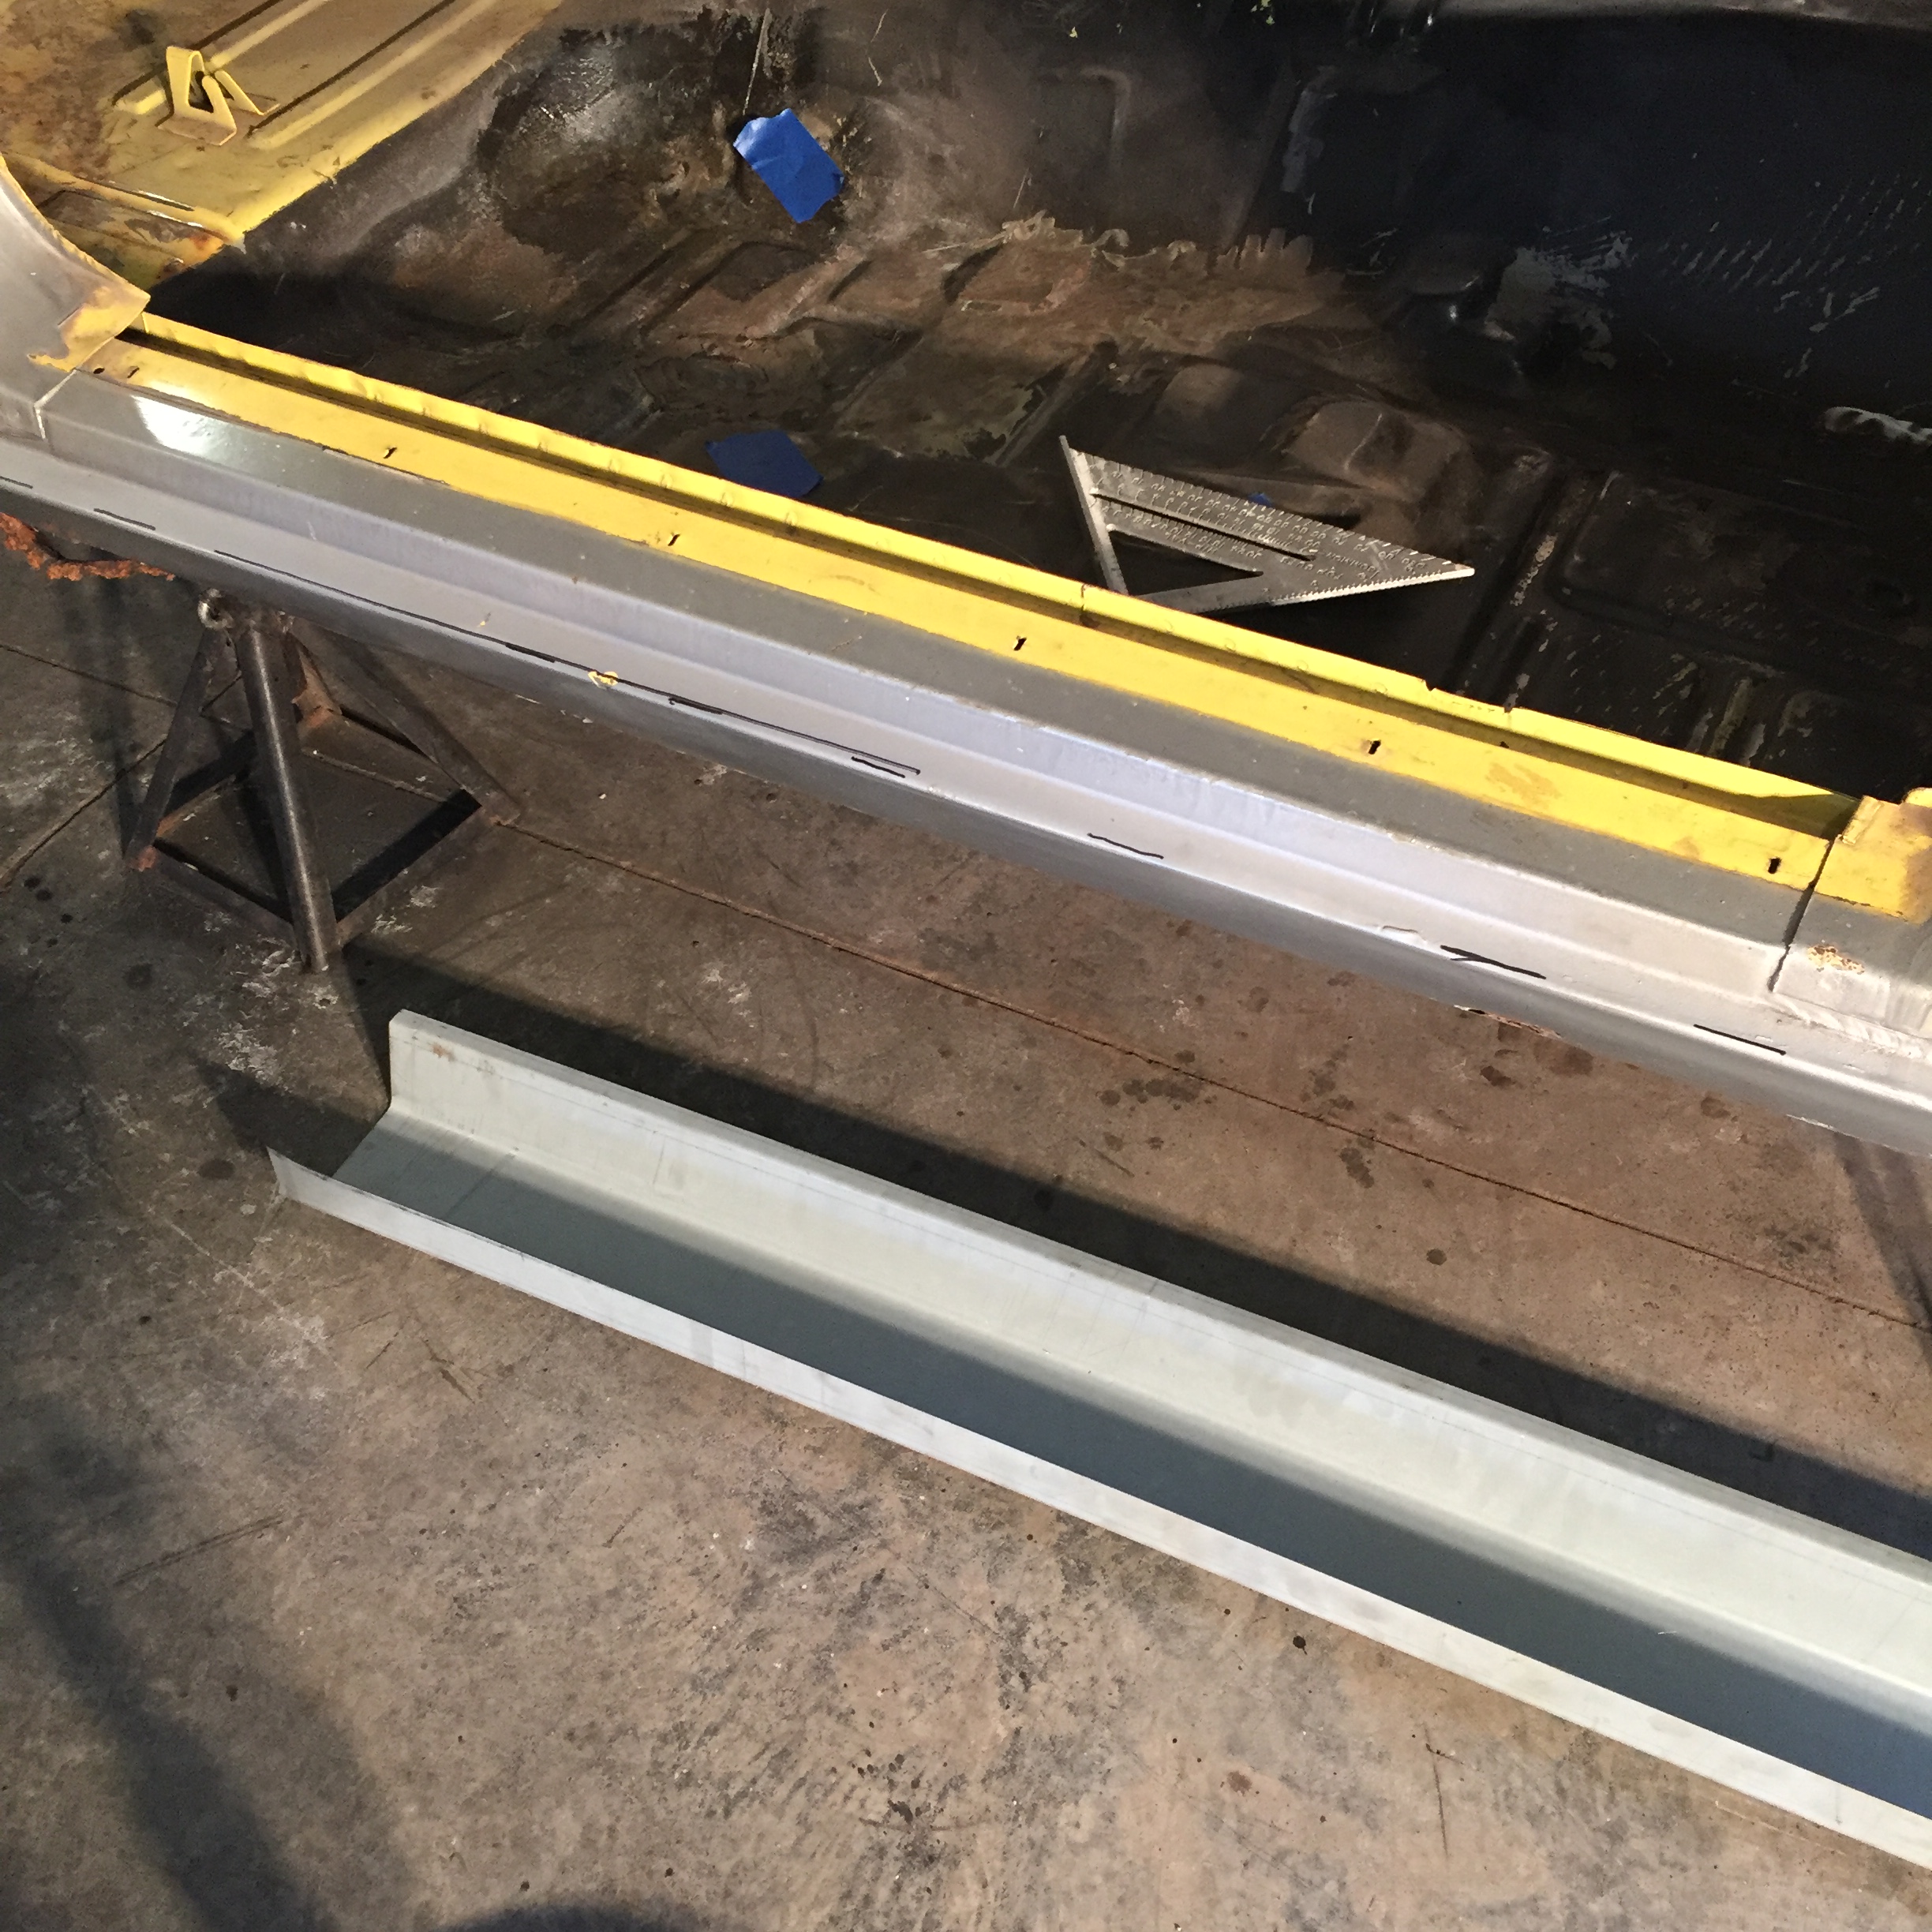
Pre-surgery. Ensuring we’re working on Mavis’s correct side and the ‘implant’ is ready to go. It will need to be cut to size and drilled for plug welds. Note the very accurate Sharpie lines marking where we will cut the old panel out.

IMG_1787

Cutting out the ‘cancer’ as they call it. Back end.

IMG_1788

Front end.

IMG_1790

Cancer sucks.

IMG_1795

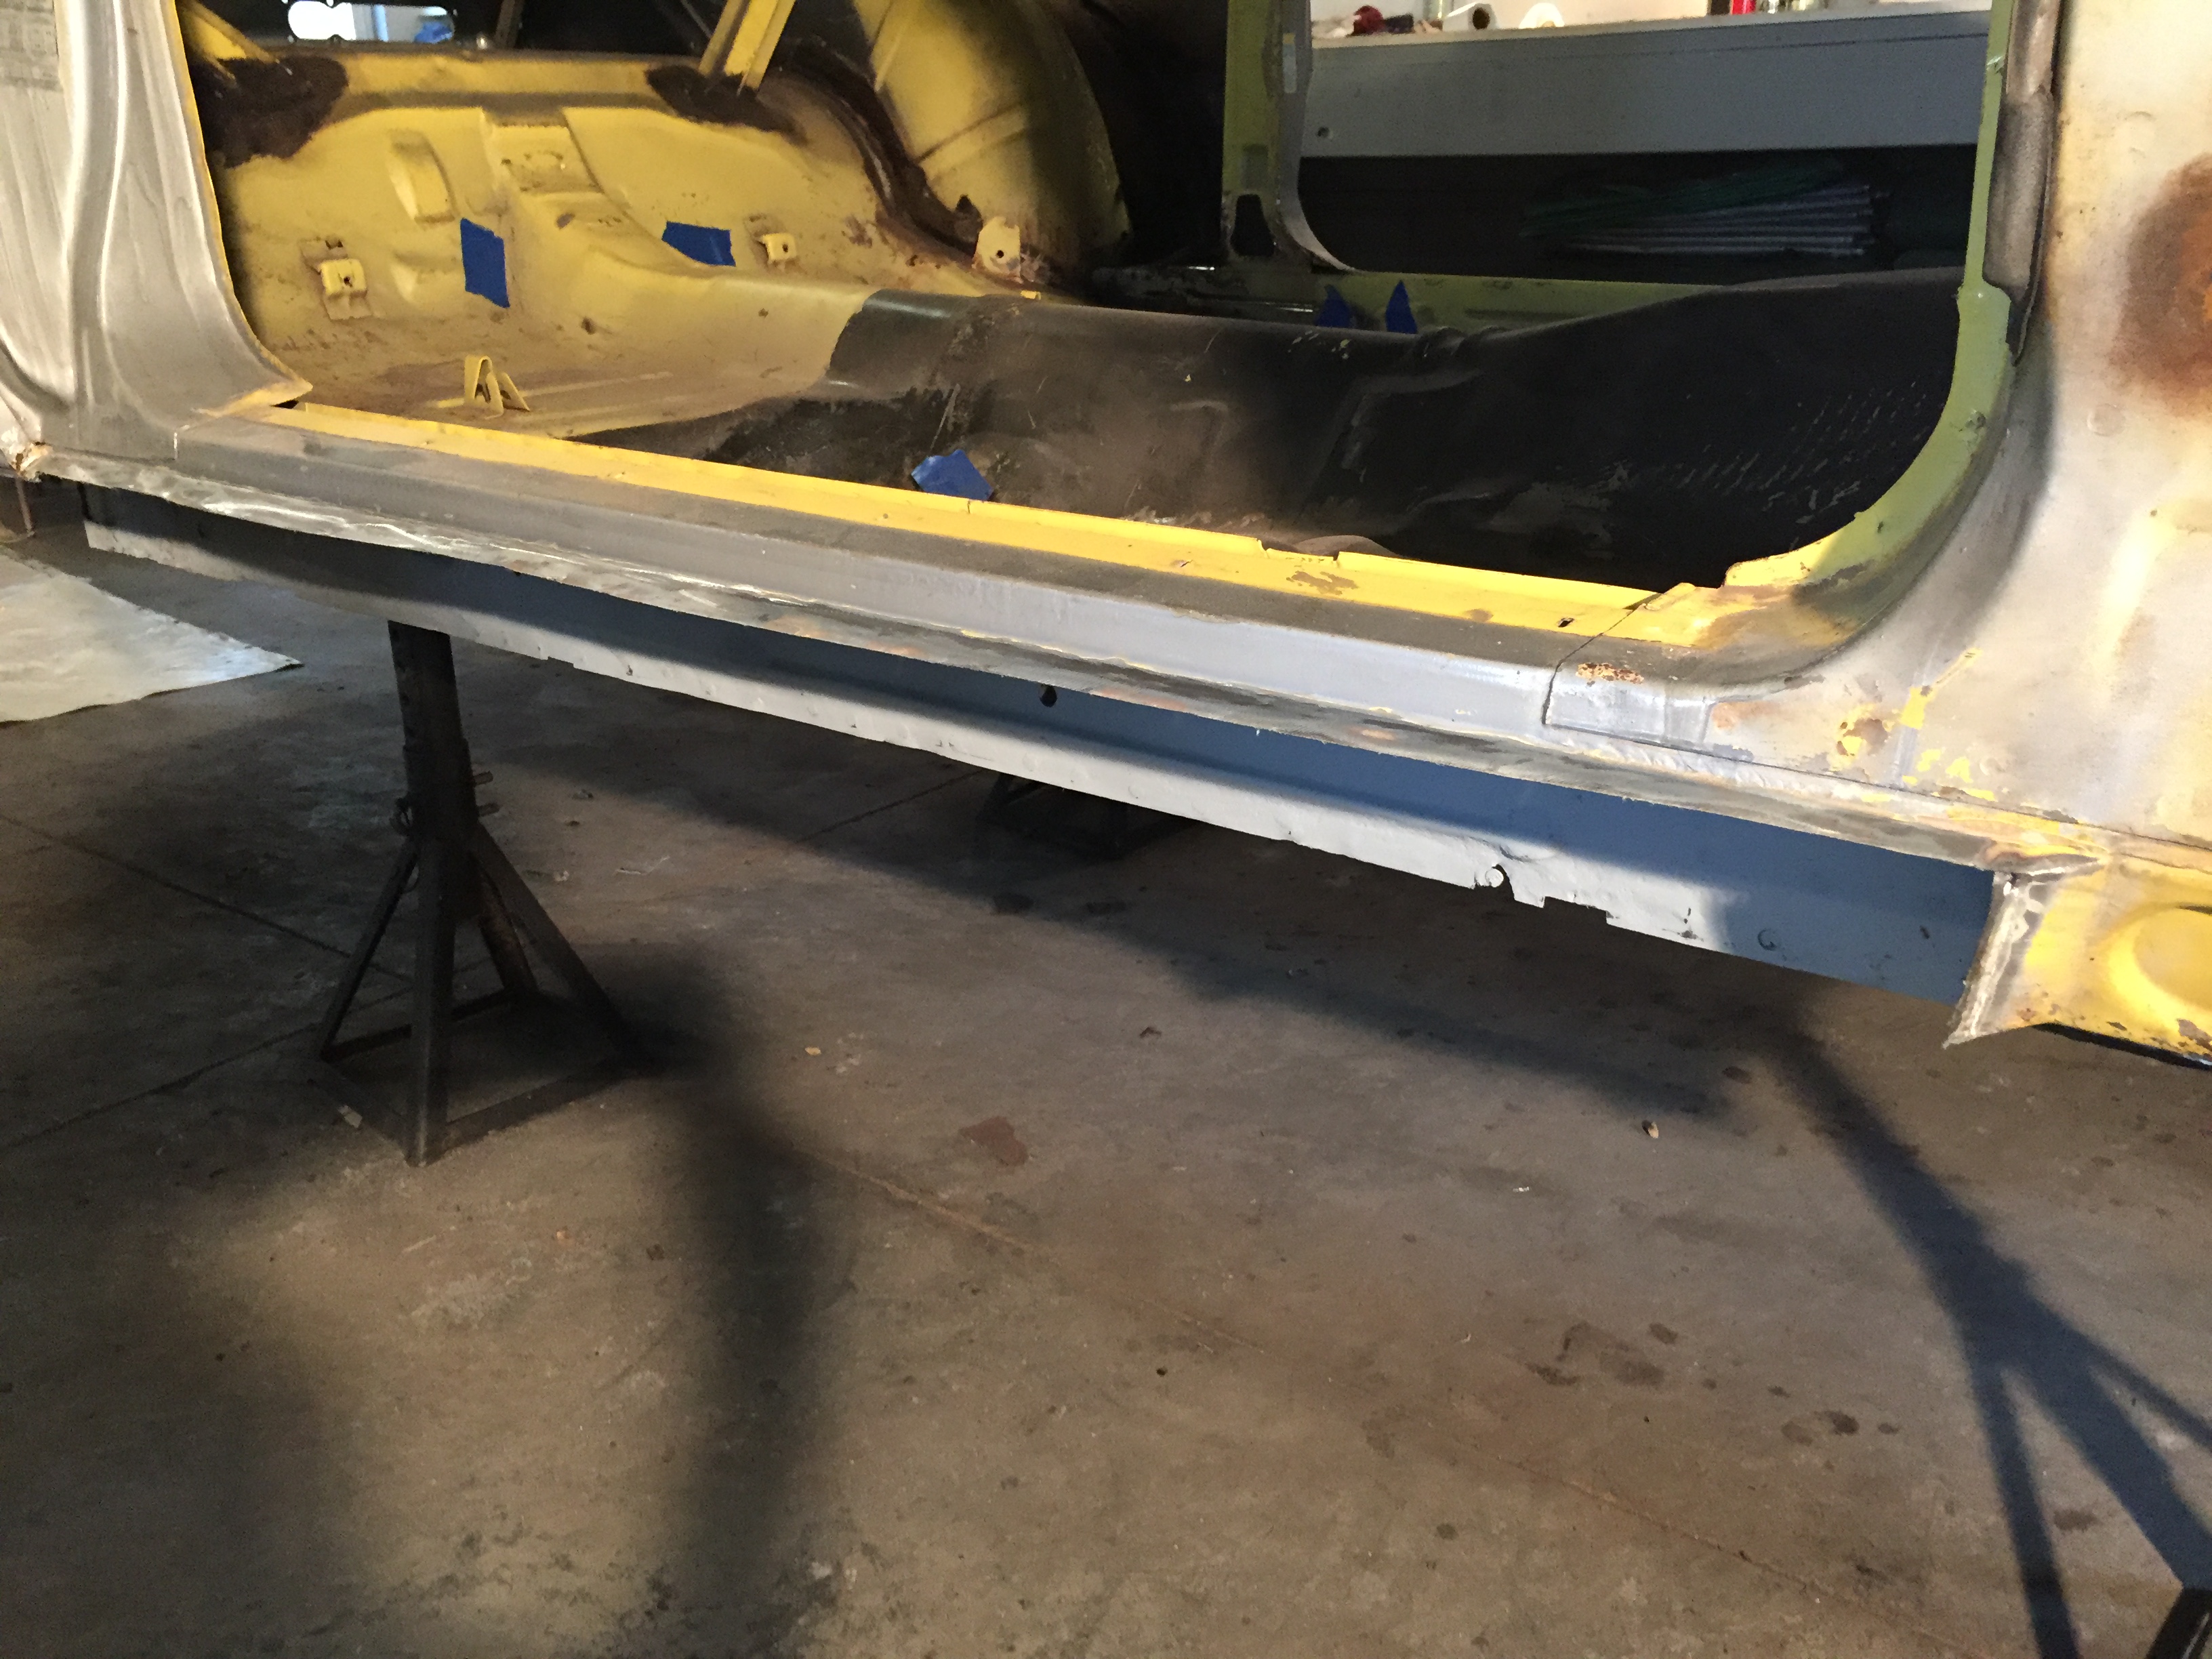
First fitting after the way too stressful first cuts.

IMG_1797

Inside of the panel cleaned up and rust treated.

IMG_1800

The front of the back wheel well area that was so bad we had to cut out most of it out and create patches. Always trying to save as much good metal as possible.

IMG_1801

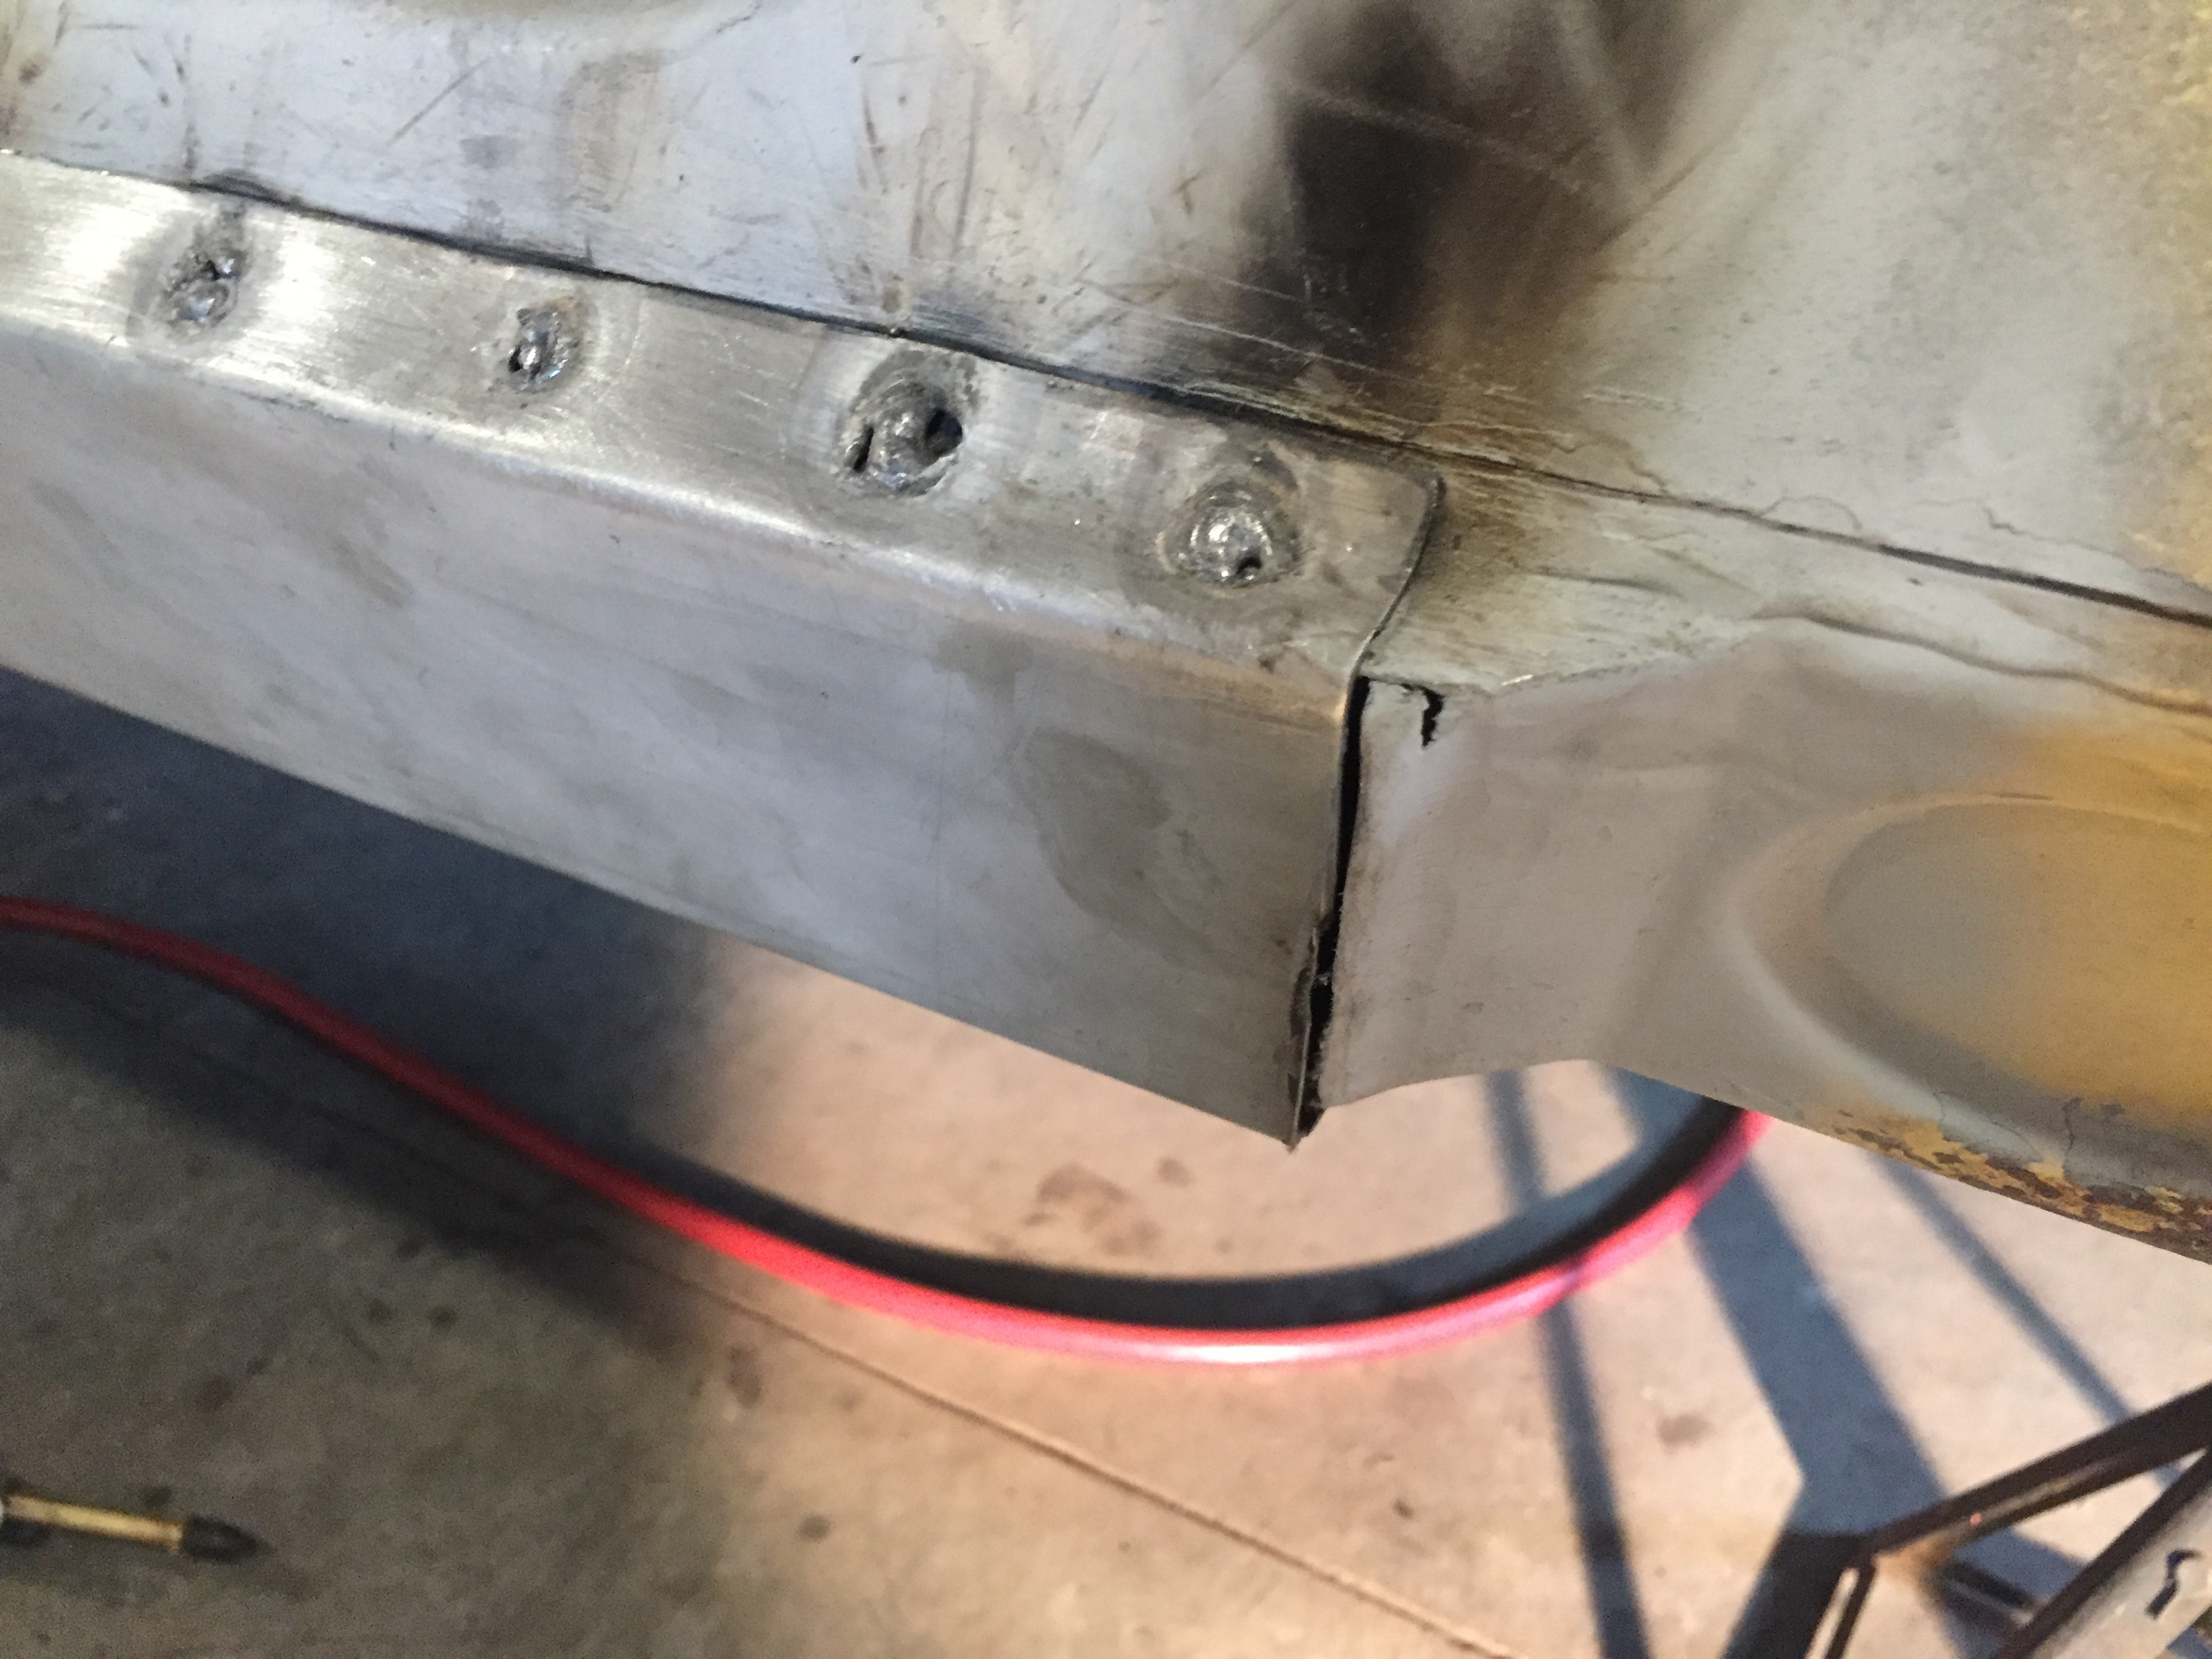
Replacement panel after we drilled the plug weld holes.

IMG_1805

Woody on the torch!

IMG_1821

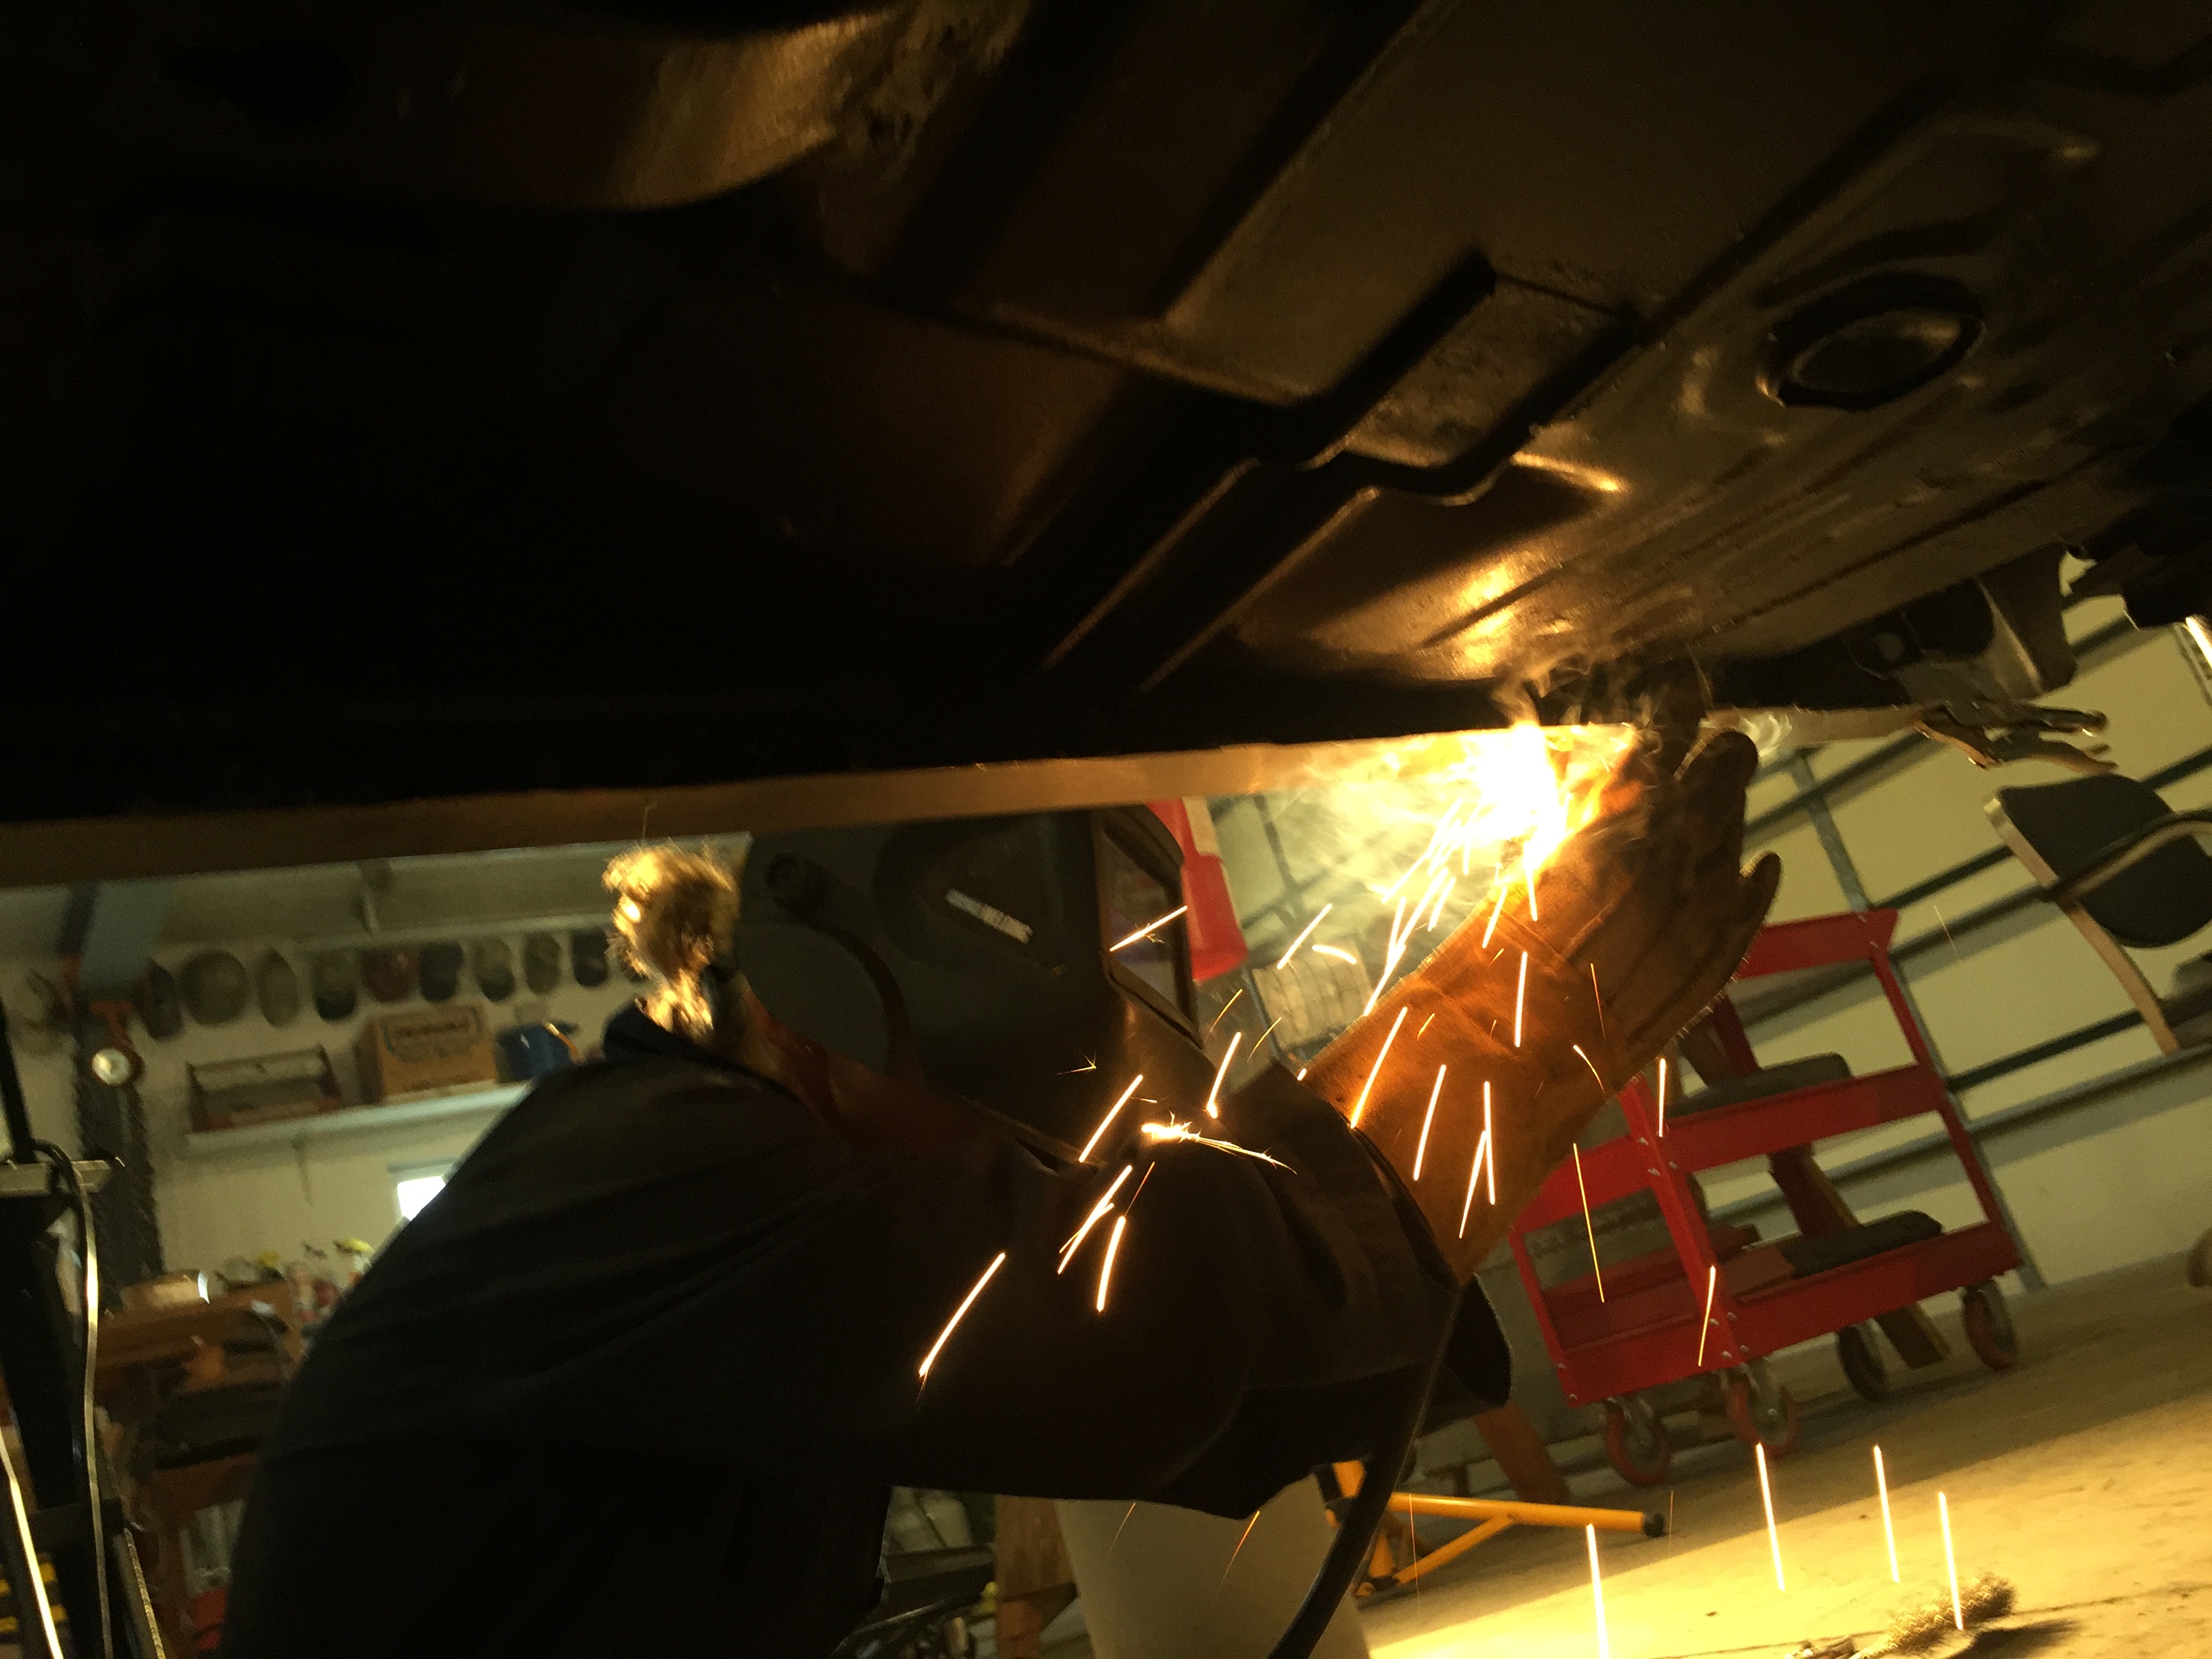
Welding in the ‘shitty’ patch, having learned my lesson.

IMG_1822

Plug welds done…not too bad!

IMG_1823

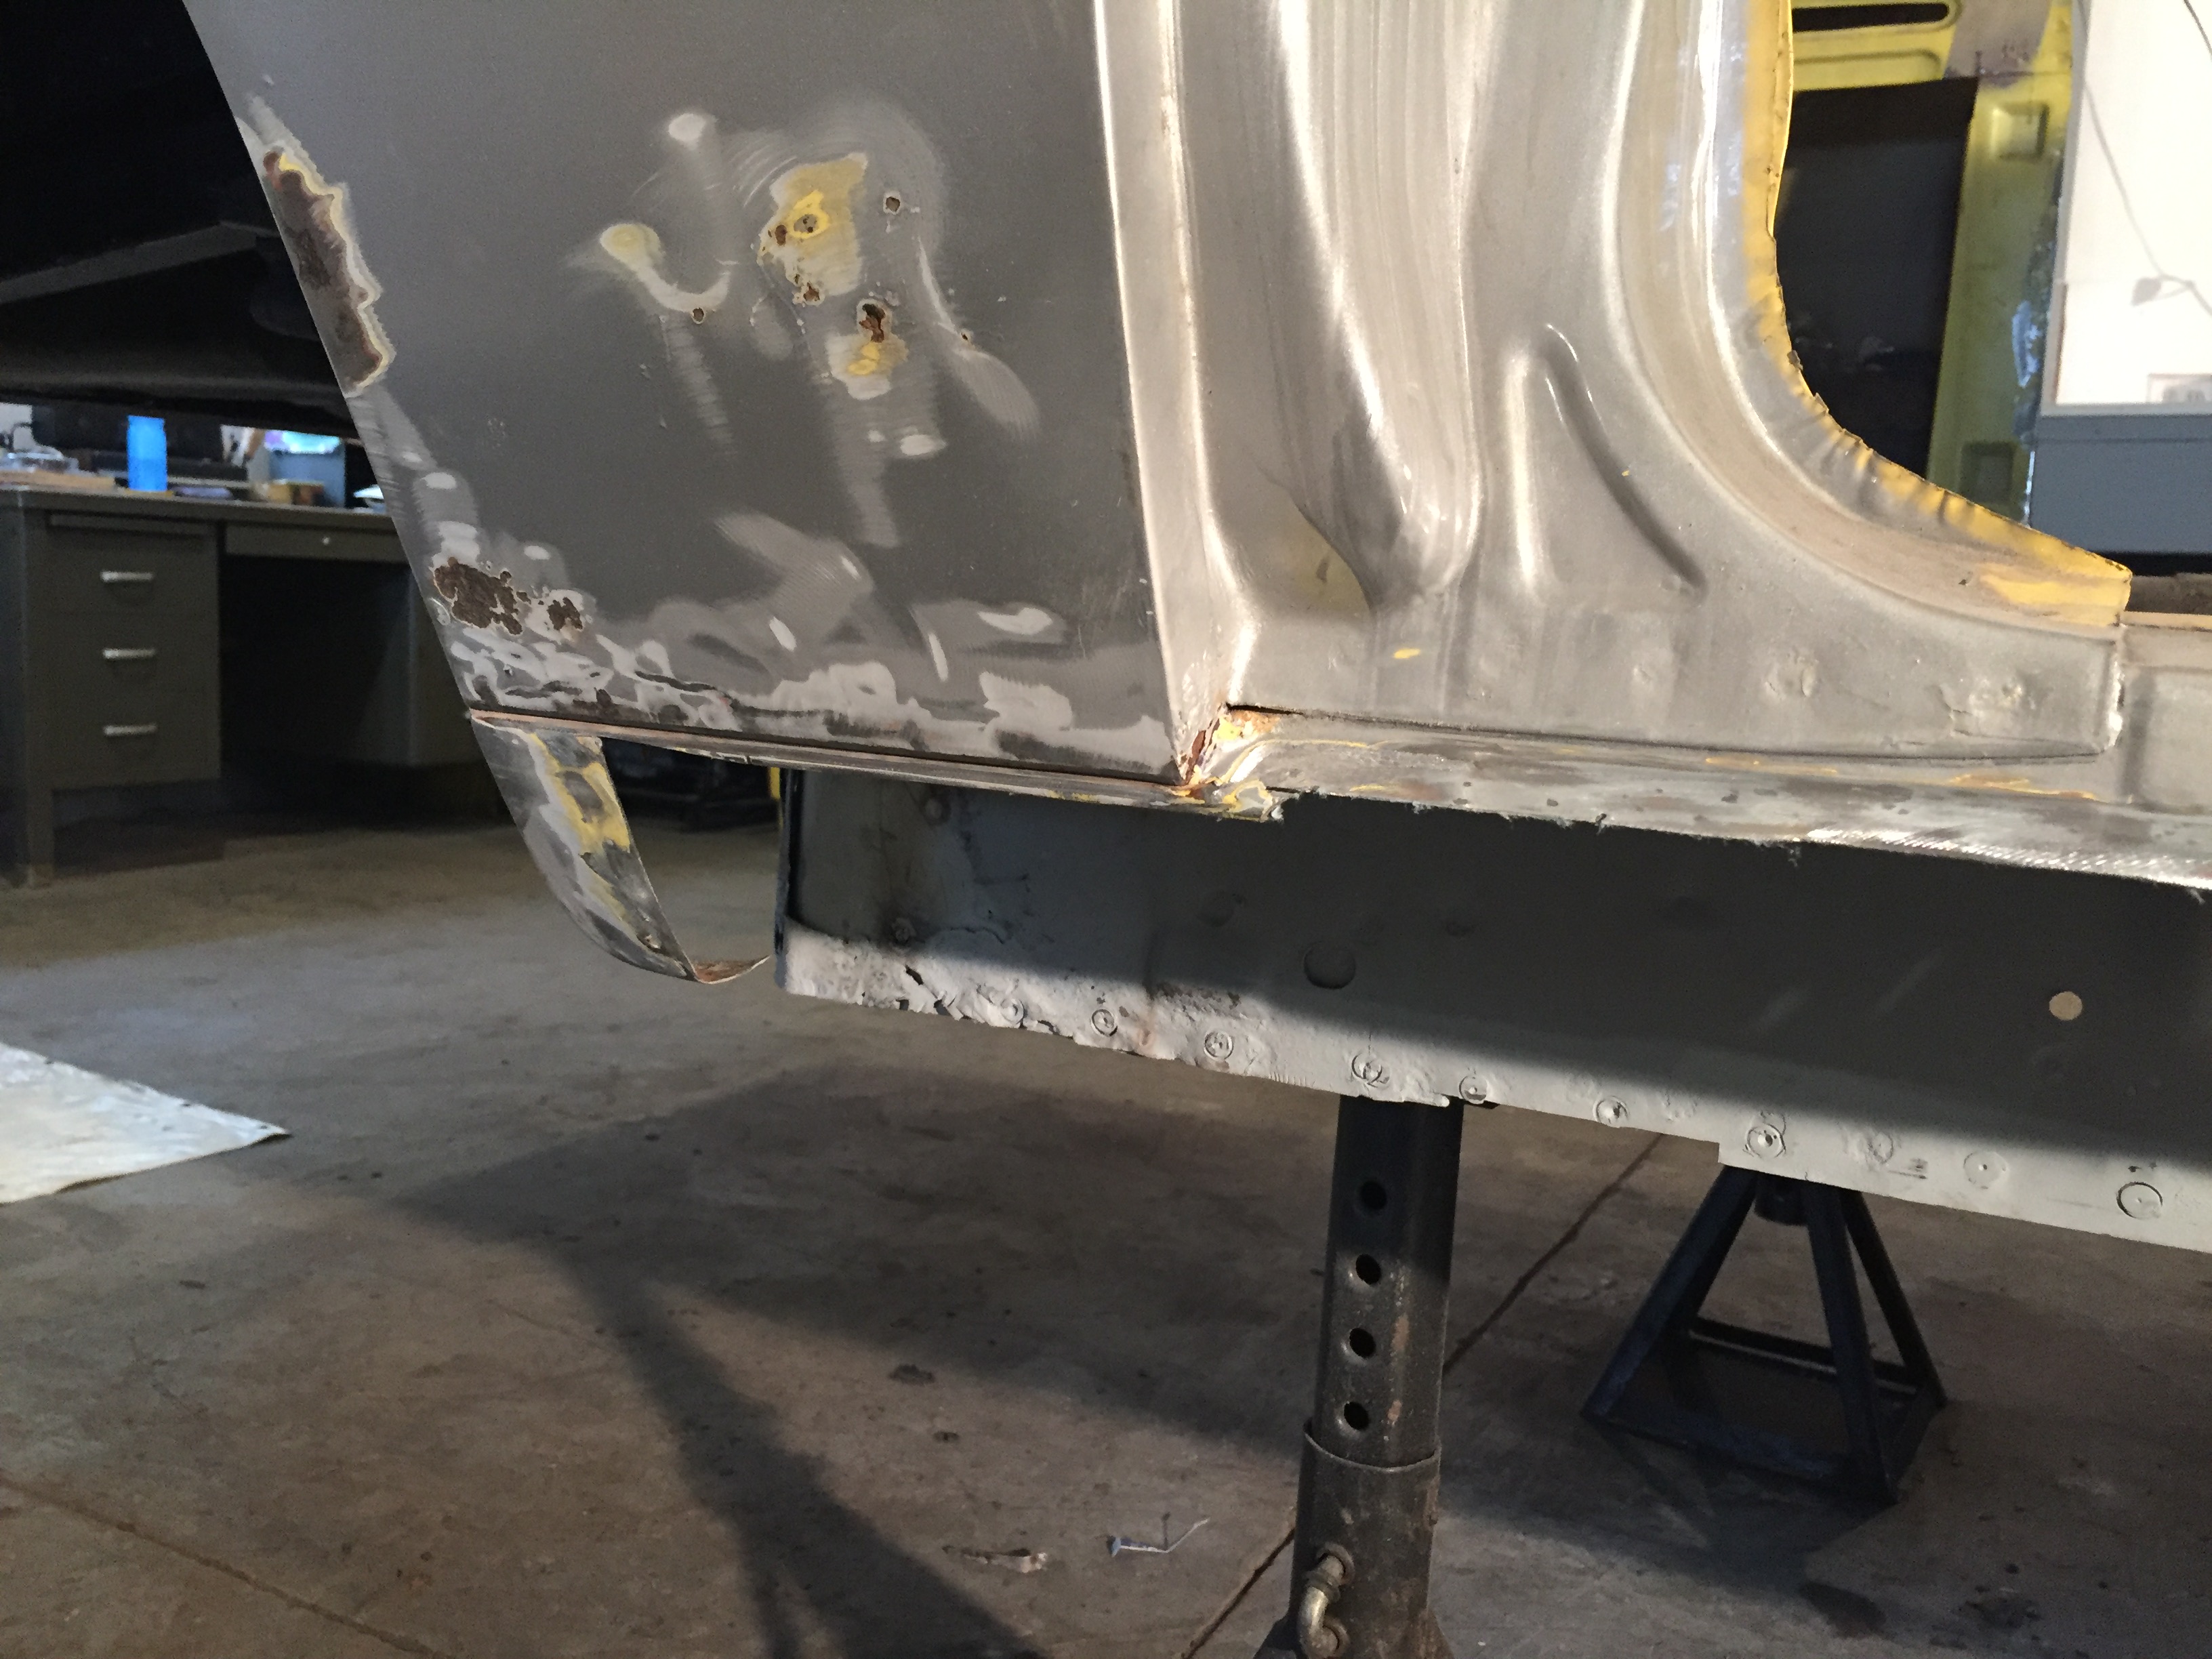
Front pre-fit a little scary.

IMG_1824

Back pre-fit looking good.

IMG_1832

Plug welds ground down and filler applied, dried and sanded.

IMG_1833

Front looking much better.

IMG_1835

This was tough as we needed to keep that horizontal seam but ‘hide’ the vertical one.

IMG_1841

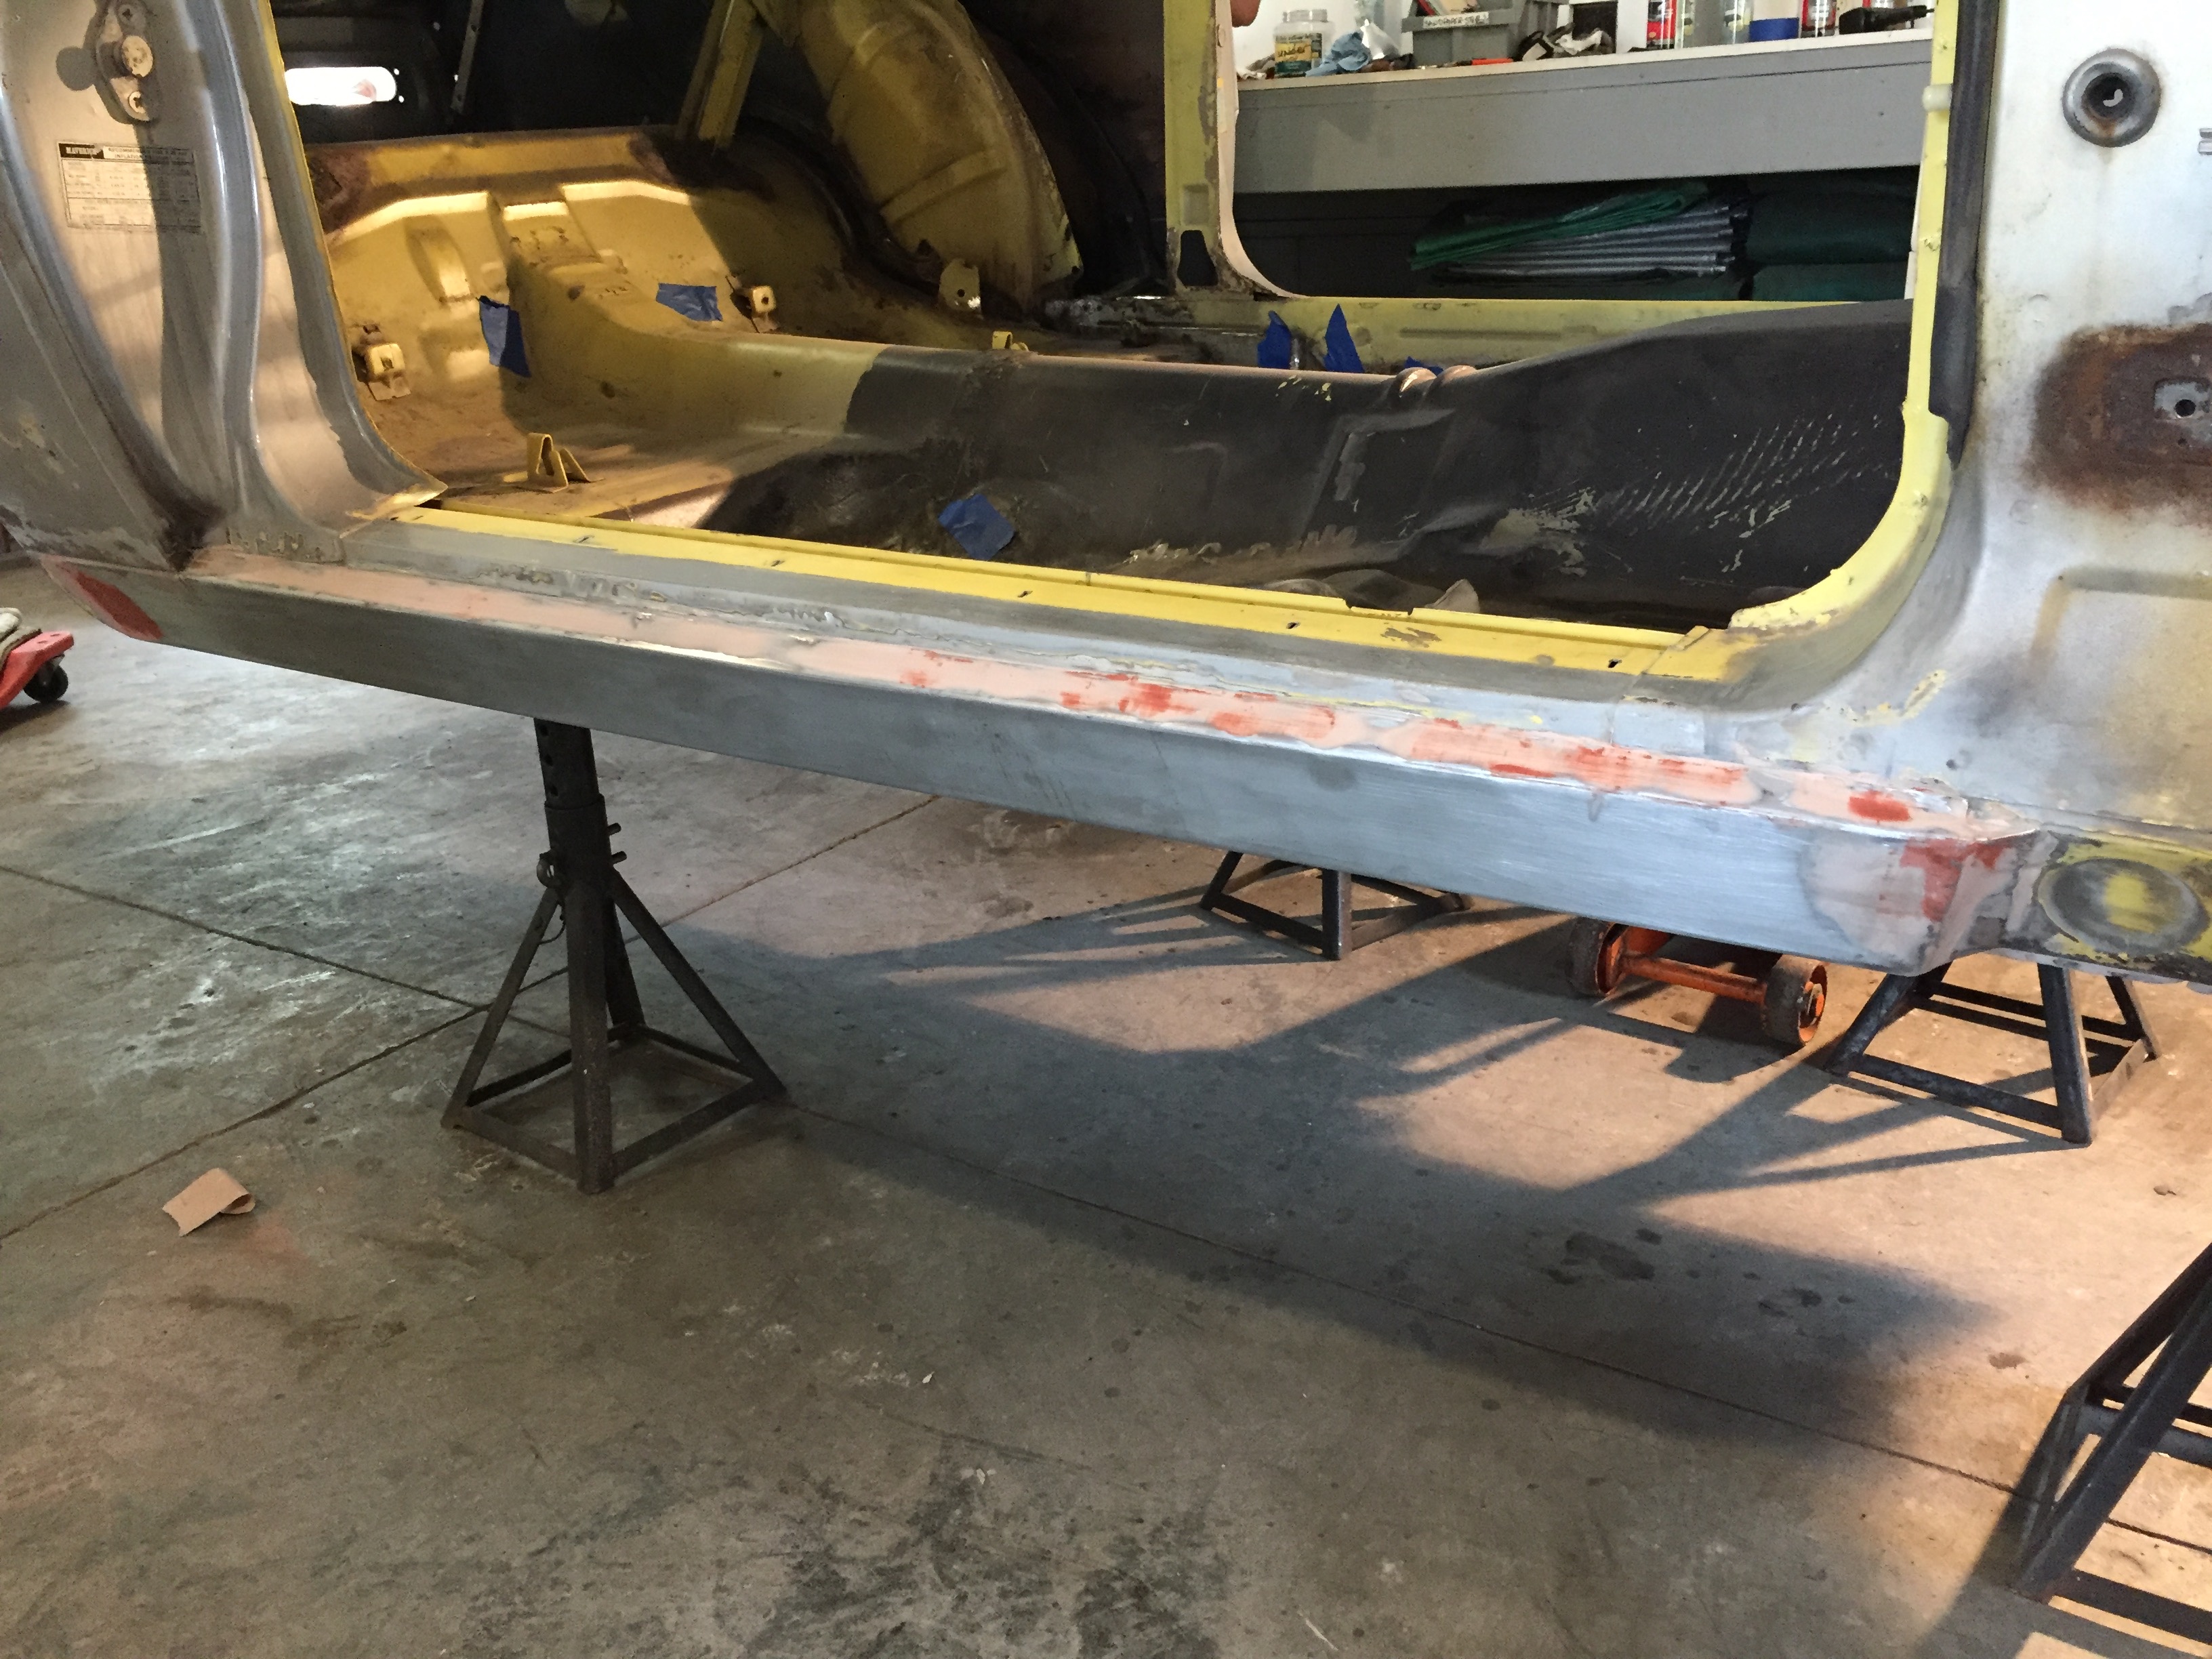
Skim coat is the darker red.  Trying to use as little as possible.

IMG_1842

Front sanded, pre-paint.

IMG_1843

Back sanded, pre-paint.
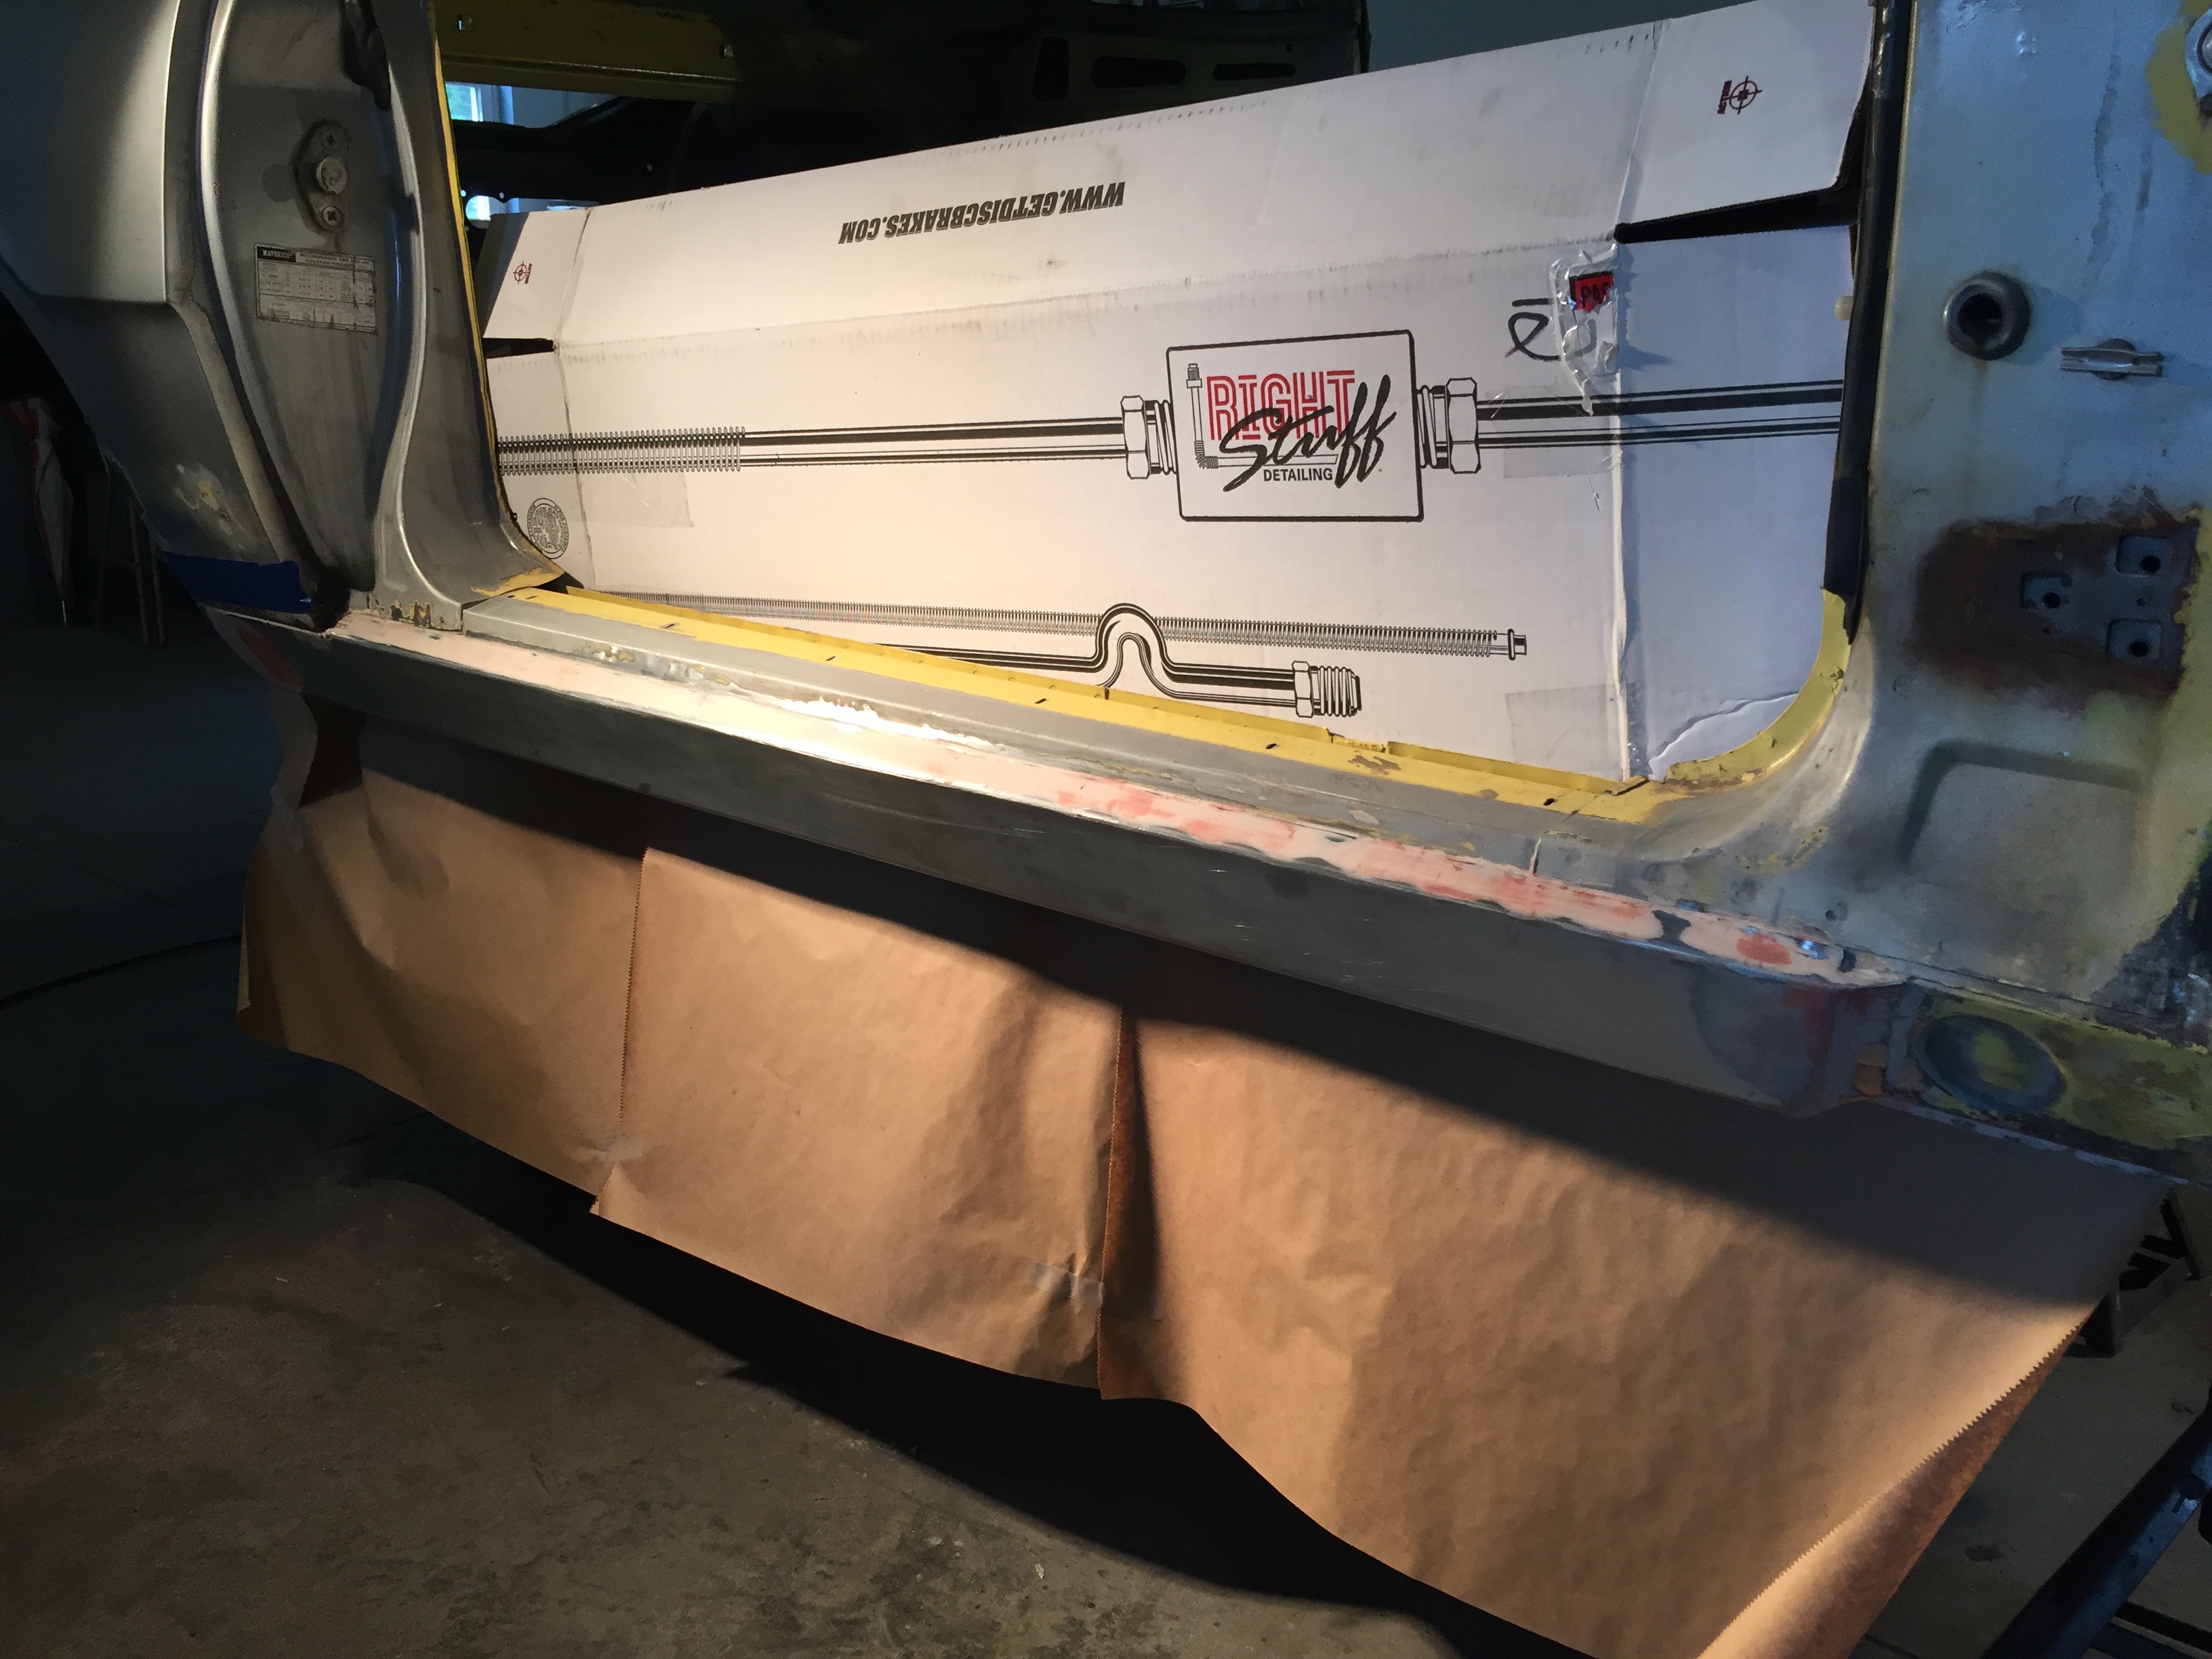
IMG_1848

Prepped for paint.

IMG_1849

Done!

IMG_1857

Final back. Don’t even try to tell me you can see that vertical seam!!  

IMG_1856

Final front.

IMG_1855

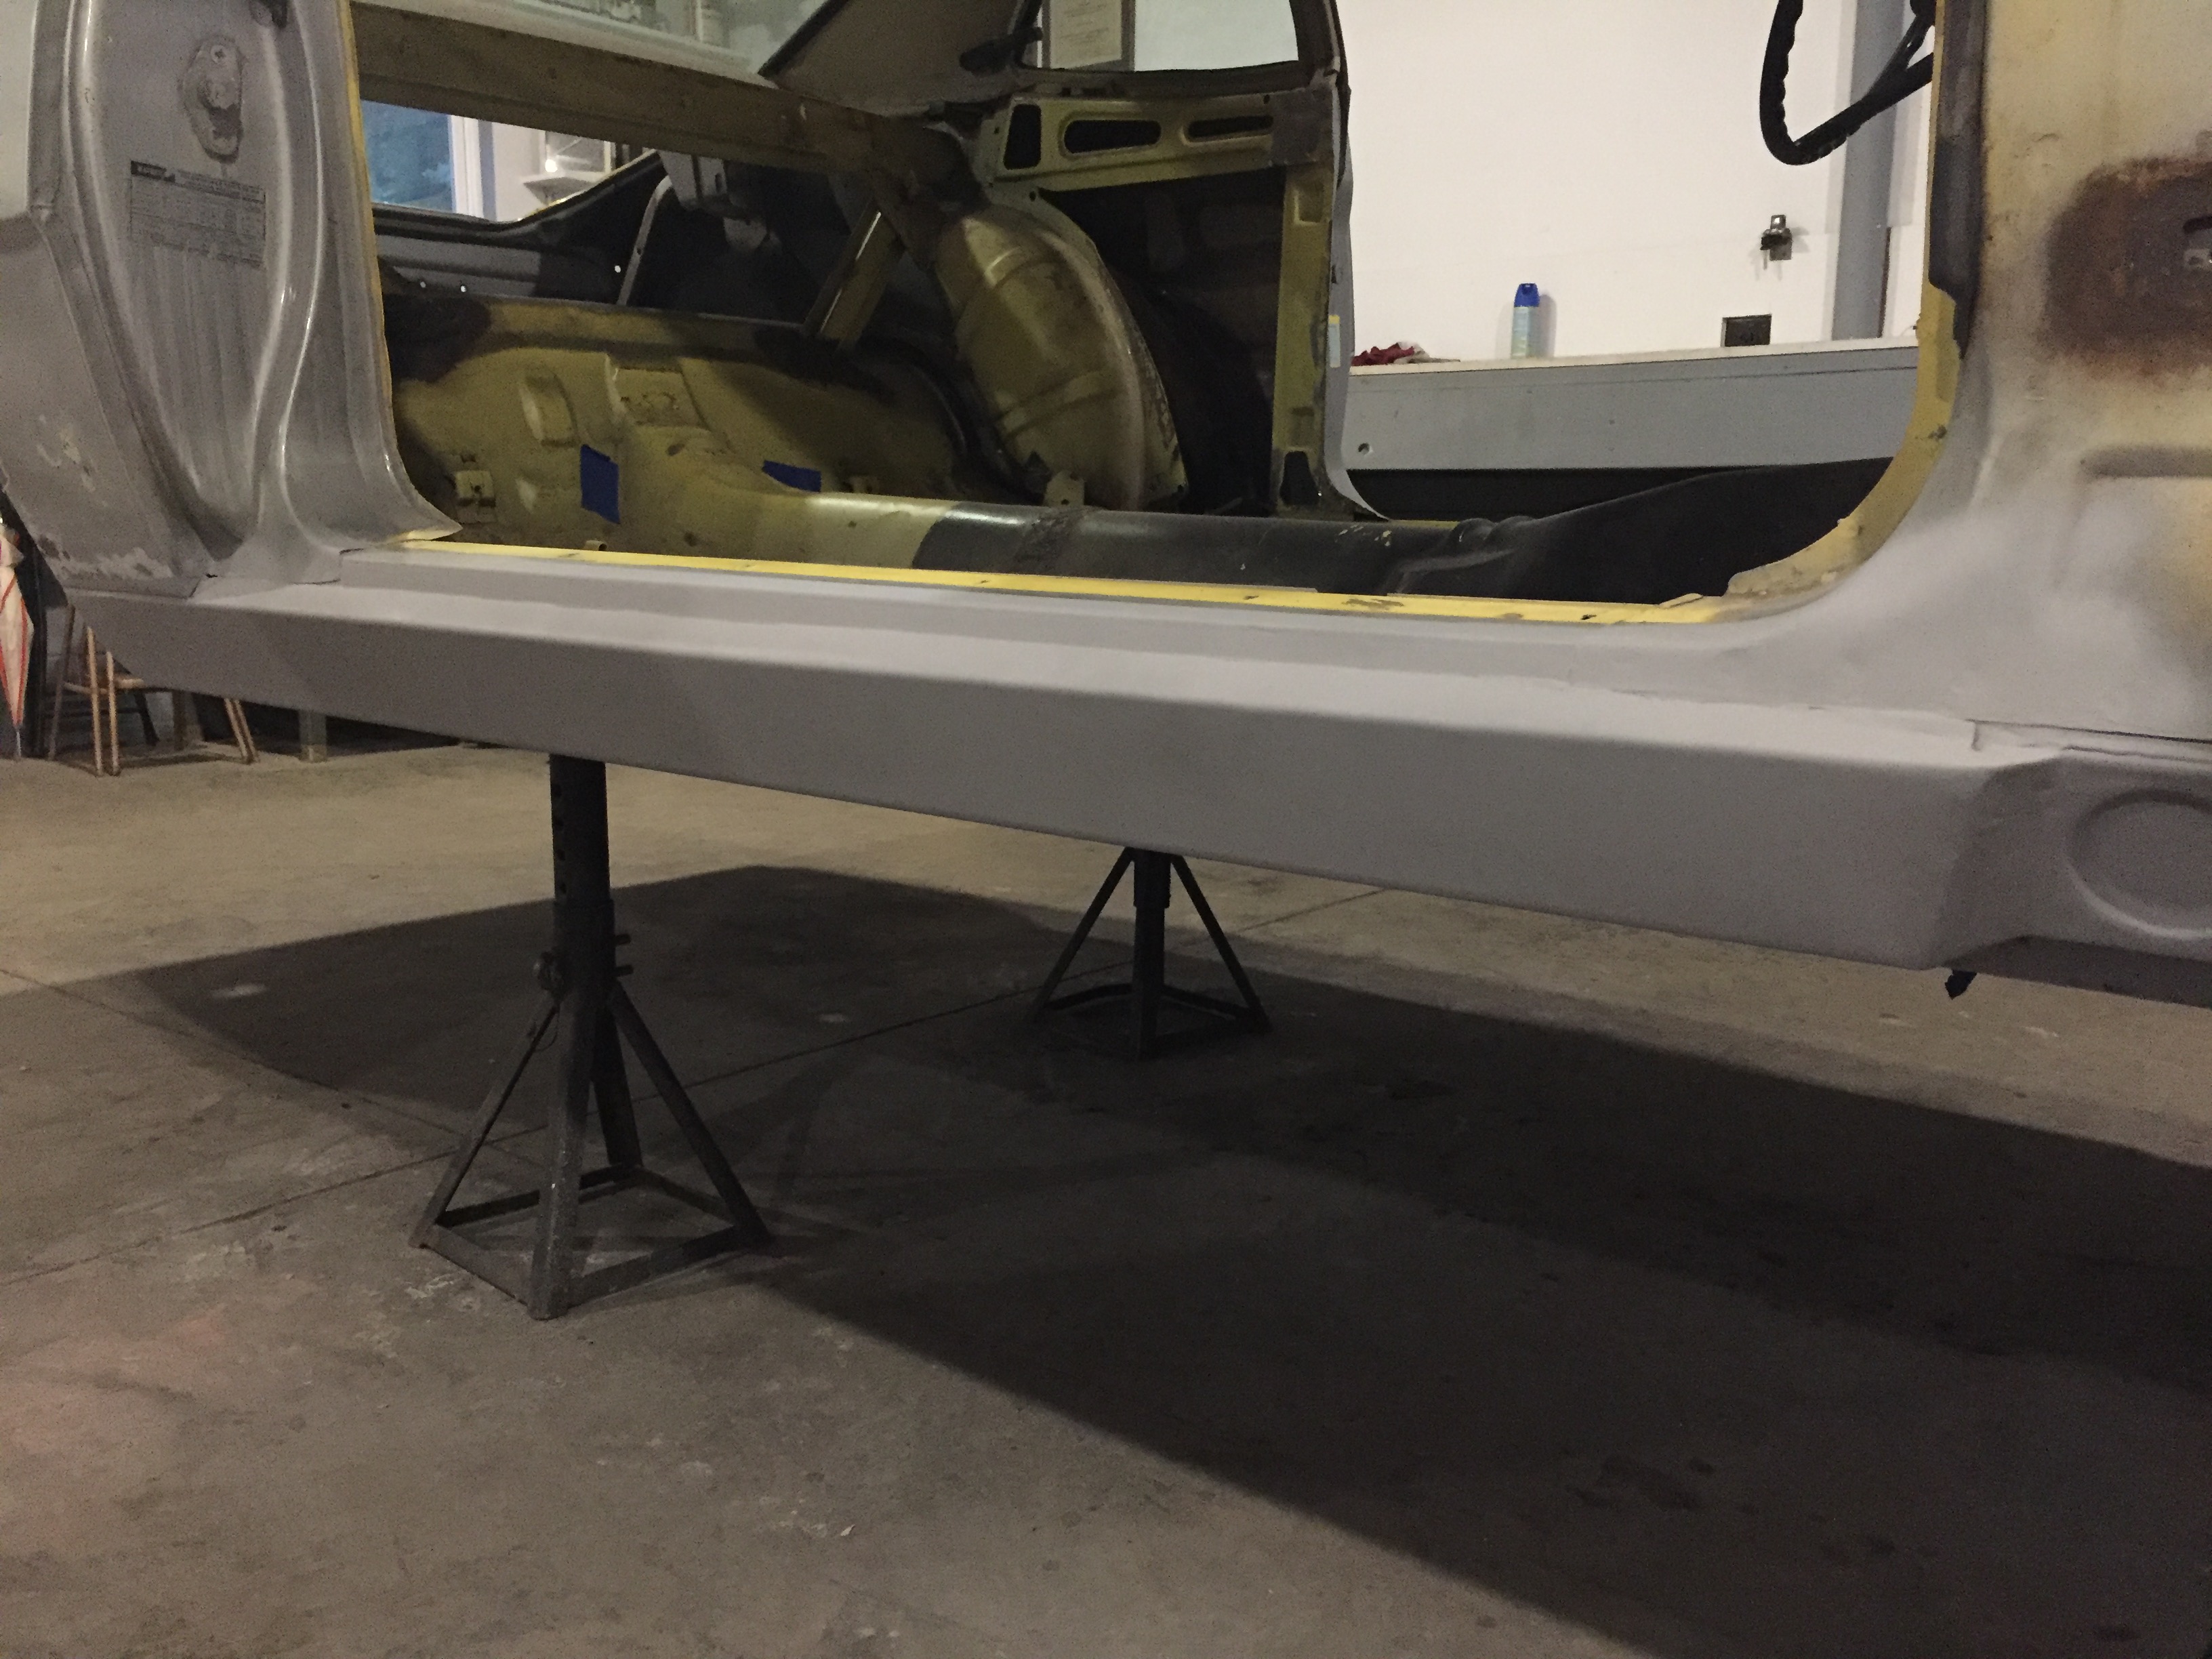
Full on final shot!!

Oh shit!  I forgot to tell you about the outcome of the brake situation and Mustang Marty Miller!  It didn’t end well in terms of the brakes, but Marty’s cool.  Skip to the end of my last post to read about it.