Prep, Prime, Sand, Base, Clear

Annnnnnd, we’re on to paint!  After finally deciding to stick with the original green (Pop won), we are ready to rock this out.  The key to a great paint job starts with ensuring that the surface you are painting is pristine.  Dent free, chip free, lint free, dust free, hair free, your breath free…NOTHING to impede the smooth application of paint.  In other words, some serious prep work is needed.

Based on the horrors we’ve uncovered these past years while pulling Mavis apart piece by piece, she’s definitely been through it.  Her front driver’s side seems to have been submerged in water for some time and she has seen her share of hailstorms.  We’ve already perfected our welding skills by patching some of the holes in her frame, but now it’s time for delicate surface work.  The reality of the sitch is that we probably should skim coat every surface of Mavis; her doors, fenders, hood, roof, etc., and block sand until every little knick and dent she has is filled and smoothed over.  But, as we are self-taught , we know she will not be absolutely perfect and like me, now over 50, she has gained the right to have a pucker or a dimple here and there.

Prep

I do though take care of my skin as best possible, so we will give old Mavis a fighting chance and attend to her more obvious surface flaws.  We start with an 80 grit paper and get down to either the original primer or bare metal.  Consider it an intense facial chemical peel. This car has been painted twice, first with the original factory yellow and then a slightly metallic gray.  Getting through all that isn’t easy. 

Then, we apply a little ‘foundation’, filling any dings and pockmarks down to about 1/8” with glaze putty. For anything 1/4″ deep or more we bring out the big guns…filler.  A little bodywork Botox. Hit any remaining bare metal with self-etch to keep from rusting then feather sand out all repairs with 220 paper.  When you are happy with that (which I never am), DA and hand sand all with 320 until smooth.  Best way to tell if something is as smooth as possible is to close your eyes and move your hand slowly over the surface, feeling for any slight differences. So most of the time it looks like I am lovingly caressing Mavis with a confused look on my face.

A good washing of all surfaces with mild soap and water and then comes primer….break out the paint guns!!!  Not so fast slick, you now have to tape out anything that you do NOT want hit with that gray primer and cover anything you don’t want hit with any hint of gray primer ‘dust’.  So Pop and I put up our Dexter crime scene tarps, sweep, set up our custom exhaust system (fan in the door) and I get to taping.  Again, the better the prep, the better the paint job, so a clean and accurate tape job is imperative.  If you may recall, I’m a very good taper.

Prime

Now we’re on to our high build primer.  Primer goes on really nicely and knowing that you are going to sand it down gives you a little more freedom to fuck up while painting.  It’s a great time to practice with the gun. 

Laying down first coat of primer…already sweating.

Sand

After laying down 3 coats of primer we let it dry completely. Then comes dry sanding with 320 paper to take off the very top bumps of the primer surface. Next, a wet sand with 600 until it’s as soft as a baby’s bottom.  I’ll tell you there is NOTHING smoother then a wet primer surface sanded with 600. I can’t even explain it, so here’s a visual.

Sooooo smooooooth!

Base

Enter, color!  We carefully mix the correct proportions of color and reducer and load the gun.  Pop is my ‘gun man’, as he preps the paint and ensures the settings on the gun are optimal.  The correct fan size, amount of paint vs. air coming through and the pressure are very important in how the paint lays down.  He’ll also follow me while I paint, ensuring the air hose doesn’t trip me (although it always trips him), helping to turn the pieces if need be and pointing out areas I may have missed.

Woody the Gun Man

Now, spraying color is where the rubber hits the road. This is the real deal, no looking back, any screw ups now mean sanding back down and starting over.  I was a WRECK!!!  The minute I put on my paint suit I’m sweating like a pig and so nervous I need to take 5 to calm myself down.  I pull myself together and we begin.  A half squeeze of the trigger for a little squirt of air to remove any pesky bits of dust that have come to the party last minute, and we’re off!

Post-color, pre-clear, spent physically and emotionally.

Clear

So you’d think clear coating is the easy part.  Color is done and looking good, let’s just seal the deal with some shiny goodness and call it a day.  Nope, clear is a bitch!  Too light a coat and you don’t get that shine, too much and you have drips and sags that need to be buffed out.  What you are looking for is the perfect ‘wet’ coat, right between lackluster and disaster. 

Getting a sag is so disappointing. You think you’ve laid down your clear coat beautifully, but then have the realization that you may have actually passed an area twice.  Slowly, out of what seems like nowhere, the weight of that extra coat takes hold. Before your very eyes your beautiful paint job looks as if it’s melting off the surface, sliding down in first one long sag, then breaking out into individual runs that say, “you suuuuuuuuuuuuck!” as they cruise down your paint job.

Ruuuuck Rooooo!

There is a way out though.  I’ll attempt to scrape these babies down to just before level then buff the wahoosy out of them to blend.  We put enough clear coat down to hopefully be able to do this without taking it all off, in theory.  We shall see.  All in all, I think we did a damn good job.  Not perfectly professional, but good enough to be proud of.  Pop and I taught ourselves to paint in our makeshift booth with a $100 paint gun.  I’m pretty happy with that.

Next up, prepping and painting the rest of the car.  What’s left is the hood, trunk deck and the remaining body.  Anything that is still grey/yellow in this pic.

Mavis, as she stands now.

That will be a huge job and will no doubt take the next 2-3 visits.  In the meantime, we’ll need to ensure we have everything we need to put the ol’ girl back together.  I’ll take inventory of remaining tasks and parts needed next.  We’re getting there! Squeeeeeeeeee!

Me and my gun man.

Seat Cover Jim’s

Trying to pick the seat upholstery for Mavis is like choosing one outfit to wear every day for the rest of your life.  Dramatic, I know, but unless you’re Steve Jobs or don’t give a shit, that would suck.  Currently, Mavis is donning the equivalent of a wallflower’s dress that’s been dragged through the dirt.

dscf1144

I liked the idea of finding the fabric first, then basing the car color on that.  I knew that I was leaning towards green, so after seeing this phenomenal fabric in a ’75 Maverick, I was determined to find it.

greenfabric

My dream fabric!  The original from 1975.

You can see how Ford was going for that Western feel with the Native American blanket like fabric and of course, naming the car ‘Maverick’, like the wild beast that it is.  In fact, this ad from 1970 really drives this vibe home.

70brochure

But then there’s this…a bit confusing, but good to know that this car will get me to and from my dive trips to the lake…with a little more jazz.

scubamav

There’s an auto upholstery shop in Denver that had book after book of amazing Ford fabrics throughout the ’70’s.  I think I spent about 2 hours pouring over swatches in their back room.  There was a possibility of ordering some of these vintage fabrics!

img_1449.jpg

I looked at fuzzy stuff…too itchy:

IMG_1438

Knitted vinyl anyone?  Without AC in the car, this option seemed a bit ‘sweaty’ if you get my drift:

IMG_1446

I even found Mavis’s original sad sad fabric, #2123 below:

img_1434.jpg

Then I found it…the original fabric from the ’75 Mav I fell in love with, swatch number 512.

IMG_1444

The owner of the shop boasted the whole time about his connections and how he had a line on vintage fabrics.  When I showed him this he said, “Yeah, but not that one.”  Anyway, if he had been able to get his hands on it, it would have run me about $300 a yard.  I’d determined I needed about 5 yards, so this was a no-go, but it was already a no-go because I couldn’t fucking find it.  At this point, I’d fallen for the green stripe look, so I carried on, searching for another green striped fabric in my price range.

Over a year ago, in Kentucky, Pop and I had found a third generation upholstery operation called, appropriately, Seat Cover Jim’s.  Now Jim is a good guy, as was his father Jim and I can only assume the same for his grandfather, Jim.  I liked their sign, it leaves nothing to the imagination.

img_2337

When we first met Jim, he thought that maybe grandpa had a stash of that amazing ’75 fabric tucked away in his warehouse.  Now Jim could not be a nicer guy, but he is the epitome of the concept that everything goes a little slower down south.  Momma and Pop call it, “Kentucky Time.”  I think I waited an agonizing 4 months before he actually walked over to the warehouse to look for the fabric, only to tell me he didn’t have it.   But can you blame him?  Look at the thing!

img_2339

But Seat Cover Jim did come through for me in the long run.  He found a beautiful, affordable, green striped upholstery fabric that I really liked.  He ordered it, I waited over a year, then my seats were done!  I’m giving Jim a hard time, but the reality is that I’m not close to being done with the car and the seats are really the last thing I’ll install.  He probably could have dragged it out another year or so.  But, without further ado….the seats.  Aren’t they pretty!!??

img_3350.jpeg

Seat Cover Jim III did a beautiful job and has been nothing but kind throughout the whole project.  Thank you, Seat Cover Jim, for being a part of Mavis’ rebirth.  And if anyone is on “Kentucky Time”, it’s me, as July was the start of the 4th year since I first felt the tickle of Mavis in my para menopausal womb.  But, things are speeding up! As of this writing, Mavis has received her rockin’ 6- banger and we’re hoping to start her up next visit!  Yes, you heard me right.  Stay tuned and much love!

img_2534.jpg

Me with Jim, son of Jim, son of Jim.

Is it Done Yet?

I don’t know that everyone who knows I’m rebuilding a car with my Pop realizes that I’m actually rebuilding a whole car.  Taking Mavis totally apart, cleaning, fixing or replacing every piece and reassembling her to be a greater version of her former self.  Yes, Mavis is taking some time.  My 48th birthday this past July marks two years since I came up with this wack-job of an idea.  But I’m ok with that.  In fact, here is a pic of me in my car, just enjoying the process, thinking about the damn good time I’ve had so far and how amazing the finished product will be.

IMG_3489

Patience is a virtue.

Actually, a lot has happened in the last two visits down to good ol’ Eddyville, KY.  Best way to describe the progress would be to say that once we put the tires back on Mavis, she’s rolling.  Now, she has no engine or seats to speak of, but she has her back end up, front end together, brakes, steering and suspension.  Mavis and I could literally be pushed down a hill and I could steer us to safety and stop, sans injury.  This, in my book, is progress.

First things first, we (I) finished the scraping and sanding of the engine compartment.  With our previous welding reinforcements and patching we were ready for paint which was VERY EXCITING as it was my first time using the spray gun that Pop has spent months teaching himself.  A coat of Rustoleum, a couple coats of glossy black and we’re set to go.  We’re a good team, as Pop takes the ‘easy to reach’ areas and I lay on my back to get in the nooks and crannies.

IMG_3135

IMG_3182

As you may recall, the brake situation stumped me and Pop for quite some time.  Went with the 9 inch drums in the back and took a chance ordering a disk brake kit for the front.  We knew going in that we had a spindle issue, that being that the 4 lug kit we wanted would only fit on ’65 Mustang spindles.  NOWHERE is there a front disk brake kit for a ’72 Maverick that we could find.  It was all about the bearings, inner and outer, not being the correct size for the spindles we currently had on Mavis.  We found a shop that at first we thought could machine down our spindles to meet the needs of this disc brake kit, but when that proved to be impossible we bit the bullet and ordered the ’65 Mustang spindles off eBay for $75 a piece.  Everything we read said they should work.  These things showed up while I was back in Denver and Pop said that they were the wimpiest looking set of spindles compared to the Mav’s.  But he also said that he’d never heard of old Mustang wheels just ‘breaking off the car’ and we’d probably be ok.

IMG_3481

Wimpy spindles…we can only hope we’ll be ok.

By being smaller, the spindles allowed the steering wheel to turn way too far to the left and the right, resulting in the soon-to-be installed tires rubbing on the soon-to-be installed fenders and that wouldn’t do.  So, as we tend to do, Pop and I came up with an ingenious little adaptation by adding an extra piece of metal rod to the stop on the spindle arm.

IMG_3494

Gosh, hope it holds.

We shaved down both sides of the two rods to a flat surface and had our buddy Curt weld the shit out of it.  It’s not pretty, but it will do the job.

Before installing the brakes we had to get the suspension in place.  This part of the project was a test of both of our coping skills.  Attempting to squeeze a massive metal coil down enough to fit in a small compartment and then releasing the insane amount of pressure on that coil so that it sits correctly in that compartment without crushing your finger off is quite the challenge.  No fingers were lost, but I do seem to remember at one point the car shifting on its stands, me leaning against it to keep it upright while screaming, “Pop! Put her down!!!!!”  Not one of our better moments, nor decisions, but the good news is we got the fucker in…both sides.

IMG_3168

Brakes went in pretty easily, as Pop had already done one side to ensure that they would actually work with our dinky spindles.  Because we went with drums in the back and discs in the front, we did need to install a proportioning valve to ensure the pressure to the back and front brakes was correct.  Pop and I installed the master cylinder (came new with our disc brakes,) connected the lines, put the discs on, bled the system and voila, we got brakes!

IMG_3153

Golf tees to stop the flow ’til we’re fully connected.

IMG_3487

We found the smallest can possible to catch brake fluid in.

Next up, wheels refinished and on, then tires.  See?  We’ll be rolling down a hill in no time!

I’ll leave you with yet another of my video creations.  On a visit to Curt’s, we were dazzled with a display of his new toy.  Enjoy.


Bitchin’ Camaro

Beth was the proud president of the Asshole Driver’s Club, but it wasn’t because she was an asshole, she really wasn’t.  She just didn’t pay attention as well as some when behind the wheel.  She paid attention to everything else; you, the conversation, the music, the journey, the destination.  She was the one who turned at the last second, sans signal.  Crossed three lanes of traffic to exit.  Swerved from one lane into the other while fully turning around to laugh with someone in the back seat.  Driving with Beth was a harrowing, sometimes terrifying experience.

In high school, Beth drove her step-dad Bob’s old light blue Camaro.  I had known that car from my youth.  When we were kids, Bob and Kate in the front seat and Beth and I in the back, some teenager in a Jeep tagged us hard from behind at a red light.  The kid came up to the driver’s side window to tell Mr. Cieslak that he had hit him.  Bob responded the only way one could in such a situation.  He said, “no shit.”

By the time the Camaro was passed down to Beth, it had been given the title of Bitchin’ Camaro (thank you, Dead Milkmen) and had seen better days.  Still, we would park it across two spaces in the high school lot out of respect for its history and because we thought it was hilarious.  Once, when I was (not supposed to be) driving it, Beth was in the passenger seat with her feet up, flat against the windshield.  I took a left into the 7/11 and pop!, the windshield cracked from side to side.  Then there is the epic story of Beth somehow hooking her front fender over someone’s back fender in a movie theater parking lot.  It took about 5 of the high school jocks to lift the entire front end of the Camaro to free it.  I don’t remember the details, but I would bet anything Beth left a note, because she truly wasn’t an asshole.

She was a sweet heart.  She was hilarious, and brilliant and loving and my best friend since 1977.  Beth passed away earlier this year and I still can’t wrap my head around it.  I’ve been down to work on Mavis twice since she died but writing about that before acknowledging her death didn’t feel right.  She and my girls, Michele, Lisa and Darice, were the first I told about my Mavis mission and they were yelling ‘yes’ even before I finished explaining the idea.  Beth would write or call me after each blog post, telling me how hard she laughed, or cried, always telling me how proud she was that I was tackling this crazy feat.  The last time I heard her voice was on the phone while she sat in her basement digging up old pictures of us for my last post, Titties, Trauma and Transmission.  Another of the long list of memories we created over our 40-year friendship.

Driving to work at the end of this past January I was overcome with a feeling of dread deep in my heart.  The tears came so fast, blurring the road and forcing me to turn back home.  I made it into the house and weak kneed, supporting myself against the kitchen counter, I sobbed.  I said out loud to no one, “something’s not right.”  And it wasn’t.  Beth would die that night.

So, I’ve been struggling and don’t know if, or when, that will ever end.  But I do know that Beth would want me to continue this journey.  Bringing Mavis back to life, accomplishing something new, sharing time with people I love.  We’ve always been a bit cosmically connected.  She’ll know, she’ll watch as I reach my goal.  Then I’ll take a long ride, play ABBA real loud and try not to drive like an asshole.  Love you Bether.

IMG_3299

Keep on Rockin’ in the Wheel World

Pop and I had to replace one of Mavis’s rocker panels because it was totally rusted out.  This was a BIG deal and new even to Pop, but we both think the results are of rock star quality.  The rocker panel is the length of metal that runs from the back of the front wheel well to the front of the back wheel well just underneath the door.  It’s what you step over to get into any vehicle.  I’ve recently discovered that its name originates from back in the day when they were building horse drawn carriages.  Here’s a fascinating bit of info for ya from “A Practical Treatise on Coach-building” by James W Burgess, published in London in 1881.

“Proportion in carriages applies to both form and colour; as regards form, it regulates the sizes of the various parts so that the whole may harmonise, and dictates the adoption of contrivances for lessening the apparent size of those parts which would otherwise be unseemly. Thus, the total height which is necessary in the body for the comfort of the passengers is too great for the length which it is convenient to give it ; therefore the total height is reduced, and to give sufficient leg room a false bottom is affixed by means of convex rockers, and which, being thrown back and painted black, cease to form a portion of the elevation ; they are, -like a foundation, out of sight, and thus the proportion of the front view (the side is called the front in coach-builder’s parlance) is preserved.”

Well thank God!  I felt my original explanation to friends who were trying very kindly to understand (and stay interested) in my rocker panel story was much more understandable.  I told them to imagine driving their car over a very steep bump in the road.  It would surely get stuck at the top, rocking back and forth with the wheels above the ground on either side.  What it would be rocking on would be…you guessed it, the rocker panels!

Regardless, they do tend to rust out faster than any part of a car or truck and Mavis’s passengers side had seen better days.

Skills required to replace a rocker panel:  Metal cutting, accurate measuring, plug welding, tack welding, grinding, body filler work, sanding, more sanding, patience and a good attitude.  It is really really stressful because neither Pop nor I are psyched about making our first real cut into Mavis’s body and fucking it up isn’t really an option.  There are only so many YouTube videos you can watch before you gotta get in there and make it happen.

I think this part may mark the first fight Pop and I have gotten into during this project.  Ok, not a full out fight, but he was clearly irritated with me.  We were up under the back wheel well where I was showing him the inner patch for the back of the panel I had been working for like, 3 hours on, and felt I had messed up.  So both our heads are crammed into this 2×1 foot space, 2 inches from each others faces and I’m whining about this shitty patch and he’s telling me it’s “just fine” and I’m saying it’s unacceptable and I’m pissed and now he’s getting pissed.  We keep grabbing this patch out of each others hands tryting to show the other how it’s working or not working and dropping it and hitting our heads trying to pick it up and in the stress of this whole fucking thing Pop says, VERY sternly, “God Dammit Janet, stop being such a perfectionist!”  I mean, he’s not happy with me, which hasn’t happened often, or ever, in my adult life.

Years ago I would have immediately felt that stinging feeling in my nose just before the tears come.  Now, I was just so blown away with being called a perfectionist tears were beyond me.  A perfectionist?  I think the only other person who has ever called me that was my best friend Beth of forty years who is a trained psychologist and knows me better than almost anyone.  So really, what does she know?

Fuck.  I may be.  Never thought of myself as a perfectionist, but I do have to admit that there isn’t much space between, “we’re going to do this thing right to the best of our ability” and, “if I can’t do this thing right I have no abilities.”  I’ve been known to never start something because it may not turn out how I envisioned it.  After years of doing this to myself on a creative level, I now decide to rebuild a car?  Not sit and doodle out a sketch, not try some slab work with clay…no, rebuild a whole fucking car.  It was the black and white of it I was attracted to at first.  Either the car starts and runs or it doesn’t.  You’ve either succeeded or failed.  But like anything, there are so many levels of what is acceptable or what is ‘right’.  High-end, high gloss, big money Foos paint jobs or flat black spray paint applied in the hot sun in the backyard.  I’m cool with both for others, why not me?  Pop and I, we are not high end, we are ‘do the best you can do with what you’ve got’ because that is what he, and Momma, taught me.

This is a lesson.  Not one I planned on.  But as I write I’m realizing that I must stay true to my mission…which I didn’t have for this project until now.

Have fun, damn it.  Do your best, learn, be in the moment and enjoy the loving relationship you and Pop deserve to have with the added appreciation of being comforted by Momma with long warm hugs, morning chats and dinners from my childhood.  Love them both back deeply, be grateful and keep on rockin’ the rocker panels!

Here are shots throughout the rocker panel replacement process.  Please enjoy, Pop and I are very proud.

IMG_1786

Pre-surgery. Ensuring we’re working on Mavis’s correct side and the ‘implant’ is ready to go. It will need to be cut to size and drilled for plug welds. Note the very accurate Sharpie lines marking where we will cut the old panel out.

IMG_1787

Cutting out the ‘cancer’ as they call it. Back end.

IMG_1788

Front end.

IMG_1790

Cancer sucks.

IMG_1795

First fitting after the way too stressful first cuts.

IMG_1797

Inside of the panel cleaned up and rust treated.

IMG_1800

The front of the back wheel well area that was so bad we had to cut out most of it out and create patches. Always trying to save as much good metal as possible.

IMG_1801

Replacement panel after we drilled the plug weld holes.

IMG_1805

Woody on the torch!

IMG_1821

Welding in the ‘shitty’ patch, having learned my lesson.

IMG_1822

Plug welds done…not too bad!

IMG_1823

Front pre-fit a little scary.

IMG_1824

Back pre-fit looking good.

IMG_1832

Plug welds ground down and filler applied, dried and sanded.

IMG_1833

Front looking much better.

IMG_1835

This was tough as we needed to keep that horizontal seam but ‘hide’ the vertical one.

IMG_1841

Skim coat is the darker red.  Trying to use as little as possible.

IMG_1842

Front sanded, pre-paint.

IMG_1843

Back sanded, pre-paint.

IMG_1848

Prepped for paint.

IMG_1849

Done!

IMG_1857

Final back. Don’t even try to tell me you can see that vertical seam!!  

IMG_1856

Final front.

IMG_1855

Full on final shot!!

Oh shit!  I forgot to tell you about the outcome of the brake situation and Mustang Marty Miller!  It didn’t end well in terms of the brakes, but Marty’s cool.  Skip to the end of my last post to read about it.

Mavis, Deconstructed

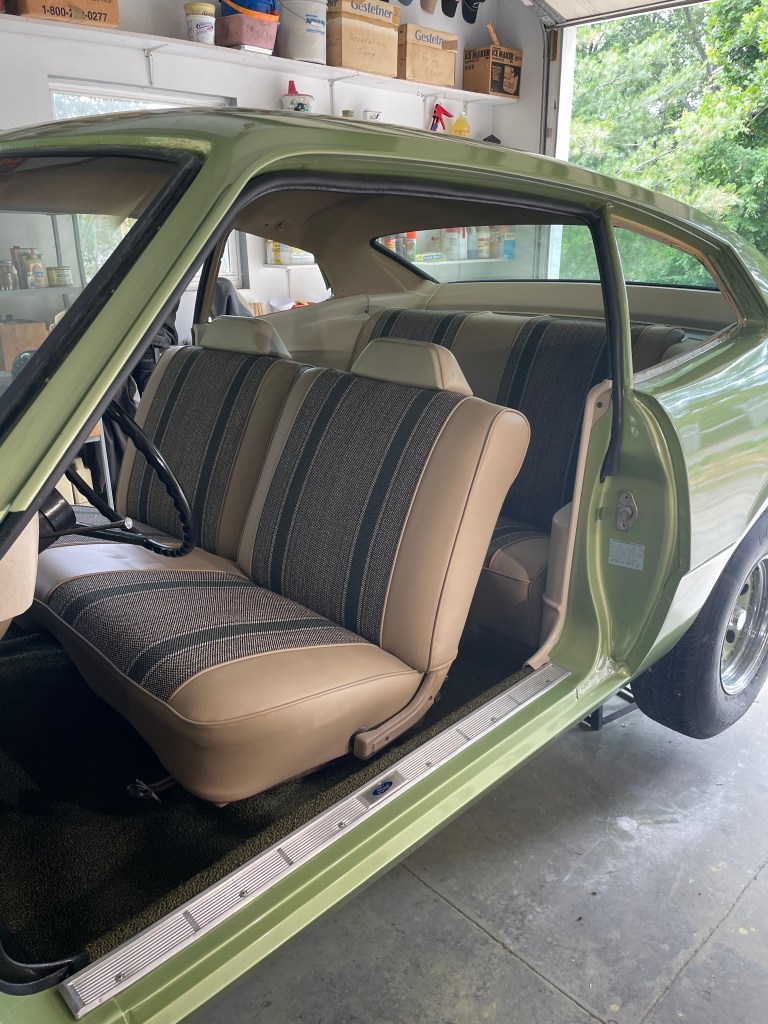
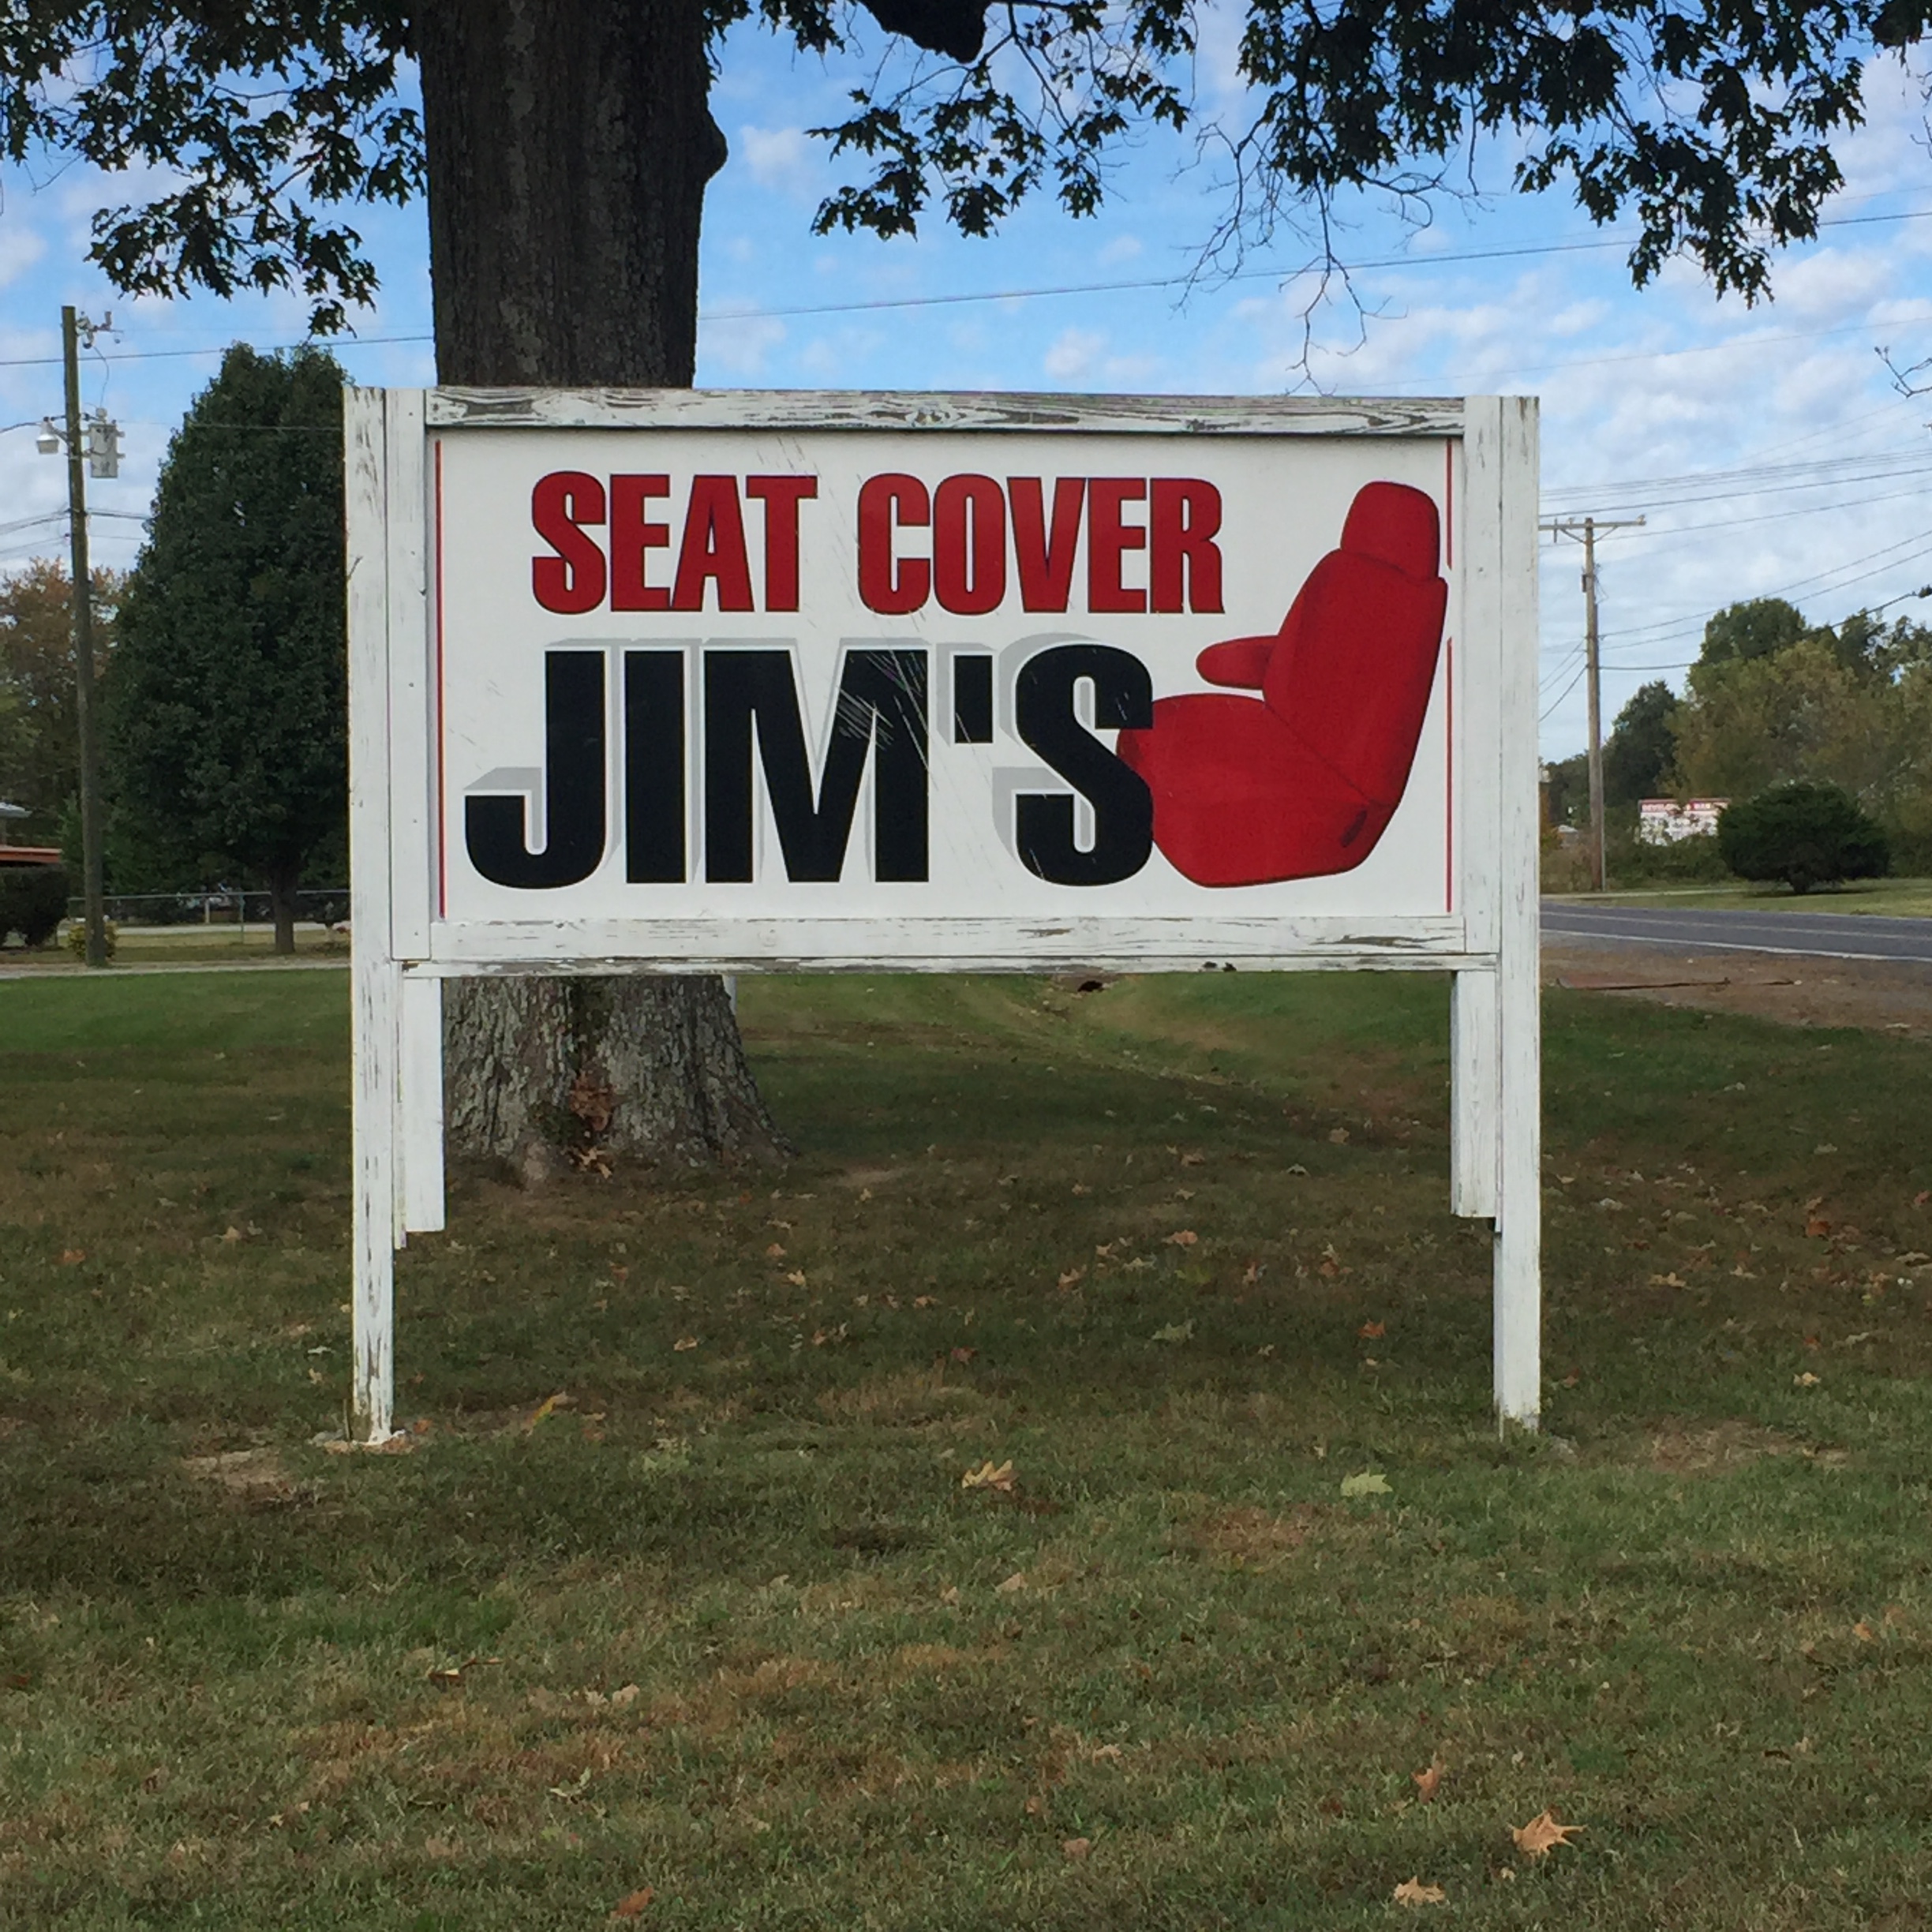
Holy smokes it’s been weeks since I’ve been home and I haven’t told you about week two of the Kentucky maiden voyage!  With the Firebird finally running and out of the garage, Mavis was now the center of attention.  Yes…Mavis.  Makes me think of a wise old lady, African American, steady, proud, and cool as shit.  Cross her and she will KICK YOUR ASS.  “Sleeper” is a term for a car that looks unassuming, isn’t overly showy or flashy but can pack a punch in the power department.  Mavis is going to be a sleeper, classy and quiet, but ready to tear it up if need be.

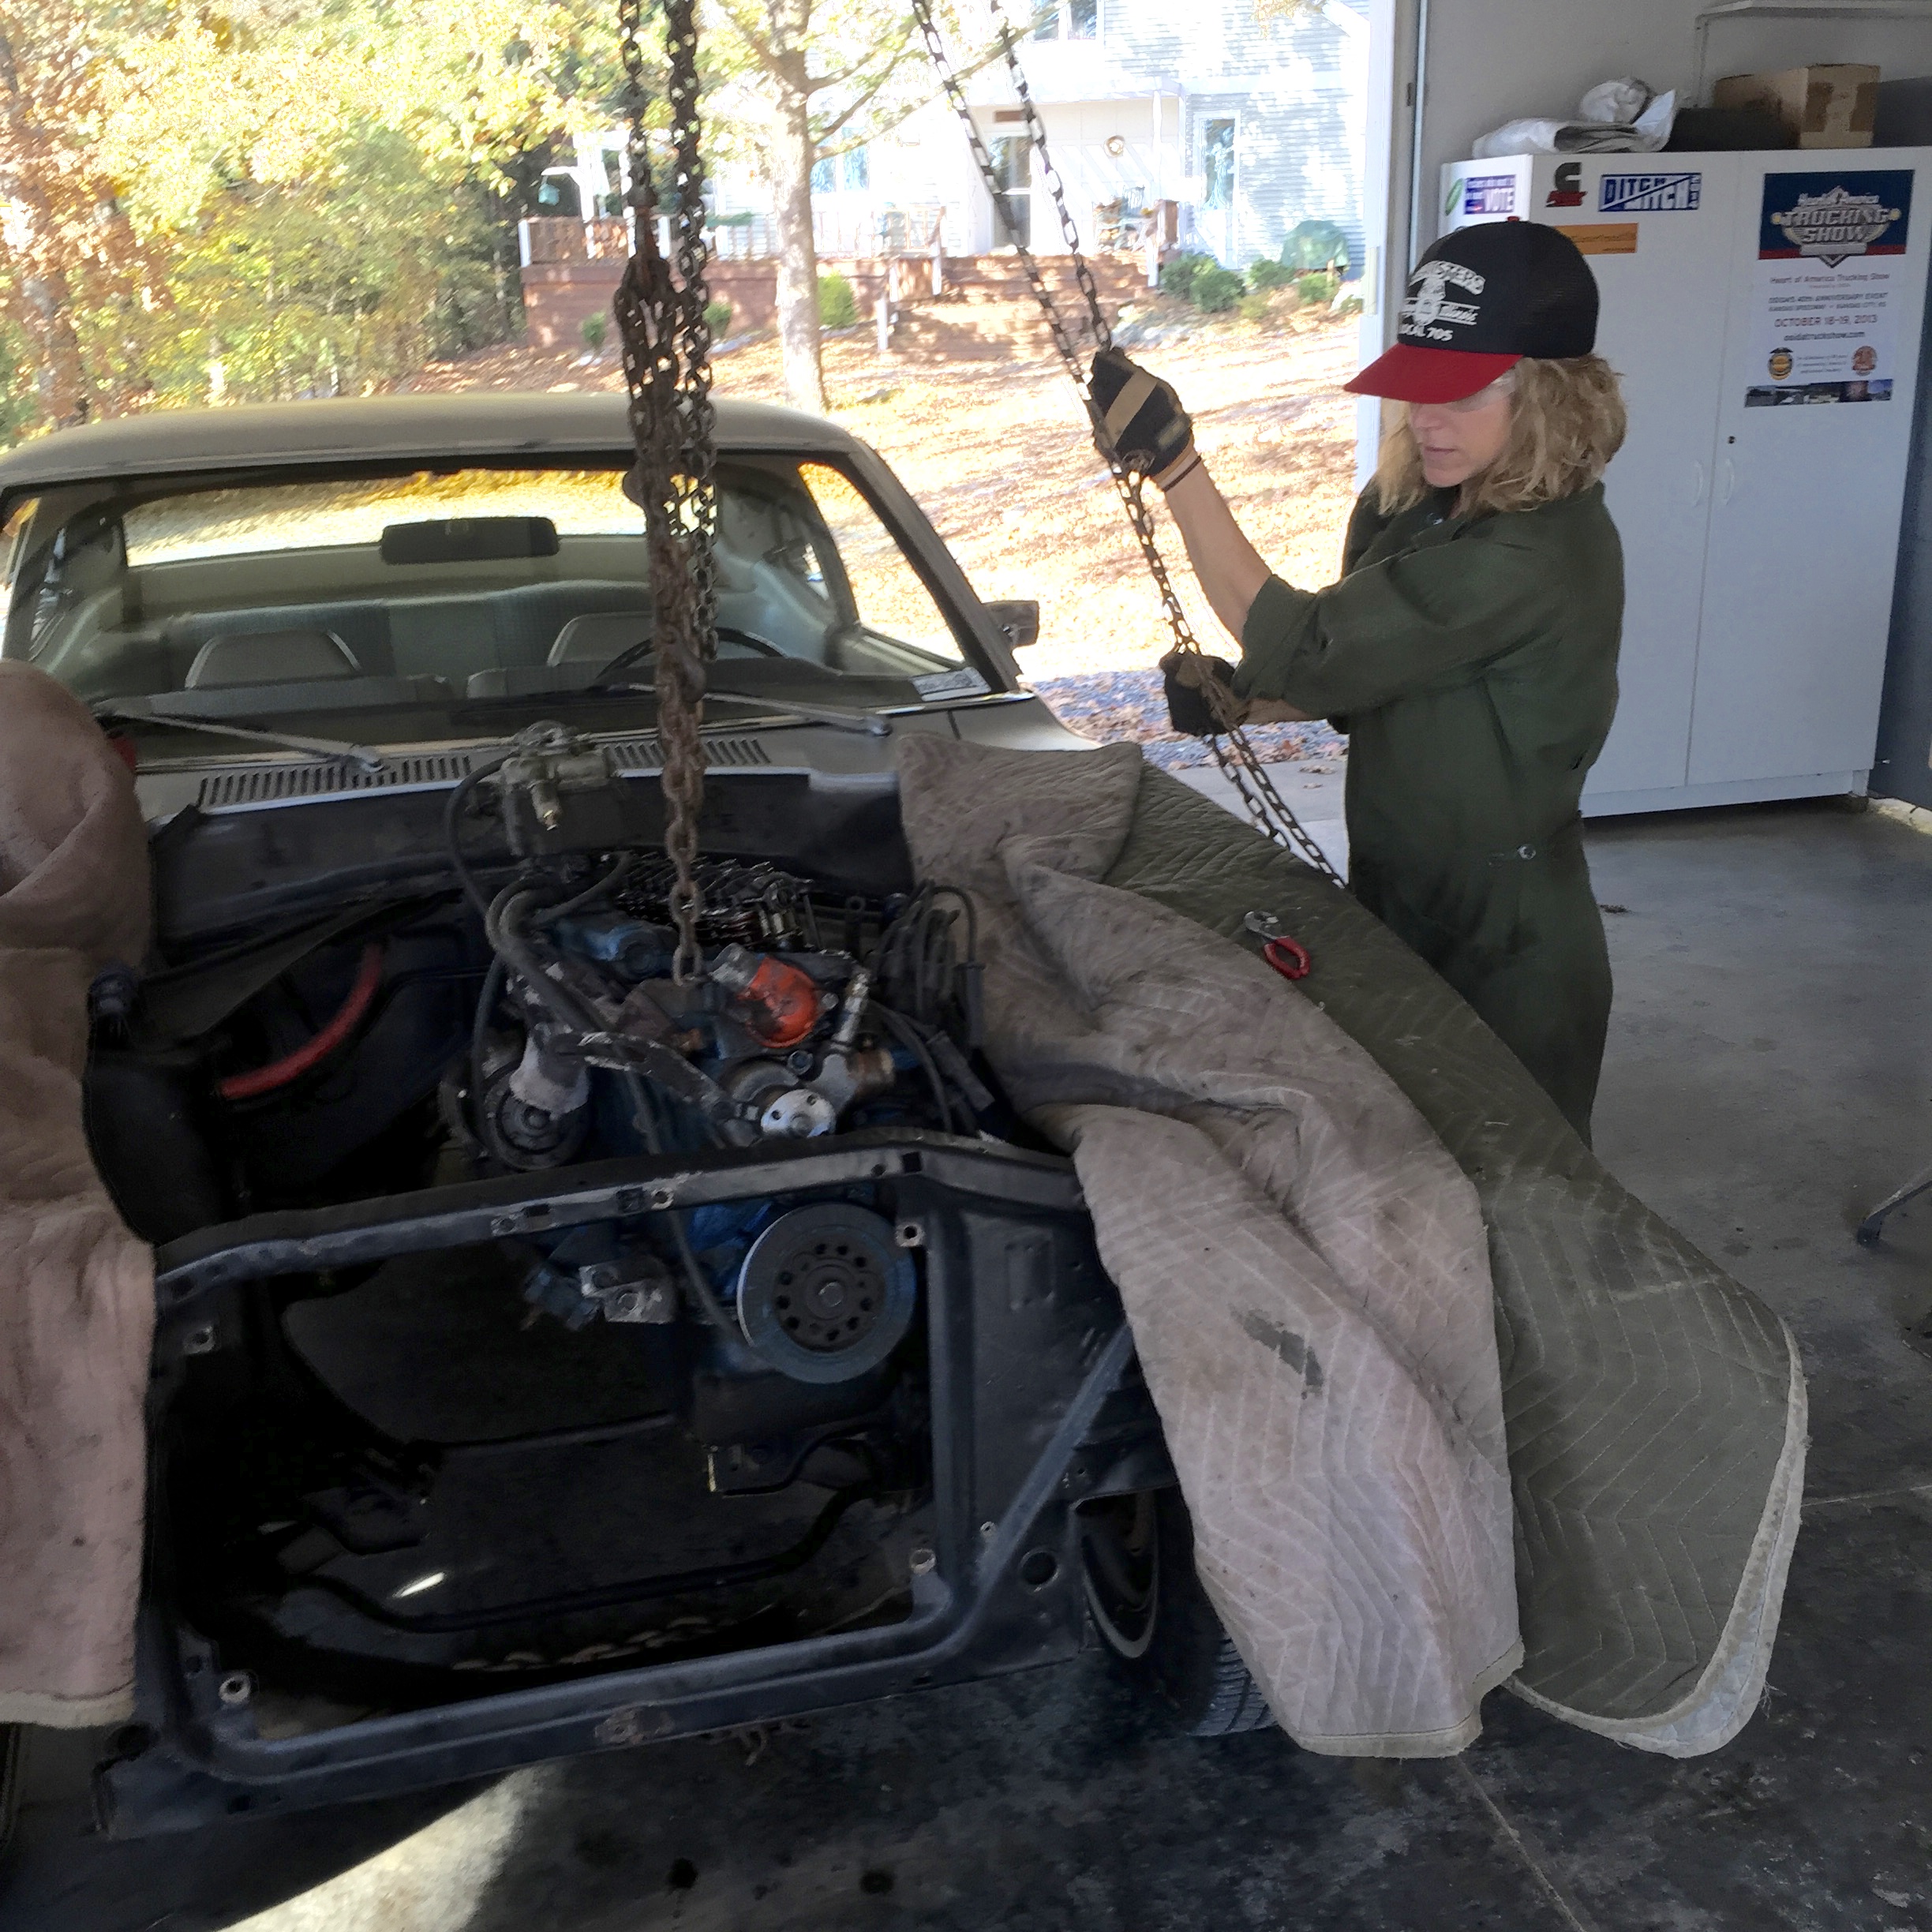
But, we need to break Mavis down before building her back up.  The goal of the week was to get the engine and transmission removed.  To do that, you need to disconnect anything attached to them and take off anything that would impede their removal.

img_9525

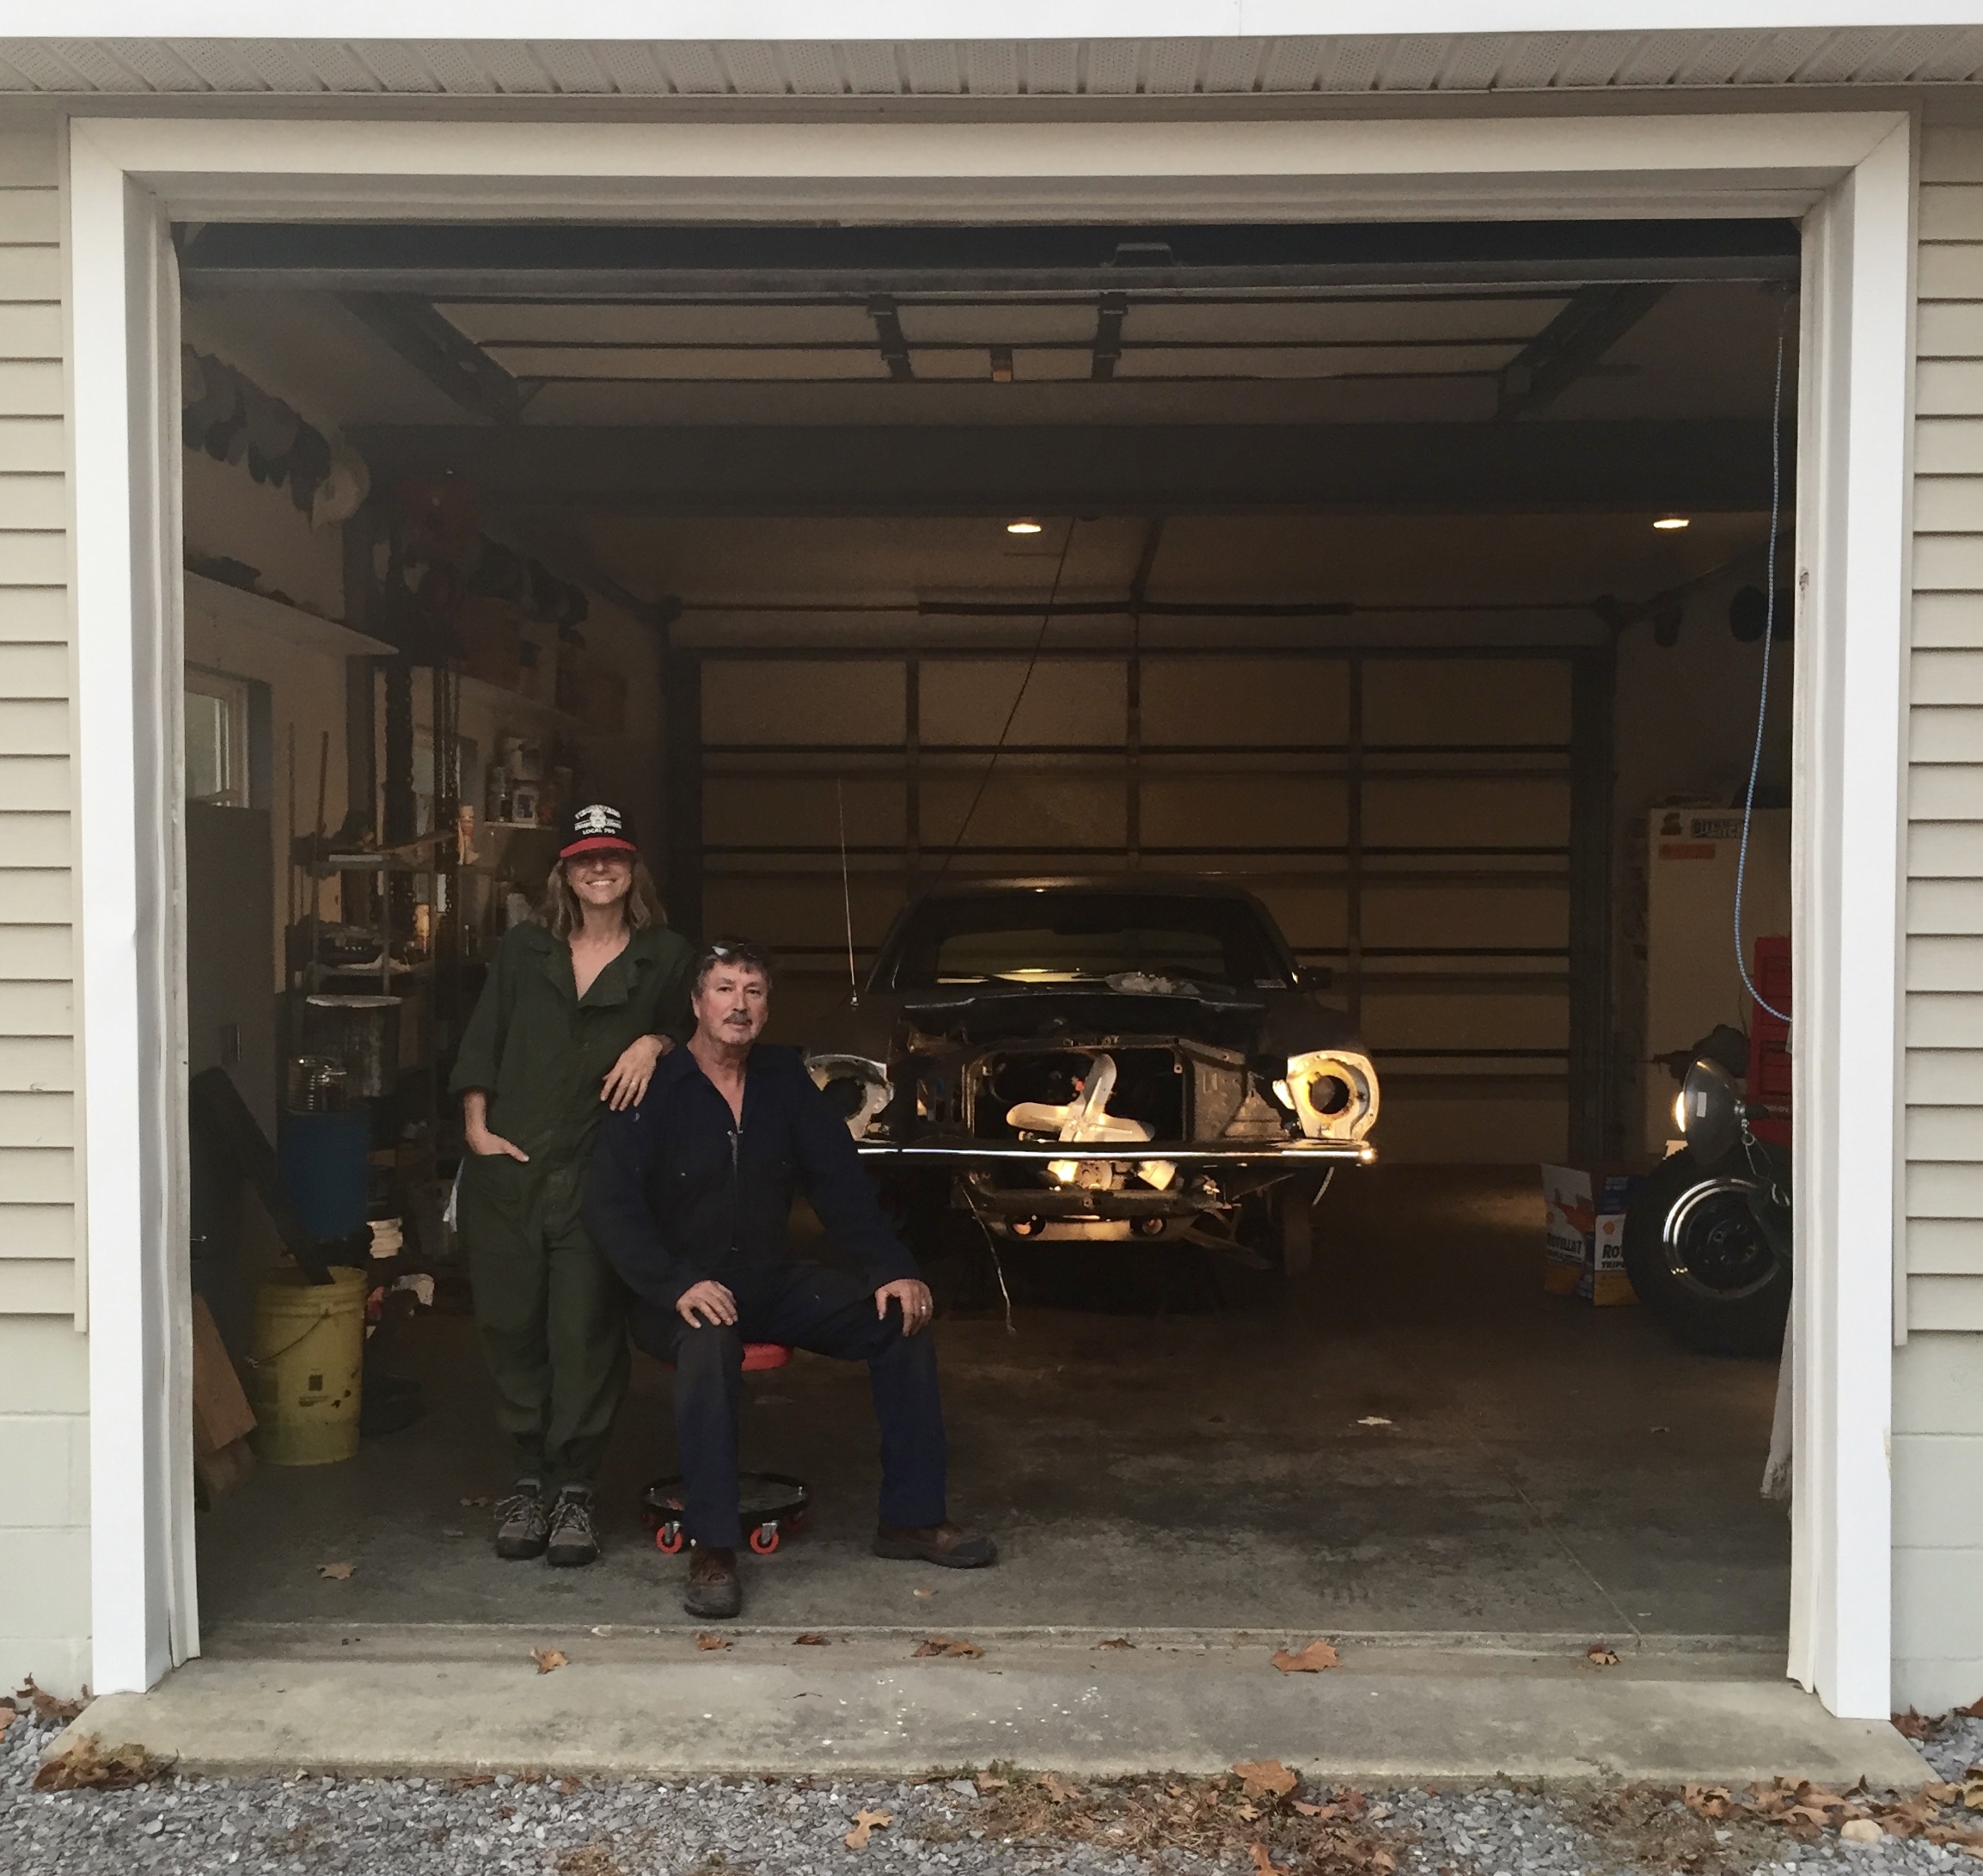
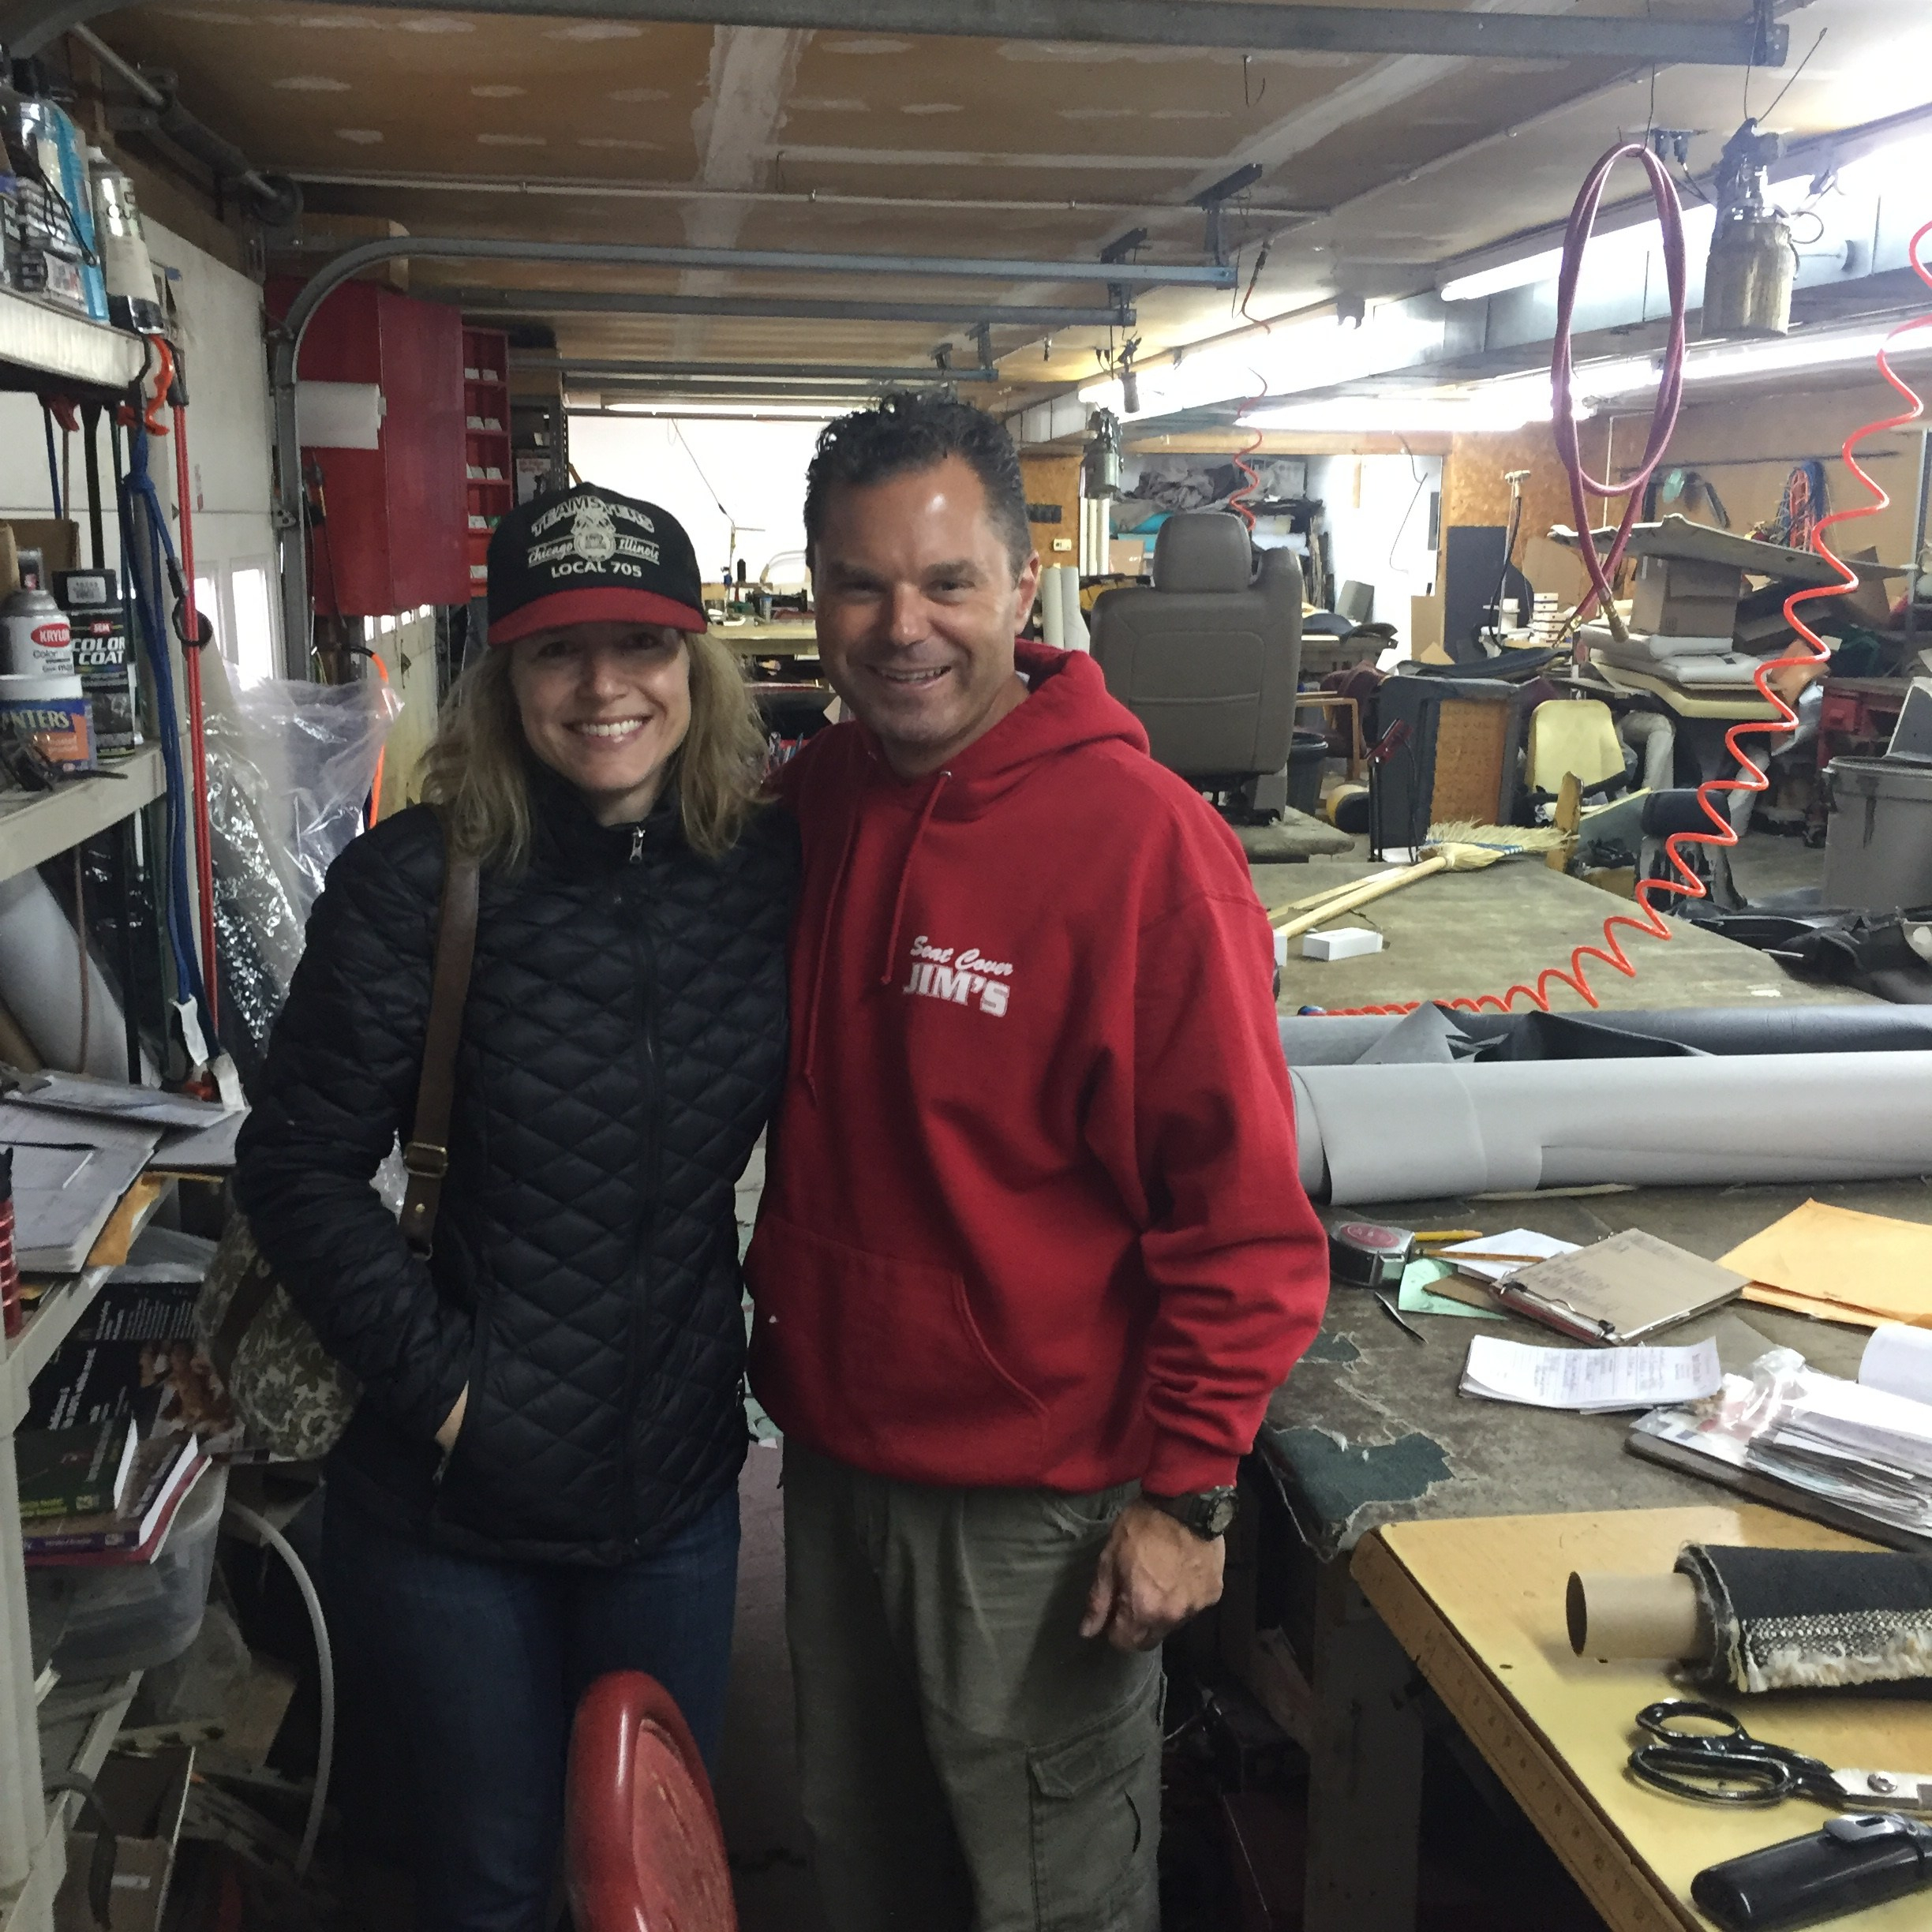
Me and the old man in our workspace.  Mavis, now in the spotlight.

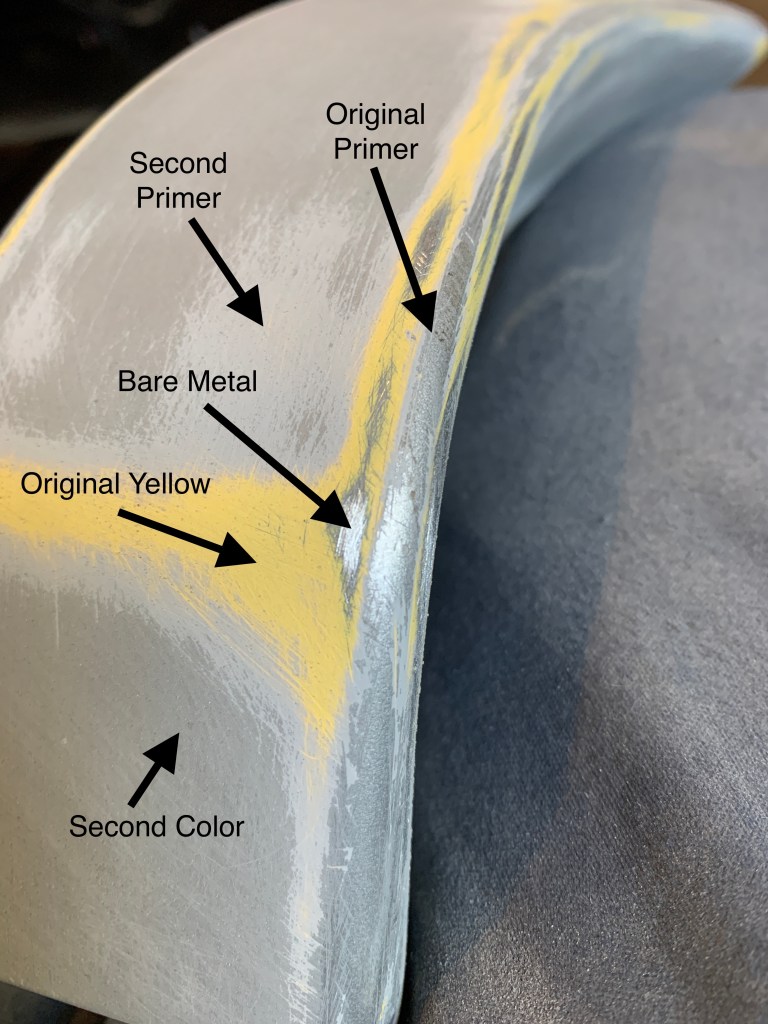
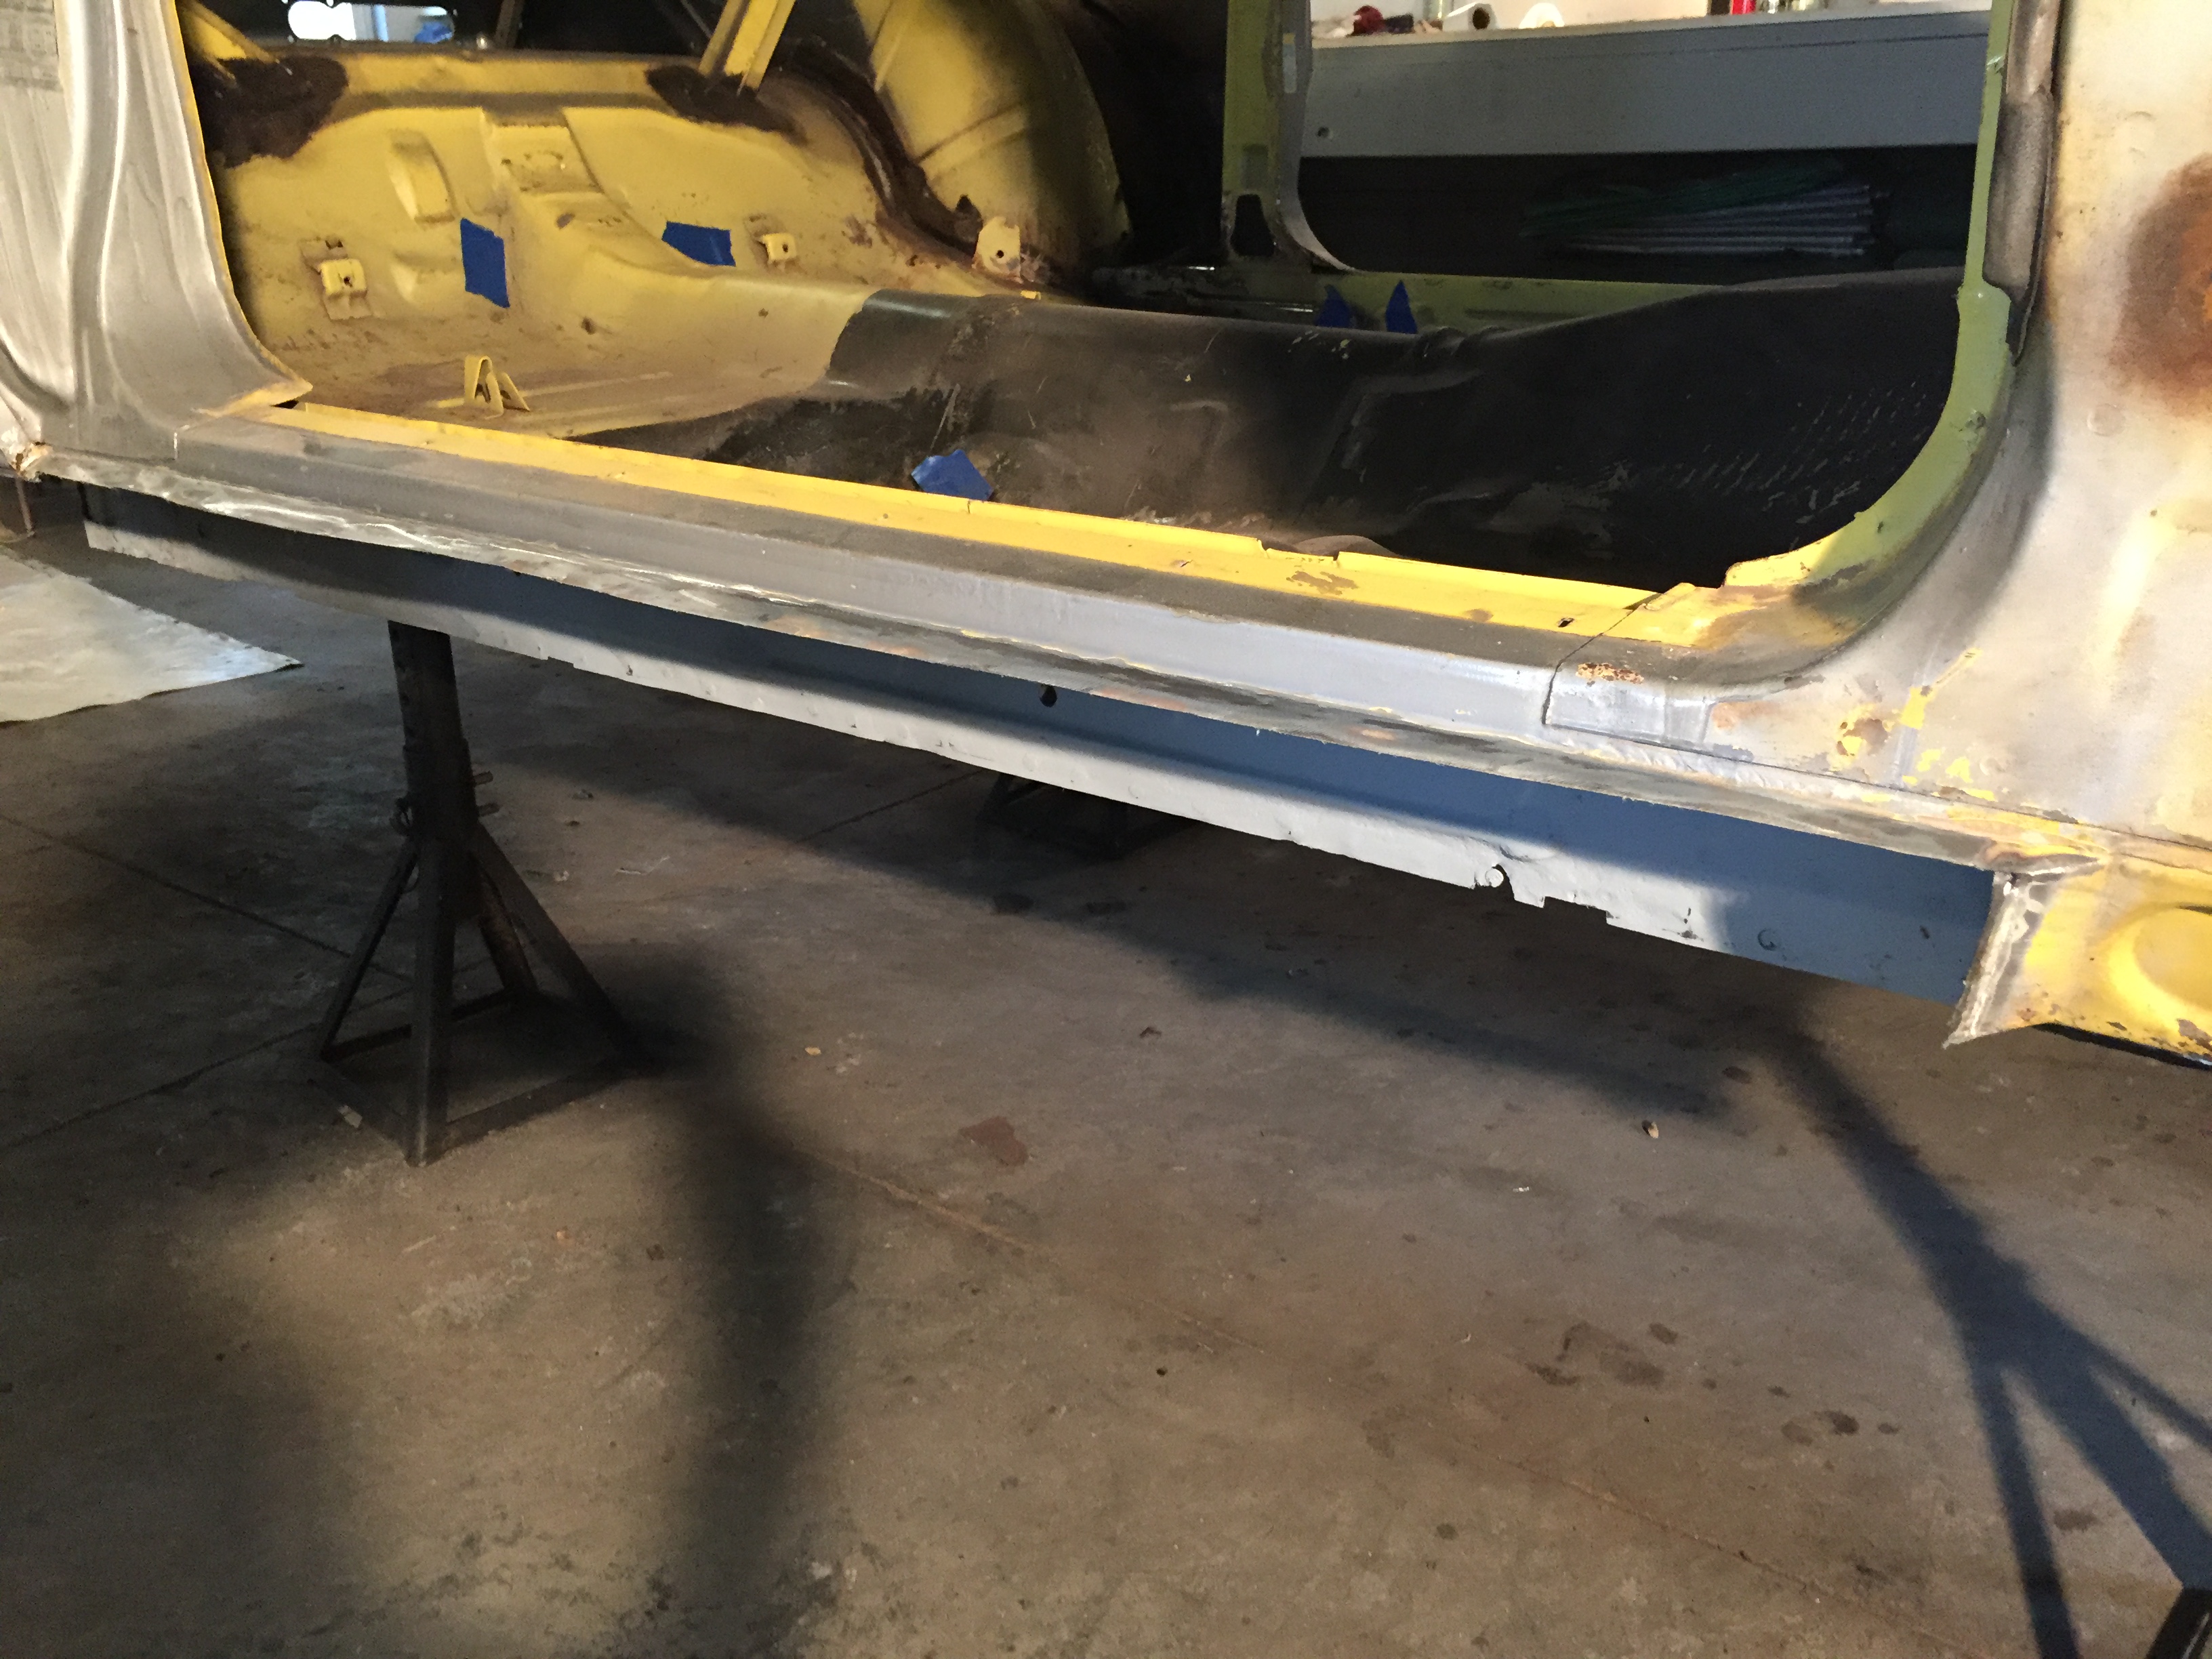
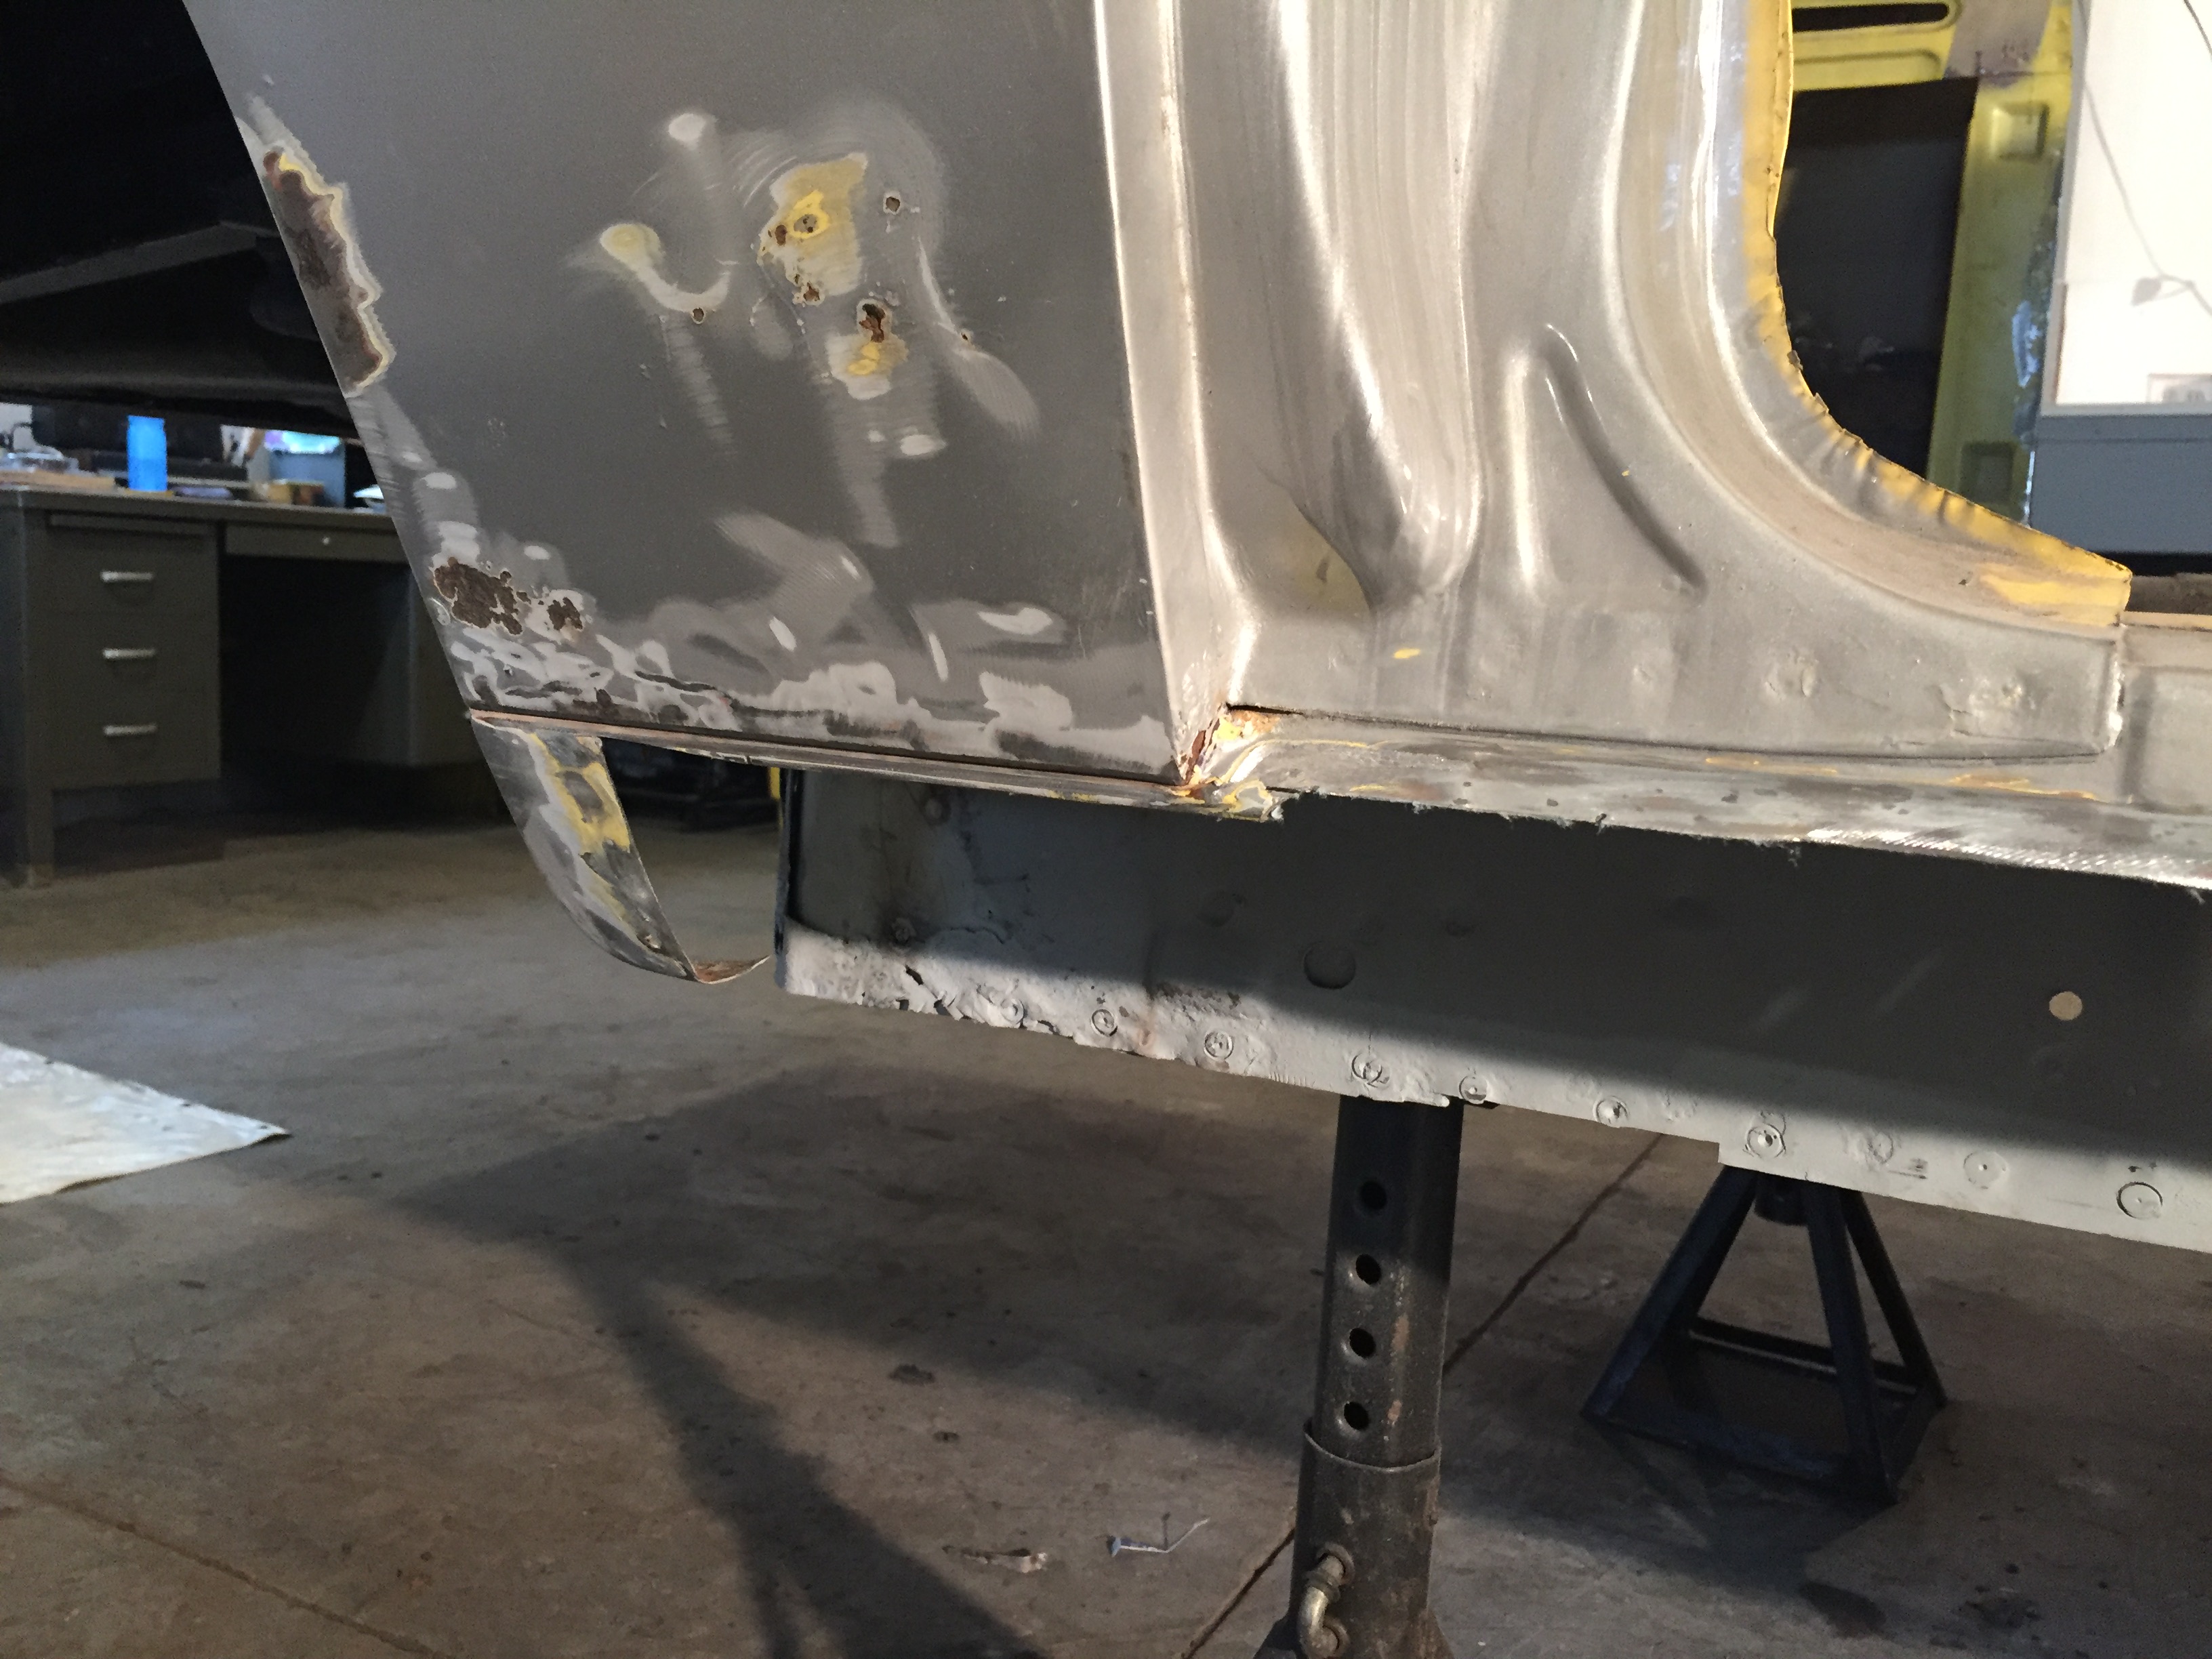
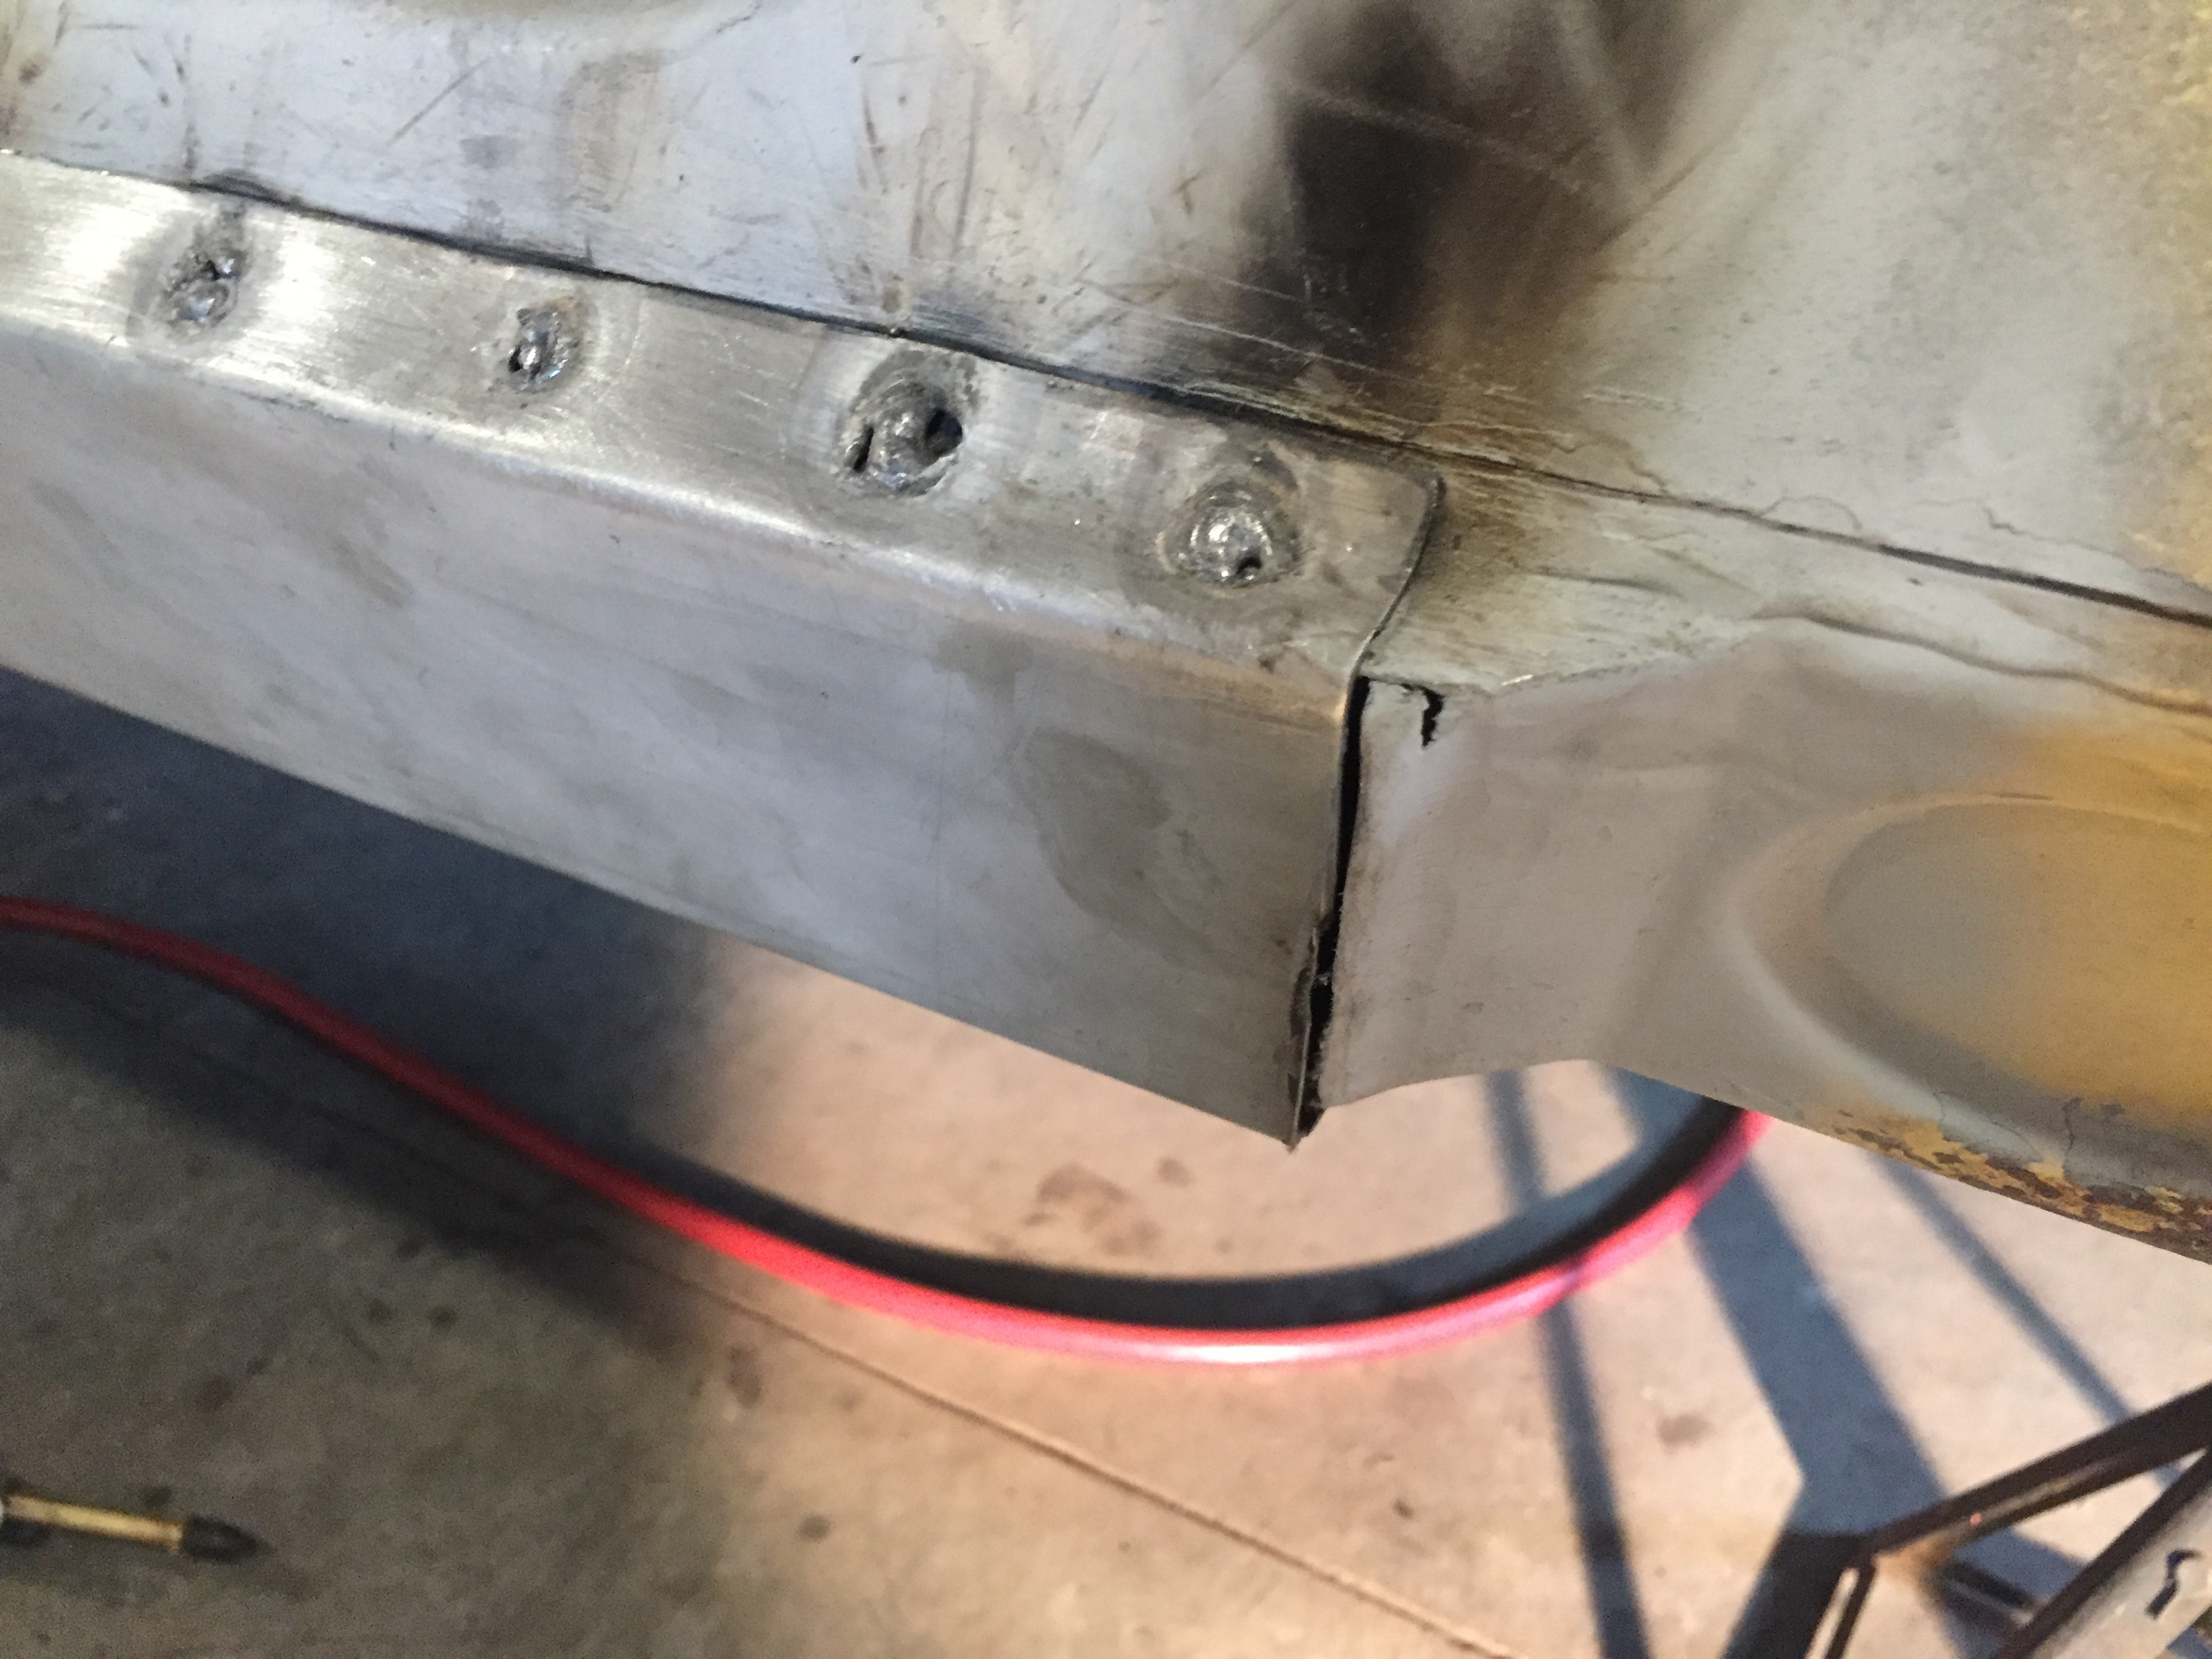
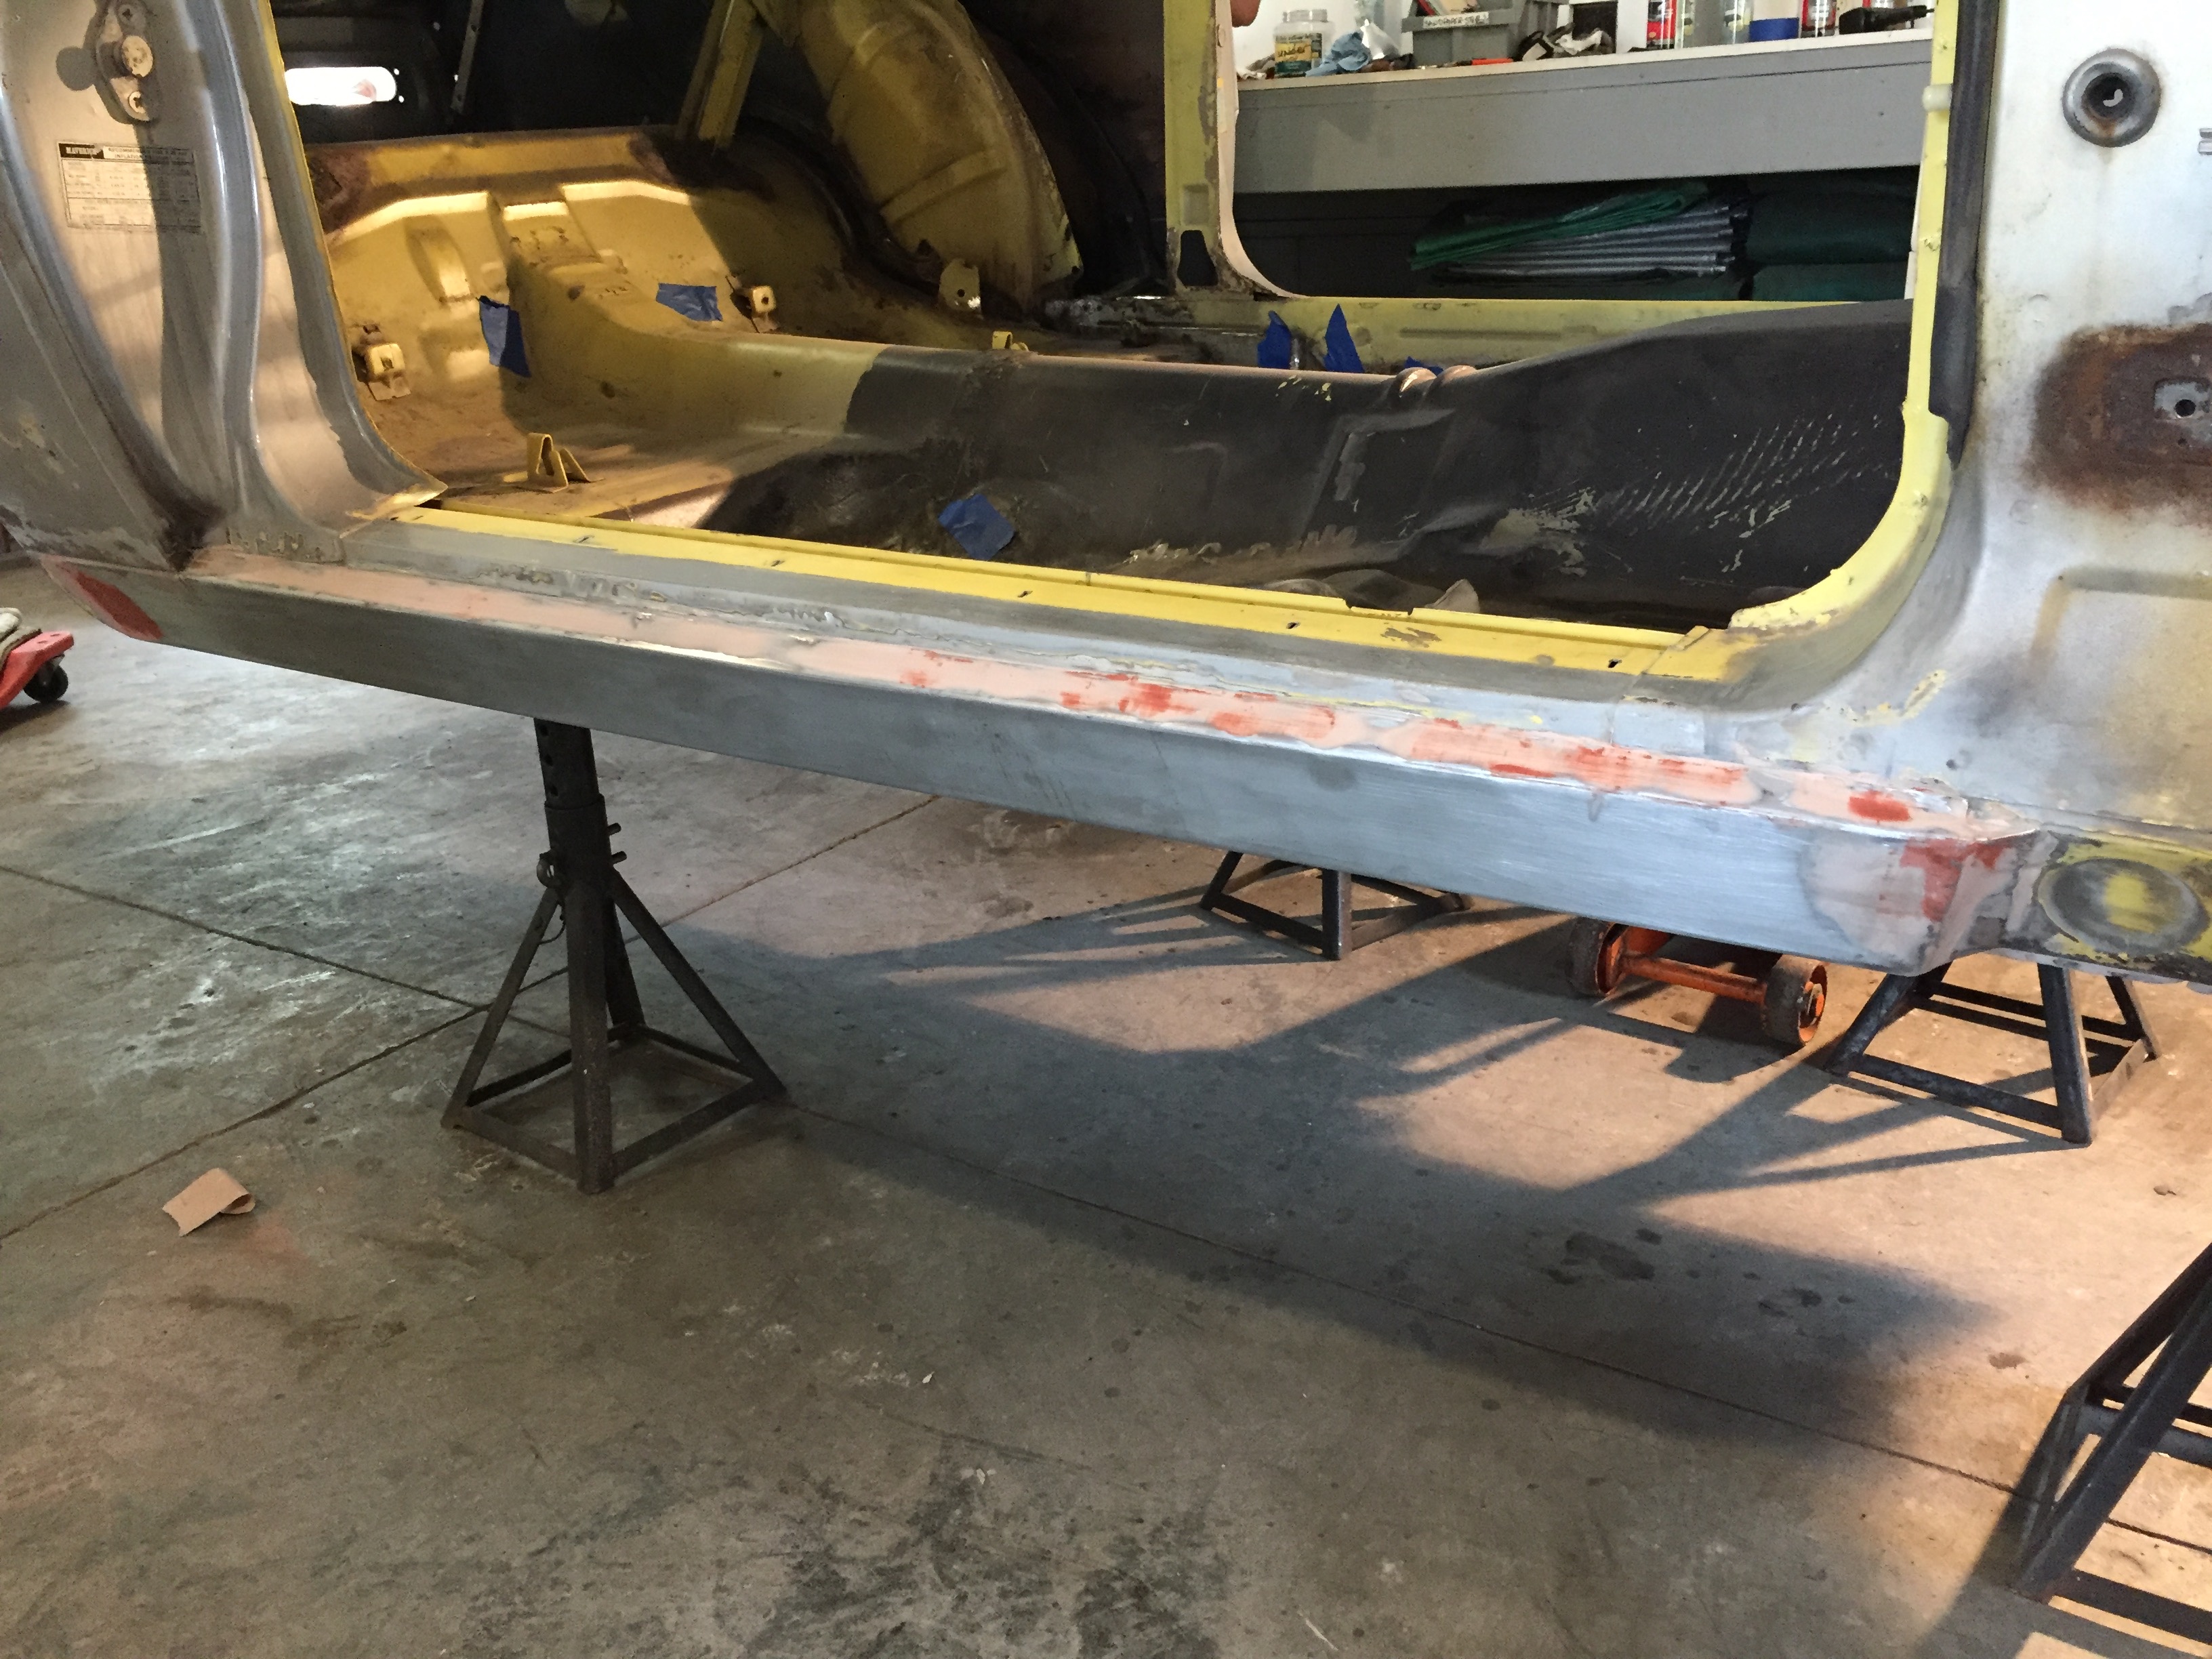
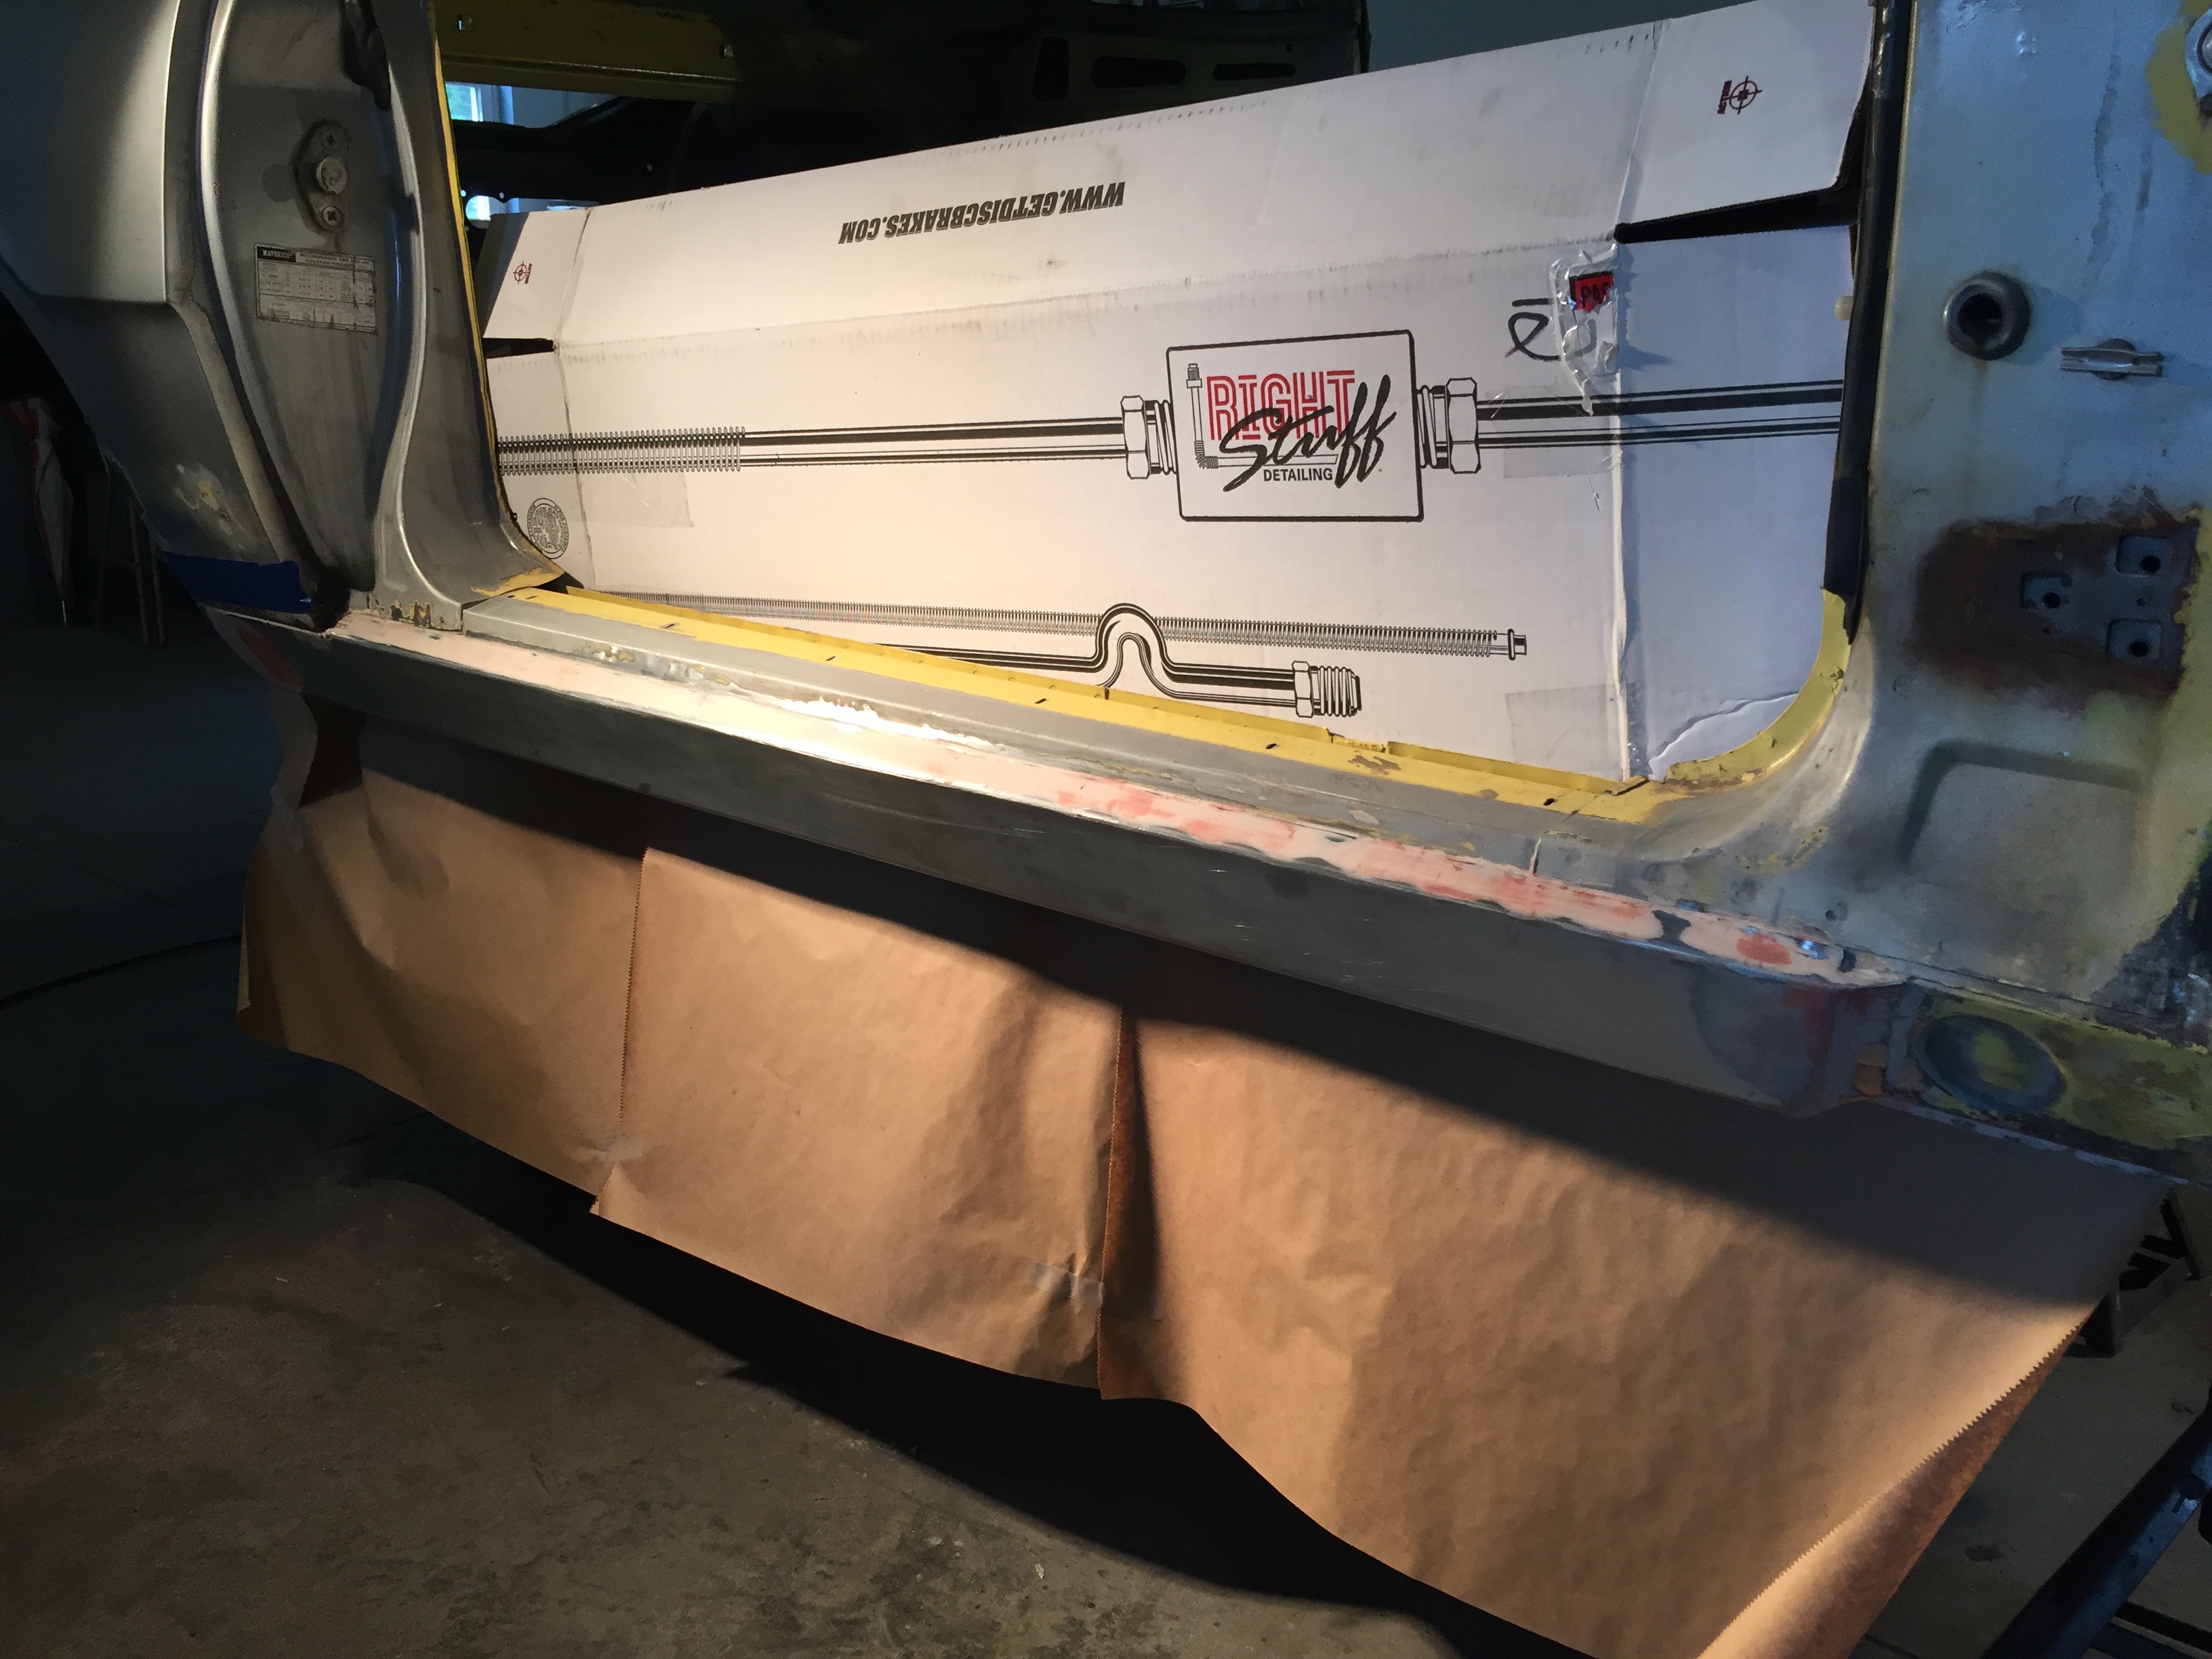
We started with the fender, headlights and grill.  I found that there is no such thing as “just unscrew that bolt” in these old cars.  The bolt has been bolted for 40 something years, rusted, perhaps bent and can be a bitch to get off.  I find this to be a great challenge.  We spray it down with our trusty Kroil, let it sit for a bit and then go at it.  Sometimes it’s brute strength that’s needed,  sometimes it’s finding the right tool or angle to finesse it off.

As we removed parts, Pop would explain them to me;  what they did and how they worked.  Everything was saved regardless of needing to be replaced or not.  We’d make notes of what we needed to either buy, repair or find in a junk yard.  Parts were stored in labeled containers according to what they were.  For example, headlights, their rims, bowls and wires were in a box, and all engine bolts, screws, washers and nuts were put in an old coffee can.  Wires were labeled with a sticker and note so we knew what the hell they were connected to and larger parts (hood, front fender, bumper) were propped up along the garage wall.

img_9608

The parts cart including transmission, valve cover and fly wheel.  We used to use this cart to roll the garbage to the bottom of the driveway when I was a kid. I told you, the P’s get rid of NOTHING.

Pop and I work well together because we tend to work alike.  We stay organized, work slowly and thoroughly and keep the workspace clean as we go.  It’s funny to watch him and see where I get some of my quirks.  When there were too many tools out and he’d step on one or one of us would catch a foot on the air hose and trip, we’d both seem to do a little freak out thing.  You feel a little clausto and disorganized and have to ‘tidy up’ before moving onto the next task.  It’s something about the state of your surroundings directly affecting your ability to deal.

We worked in this way for a couple days, removing every wire, tube and pipe attached to the engine.  While Pop was at breakfast with friends one morning I felt the need to get a jump on things.  Momma was in the garage with me and we had been poking around, seeing what we could clean or whatever.  I got a bit bold, decided it would be a good idea to remove the radiator and went about the business of draining it.  Momma sat in a chair, one leg crossed over the other, bouncing her foot like she does, and watched.  I undid the top hose and was surprised as to how much antifreeze came out.  Luckily I had already thought to put a bucket underneath to catch it.  Feeling confident, I proceeded to loosen the bottom hose, which started a slow drip.  Sat back with Momma to wait, but soon became impatient and decided to pull the entire hose off.  HOLY SHIT!  Neon green fluid spewed from the thing like projectile vomit!  The power of it knocked the bucket over and flooded onto the floor.  I’m screaming, “Oh my God!!!” trying to get the hose back on which only intensified the spray.  It was flowing like a firehose! I finally get to the bucket just as the last of the antifreeze empties out with a belch and it’s over as quickly as it started.  Momma’s still sitting in her chair and she says quietly, “wow.”  Clean up involved mops and the garden hose and when Pop got home I told him about my faux pas.  That’s when he showed me the petcock at the bottom of the radiator, a small valve conveniently located to drain the antifreeze.  (Yes, it’s called a petcock.  Awesome.)

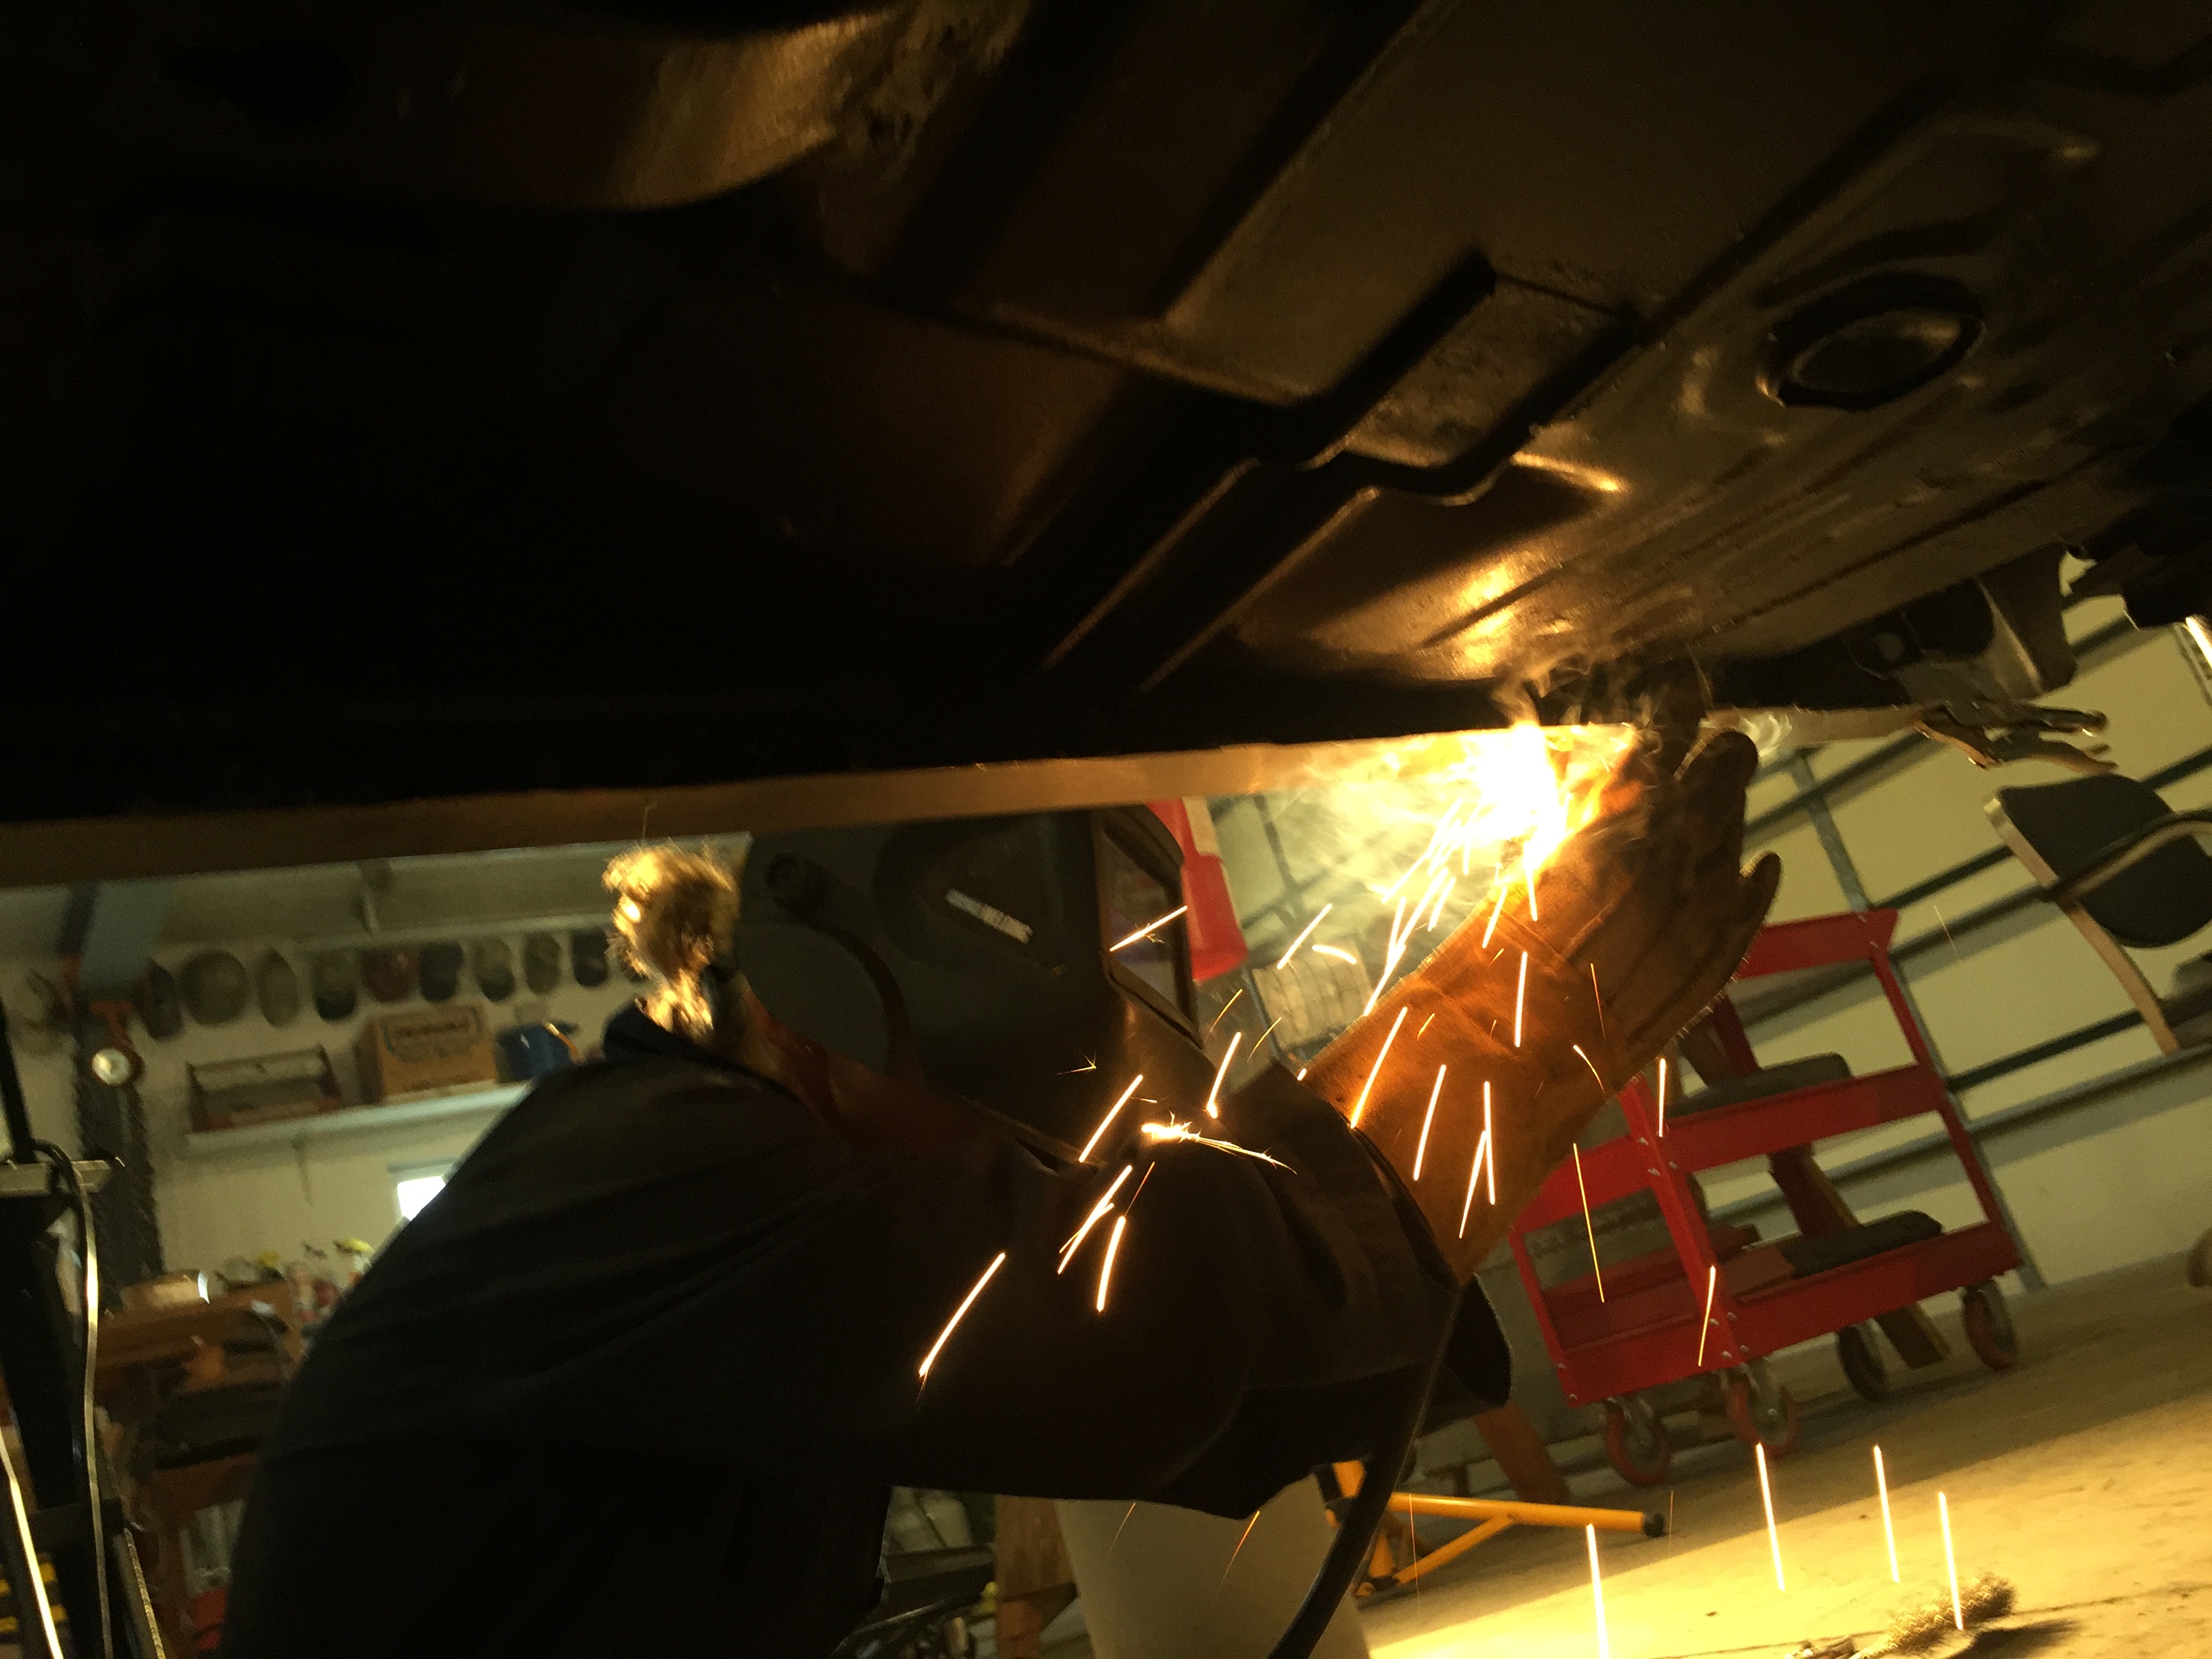
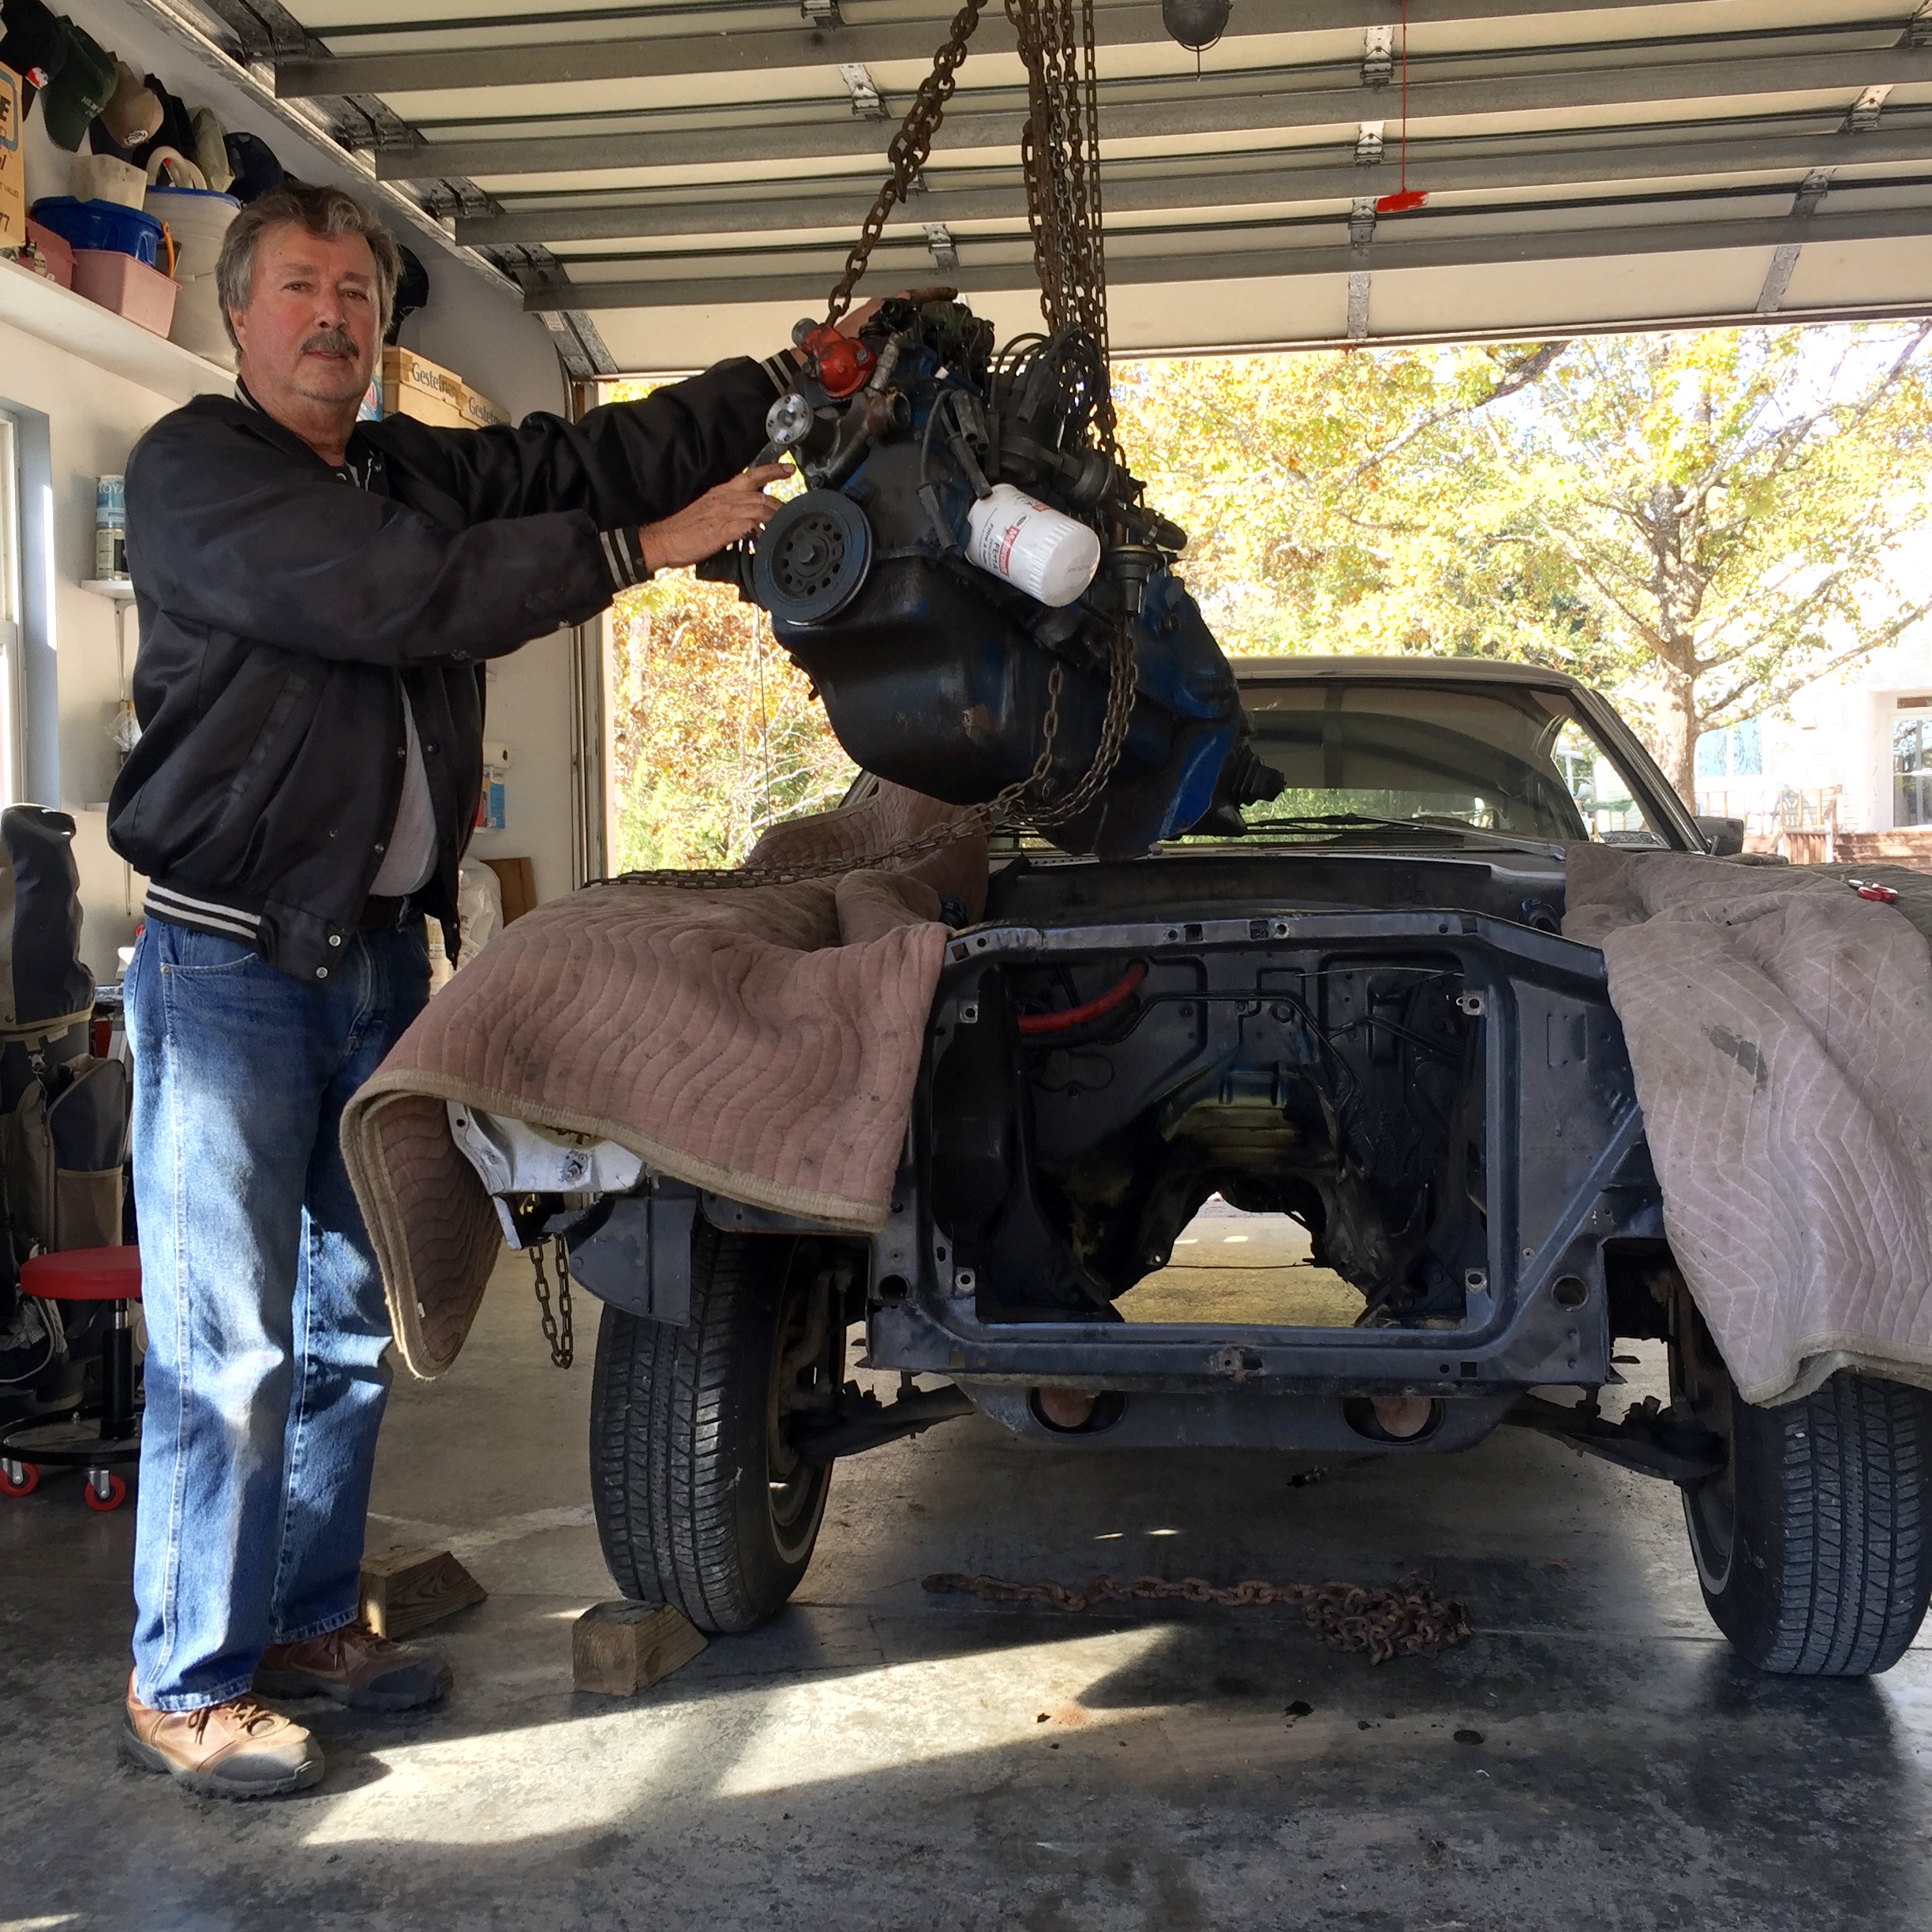
Eventually it was time to remove the engine and transmission.  Pop and I cut the exhaust off all together as it was junk.  That was interesting…Pop on his back under the car with a sawsall bouncing around on the pipe, inches from his face.  We were, though, wearing safety glasses.  We supported the rear of the engine, then disconnected and removed the transmission.  Removed the bolts from the front motor mounts and lifted the engine out with the chain fall.  We are fucking pros!

img_9569

Pulley systems make you feel strong.

img_9572

Success!

img_9574

The inline 6, chained up and out.

img_9578

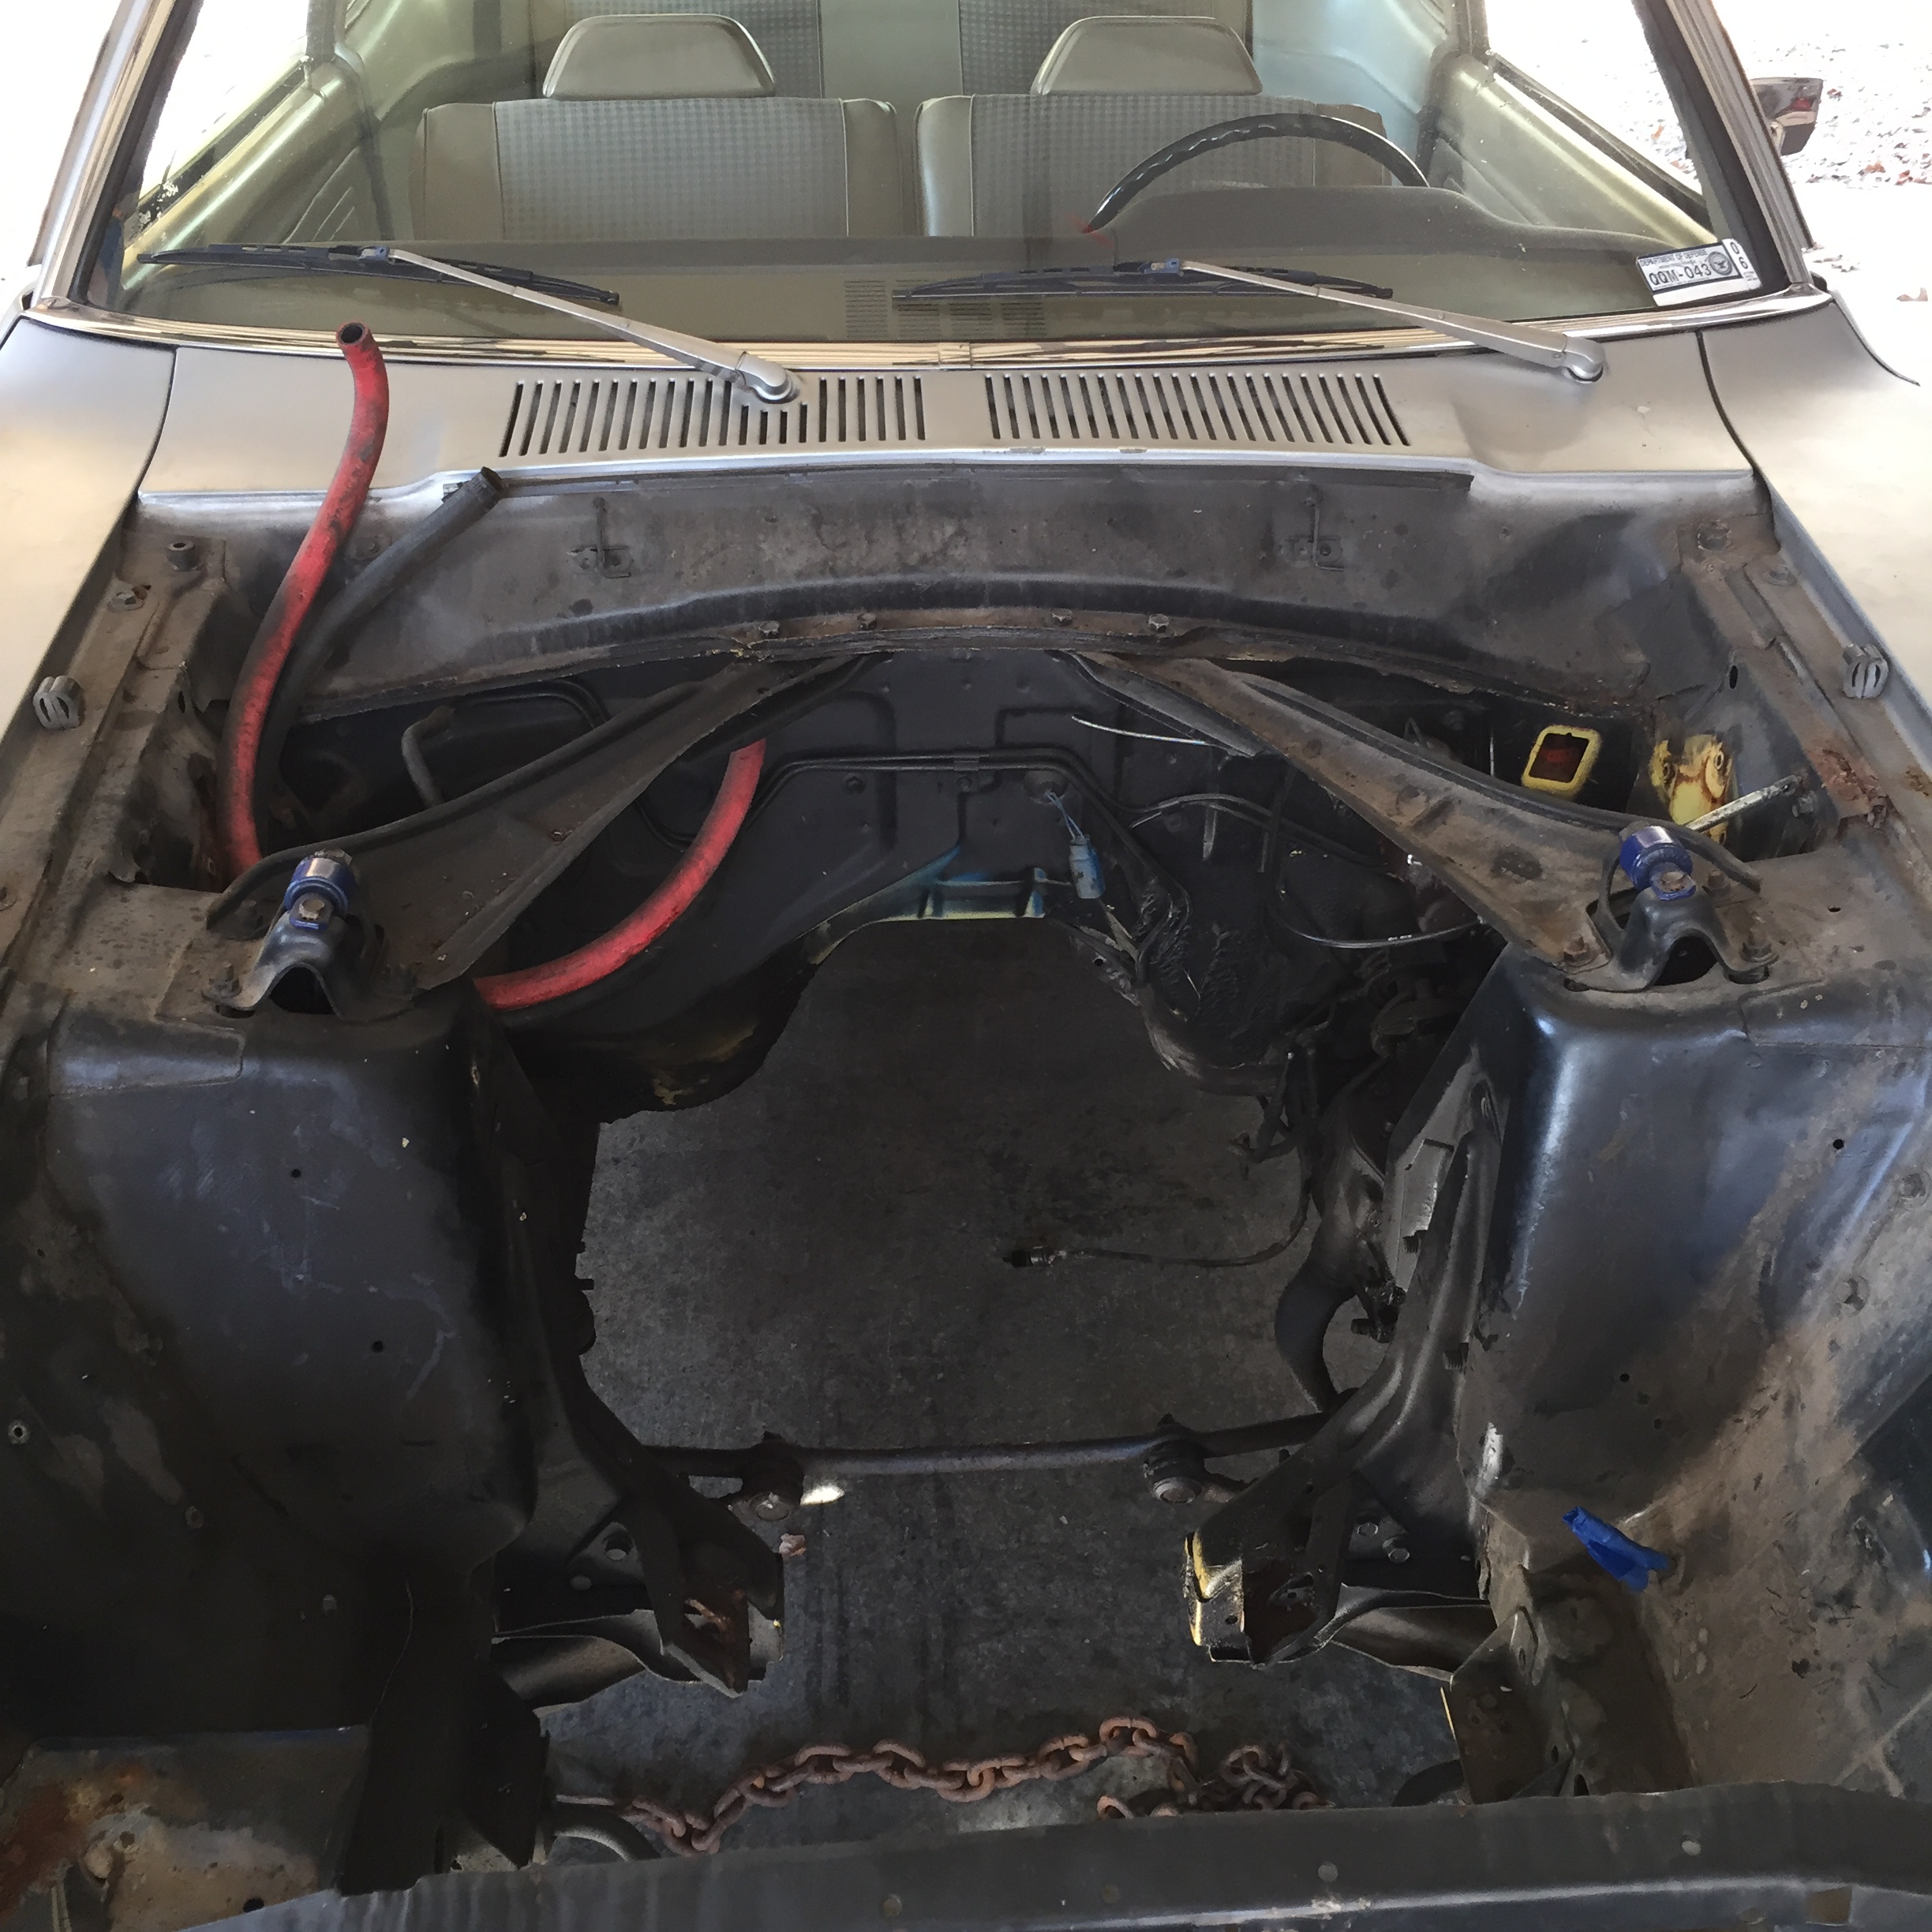
Mavis, now just a cold, empty shell of herself.

img_9594

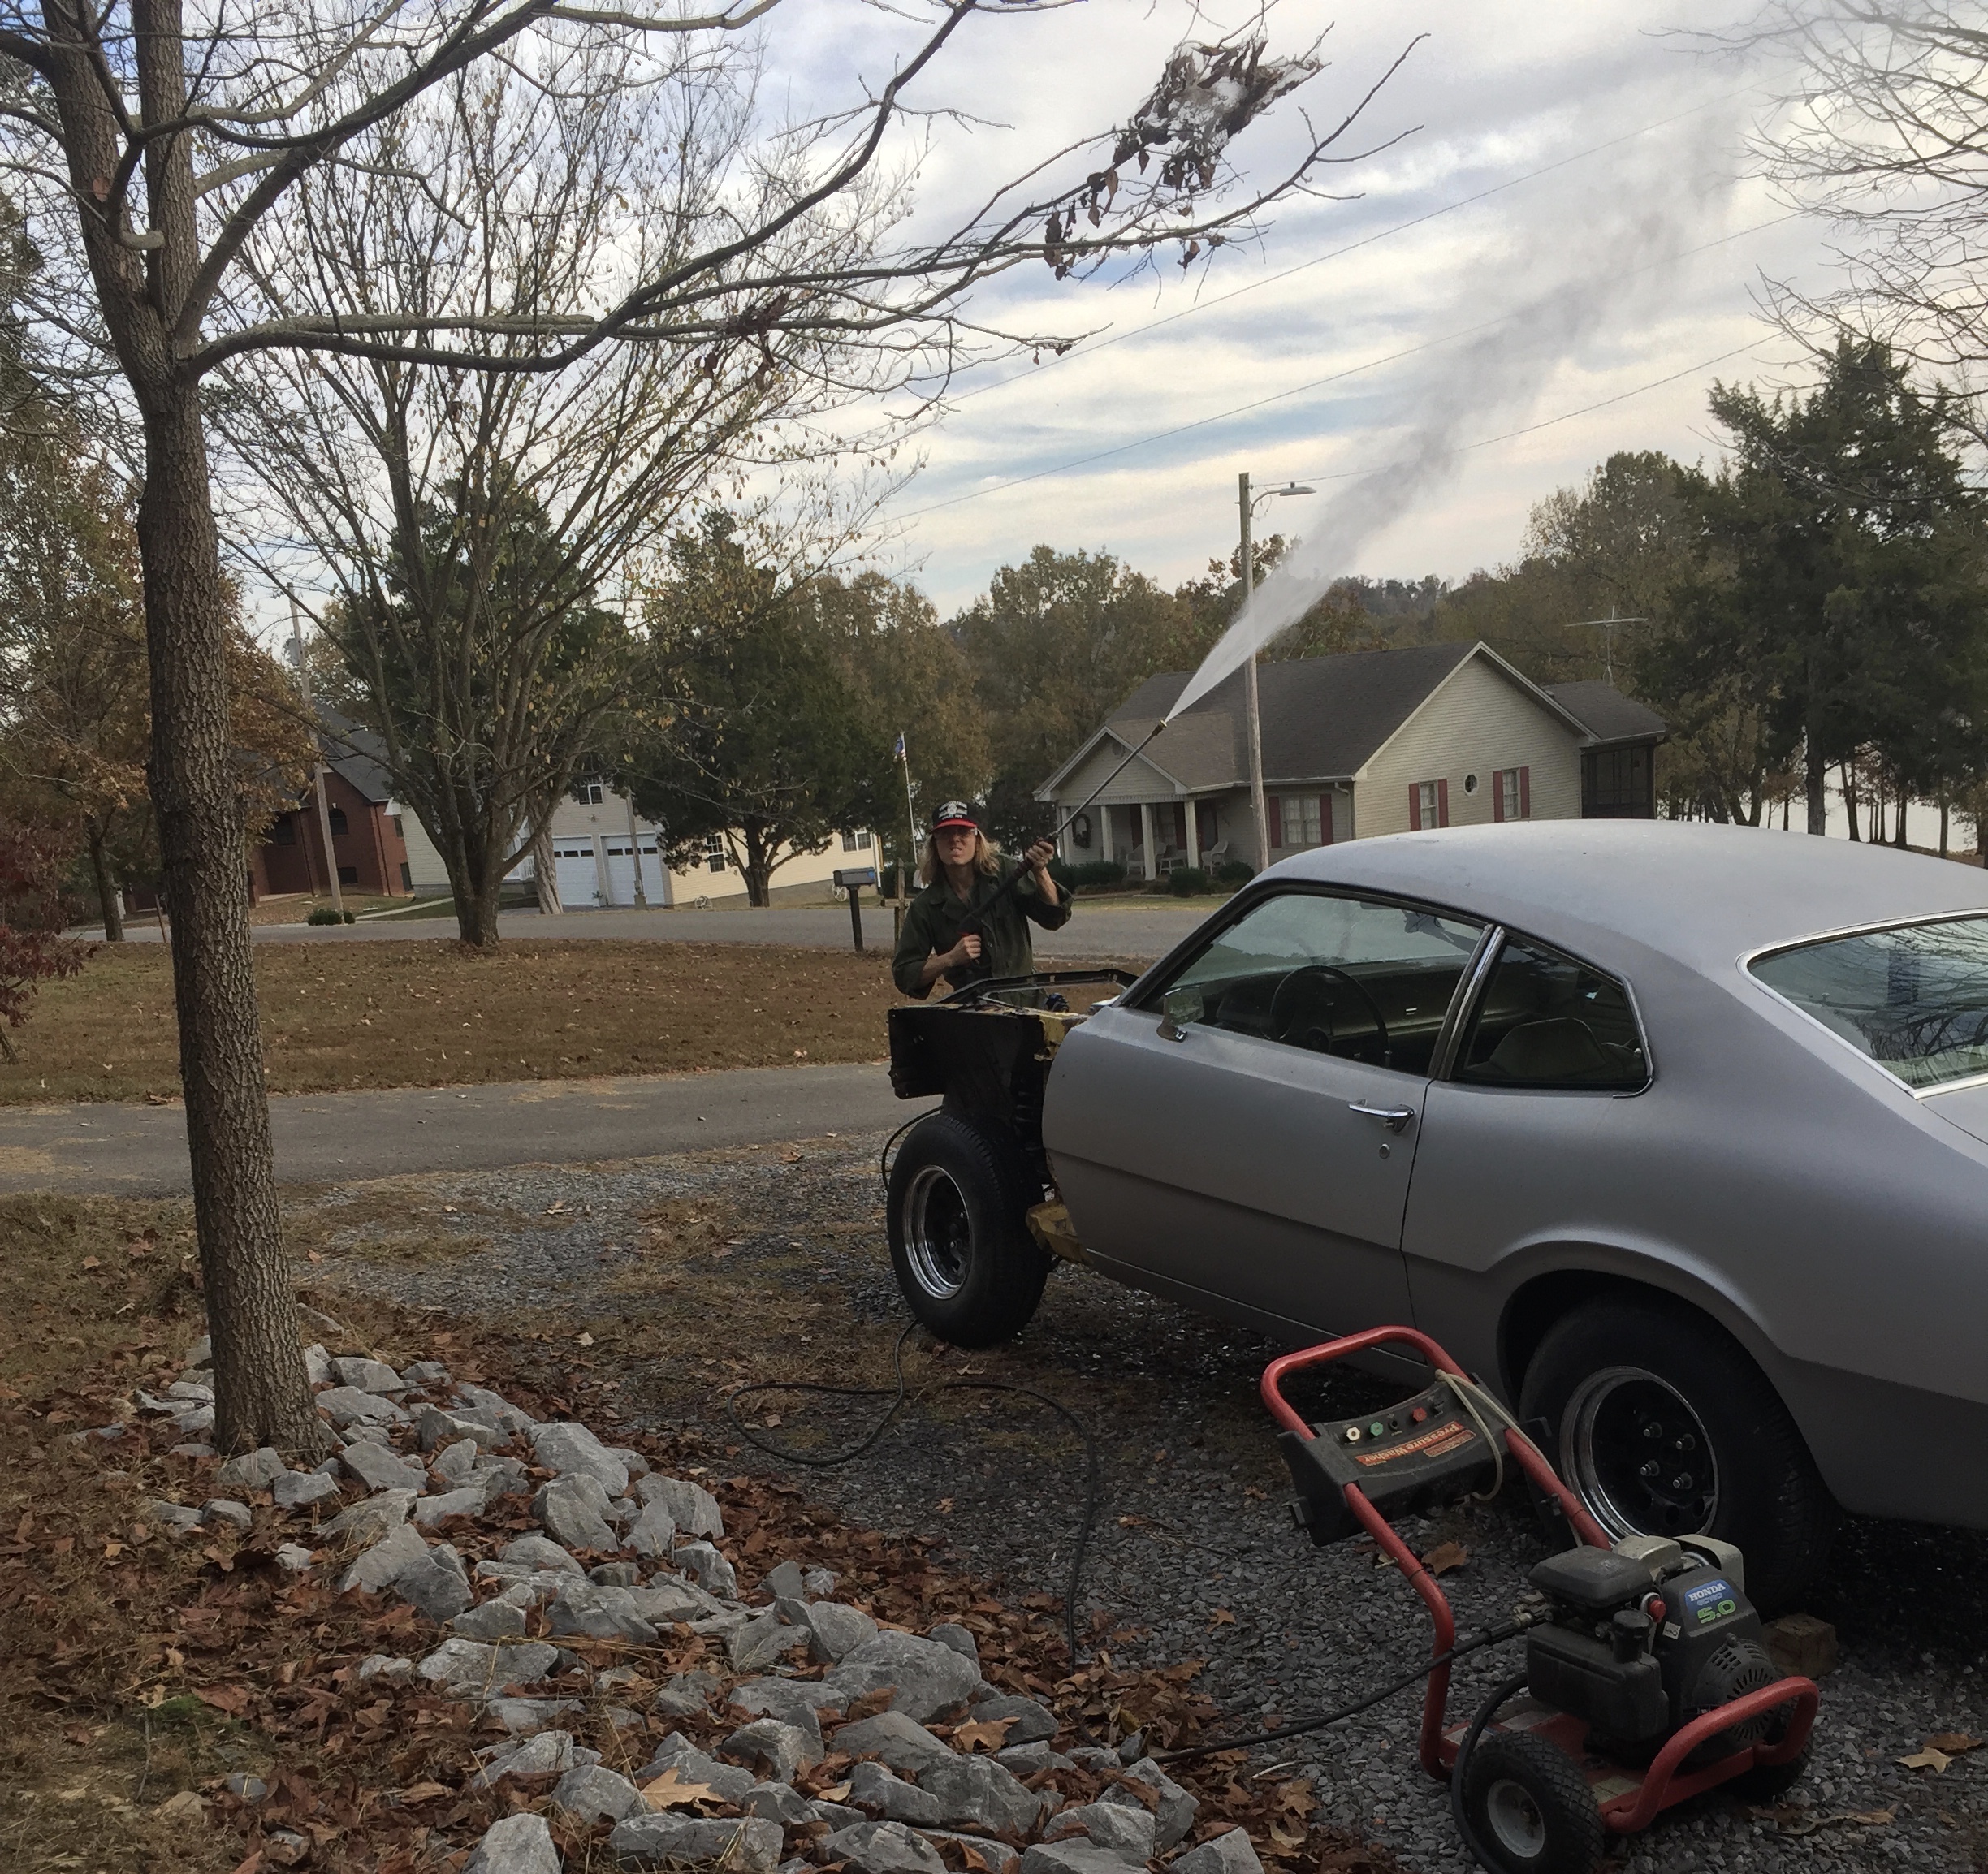
We sprayed the engine compartment down with degreaser and gave her a rinse.  God how I love a power washer!

img_9606

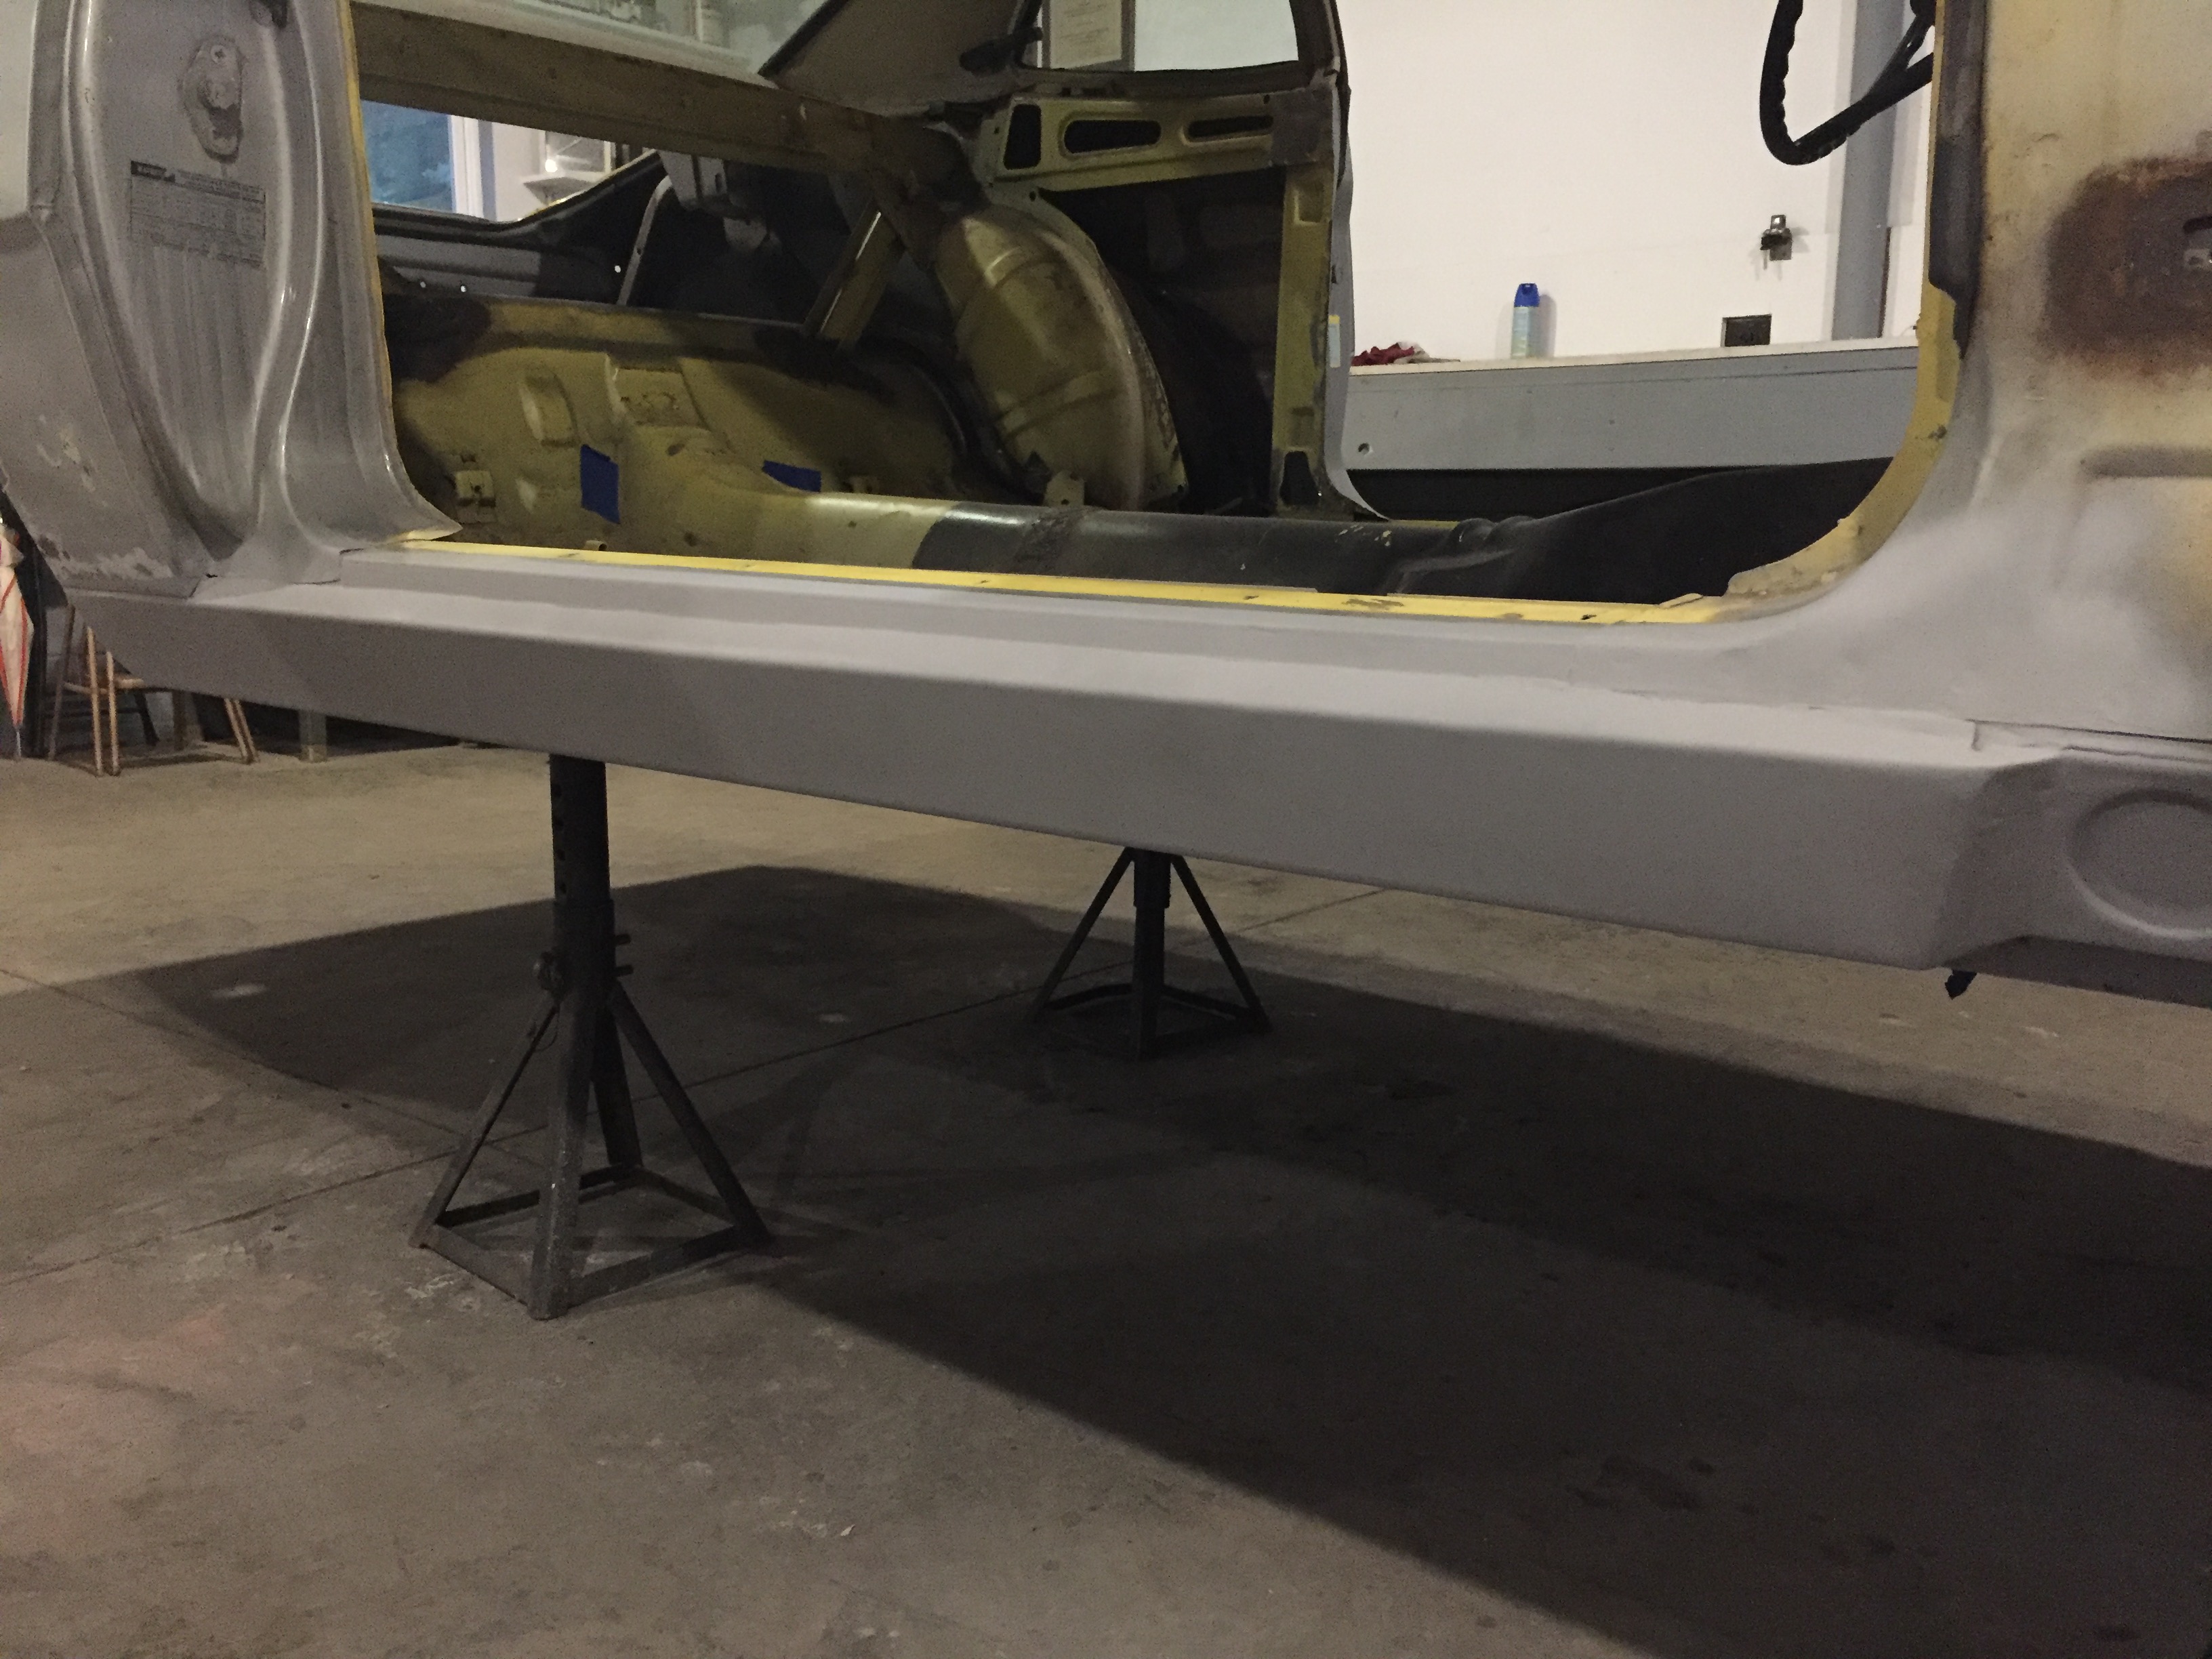
And this is how I left her (after we pulled the wheels off).  On stands for the duration, engine extracted, ready for her make over.

Although we did get a lot of work done, I was able to spend a little fun time with the P’s.  I went with Momma to her water aerobics class a couple times.  Me and 20 plus ladies from about 60 to 80 years old moving some serious water, chatting it up.  I saw neighbors Danny and Vicki, who were so thoughtful and brought me a Life magazine that had a 1972 Maverick ad in it.

The three of us attended a surprisingly religious bluegrass concert at the Kentucky Opry House.  Apparently the word ‘gospel’ in the program title didn’t tip us off.  We went with it, had a great time and Pop kept saying, “I don’t know, I just keep smiling.”  We met Pop’s friend Jimmy there who is 89 and peppy as ever.  It’s not often you get a chance to talk with someone who starts a conversation by saying, “When I was in the Philippines during World War II.”

Pop has some stories himself and I thought I had heard them all, but during my visit things would spark a memory and he would share.  While laying under Mavis, draining transmission fluid, he told me about the old gas station he worked at as a kid.

“We moved from Rogers Park (Chicago) to Wilmette when I was 12 and I always hung around the gas station a block away.  It was called Lee’s Shell and I just showed up and started doing stuff.  The place was full service so I’d check oil, wash windows, whatever.  I wasn’t in high school yet and I don’t even know if I was paid.  Eventually I worked part-time for a little money and stayed until they sold the place when I was 17.

img_9597

Pop at 12

I was there by myself one day, I was 13 or 14.  A guy brought his car in for an oil change so I put it on the lift, drained the oil and put 5 quarts back in.  I collected his money and he left.  Turns out I hadn’t drained his oil, but mistakenly had drained his transmission fluid instead.  The guy calls later from across town with a burnt up transmission.  I was devastated…I cried…it was terrible!  Must have been a couple hundred bucks that came out of my pay to rebuild the guy’s transmission.  I remember I had to take some money out of my savings.  Very young mistake.  Lee probably would have let me get away without paying for it, but I insisted.  I was in tears.

Lee was a heavy set, rough guy.  He was nice enough to me.  Gad, the people that hung around that place.  Willy T was a Chicago Outlaw who worked there.  He was real thin, rode his Harley.  He was a full time bad dude.  Two other guys hung out there, motorcycle guys, two characters.  They had a Cushman, big motor scooter, that they had put a Harley Davidson engine in.  It was like an 80MPH Cushman!  I remember one night they were drinking and had to go to the hospital because they had crashed into each other.  They were all alcoholics.

They were all nice to me though.  They’d give me beer and let me smoke cigarettes.  I would be with Lee and on some occasions we’d go get parts or whatever, I’d tag along.  Sometimes he would go to collect bills from the housewives.  He would go into the house and I’d wait.  Sometimes he took a long time to collect the bill.”

Yes, I’m learning a lot about rebuilding cars, but I’m learning even more about Pop.